Remote development IDE setup
You might find development easier in an IDE with features such as code completion and syntax highlighting. The preferred IDEs are Visual Studio Code and PyCharm. You can use other IDEs such as Eclipse and Vim, but Q2 can provide only limited support for these.
Visual Studio Code
To set up Visual Studio Code for development, complete the following steps:
Ensure that you have connected to the shared development machine. Enter the command
ssh sdk-shared-dev.q2devstack.com -l <username>in a terminal. The username and password are the credentials you use for Q2Developer.Download and install Visual Studio Code.
Launch Visual Studio Code and open the Extensions marketplace.
Search for
Remote - SSH Extensionand install the extension.
Optionally, add an SSH key authentication to the remote server for faster and easier login. Refer to Visual Studio documentation for more information on how to do this.
Open the Remote Explorer tab on the left sidebar and configure a new target by selecting the + button next to SSH. Enter the command you used in step 1 here and select your desired configuration file. If you are asked what kind of server to connect to, the shared development machine is running Linux.
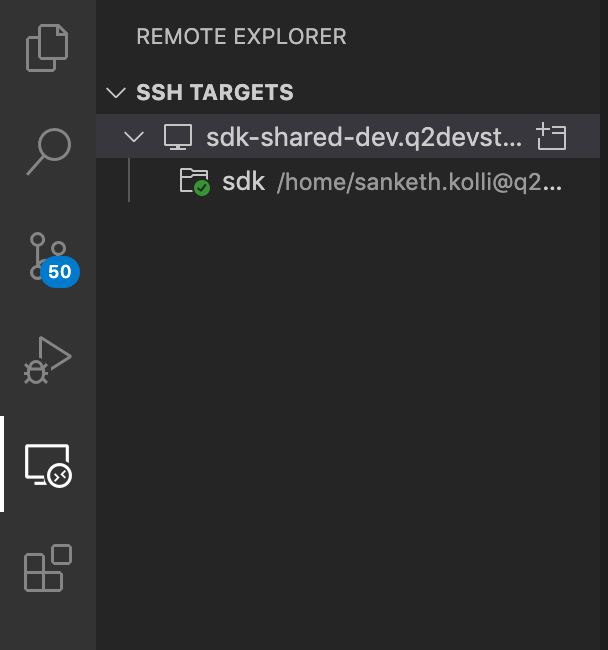
Connect to the SSH host by opening the command palette, entering
Remote-SSH: Connect to Host..., then selecting your host. Once connected you will see an indicator in the bottom left of your window.
Open the extension marketplace, search for “Q2 SDK Extension Pack”, and select Install on SSH. Reload the window after installation.

Open Explorer and select Open Folder. Open
/home/<username>/sdk.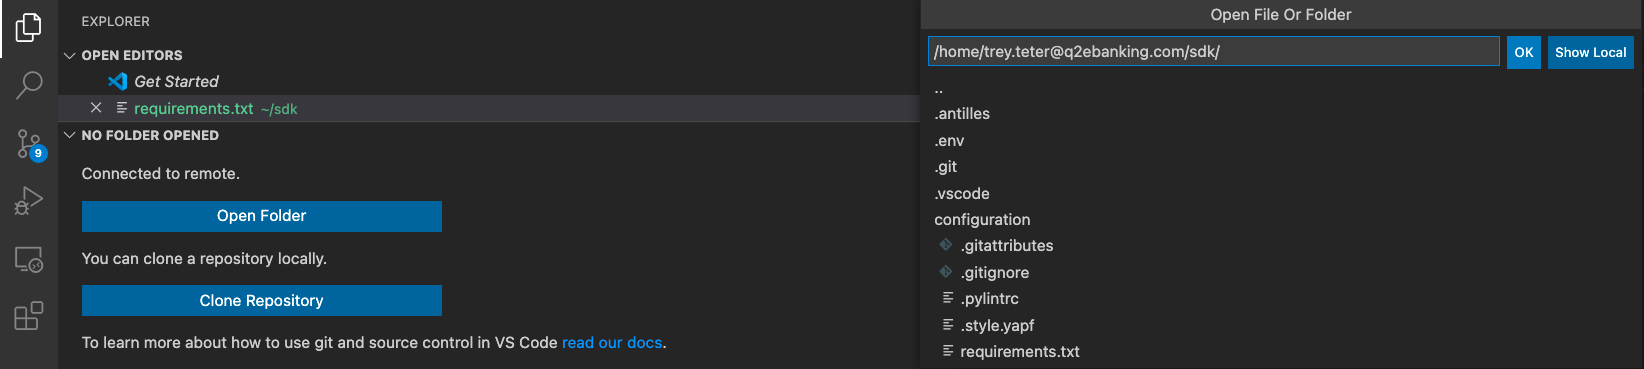
Open the command palette and run
Preferences: Open Remote
Settings (JSON) (SSH: sdk-shared-dev.q2devstack.com)
. The settings.json file of the remote machine should appear as the following. If not, copy this into the file:{ "python.defaultInterpreterPath": ".env/bin/python" }
Enter the command
generate_vscode_filesinto a terminal in your SSH session. This creates a.vscodedirectory in your/home/<username>/sdkdirectory. Verify that the contents of the three files in this directory match the following:settings.json:
{
  "files.exclude": {
    "**/__pycache__": true,
    "**/.antilles": true,
    "**/.env": true
  },
  "mssql.connections": [
    {
      "server": <db_host>,
      "port": <db_port>,
      "database": "Q2DB_sdk_<stack_name>",
      "authenticationType": "SqlLogin",
      "user": <db_user>,
      "password": <db_password>,
      "emptyPasswordInput": false,
      "savePassword": true,
      "profileName": "<stack_name>"
    }
  ],
  "python.defaultInterpreterPath": ".env/bin/python"
}
launch.json:
{
  "version": "0.2.0",
  "configurations": [
    {
      "name": "q2 run",
      "type": "python",
      "request": "launch",
      "program": "/usr/local/bin/q2",
      "args": [
        "run"
      ],
      "console": "integratedTerminal"
    }
  ]
}
extensions.json:
{
  "recommendations": [
    "q2.vscode-sdk-pack"
  ]
}
The Visual Studio Code environment is now set up and ready for you to begin development.
PyCharm
Note
Remote configuration is available only for the professional version. If you do not have a license, you can use the trial version.
To set up PyCharm for development, complete the following steps:
Download and install PyCharm.
Create a new directory on your local machine to use for your project, then open the project in PyCharm.
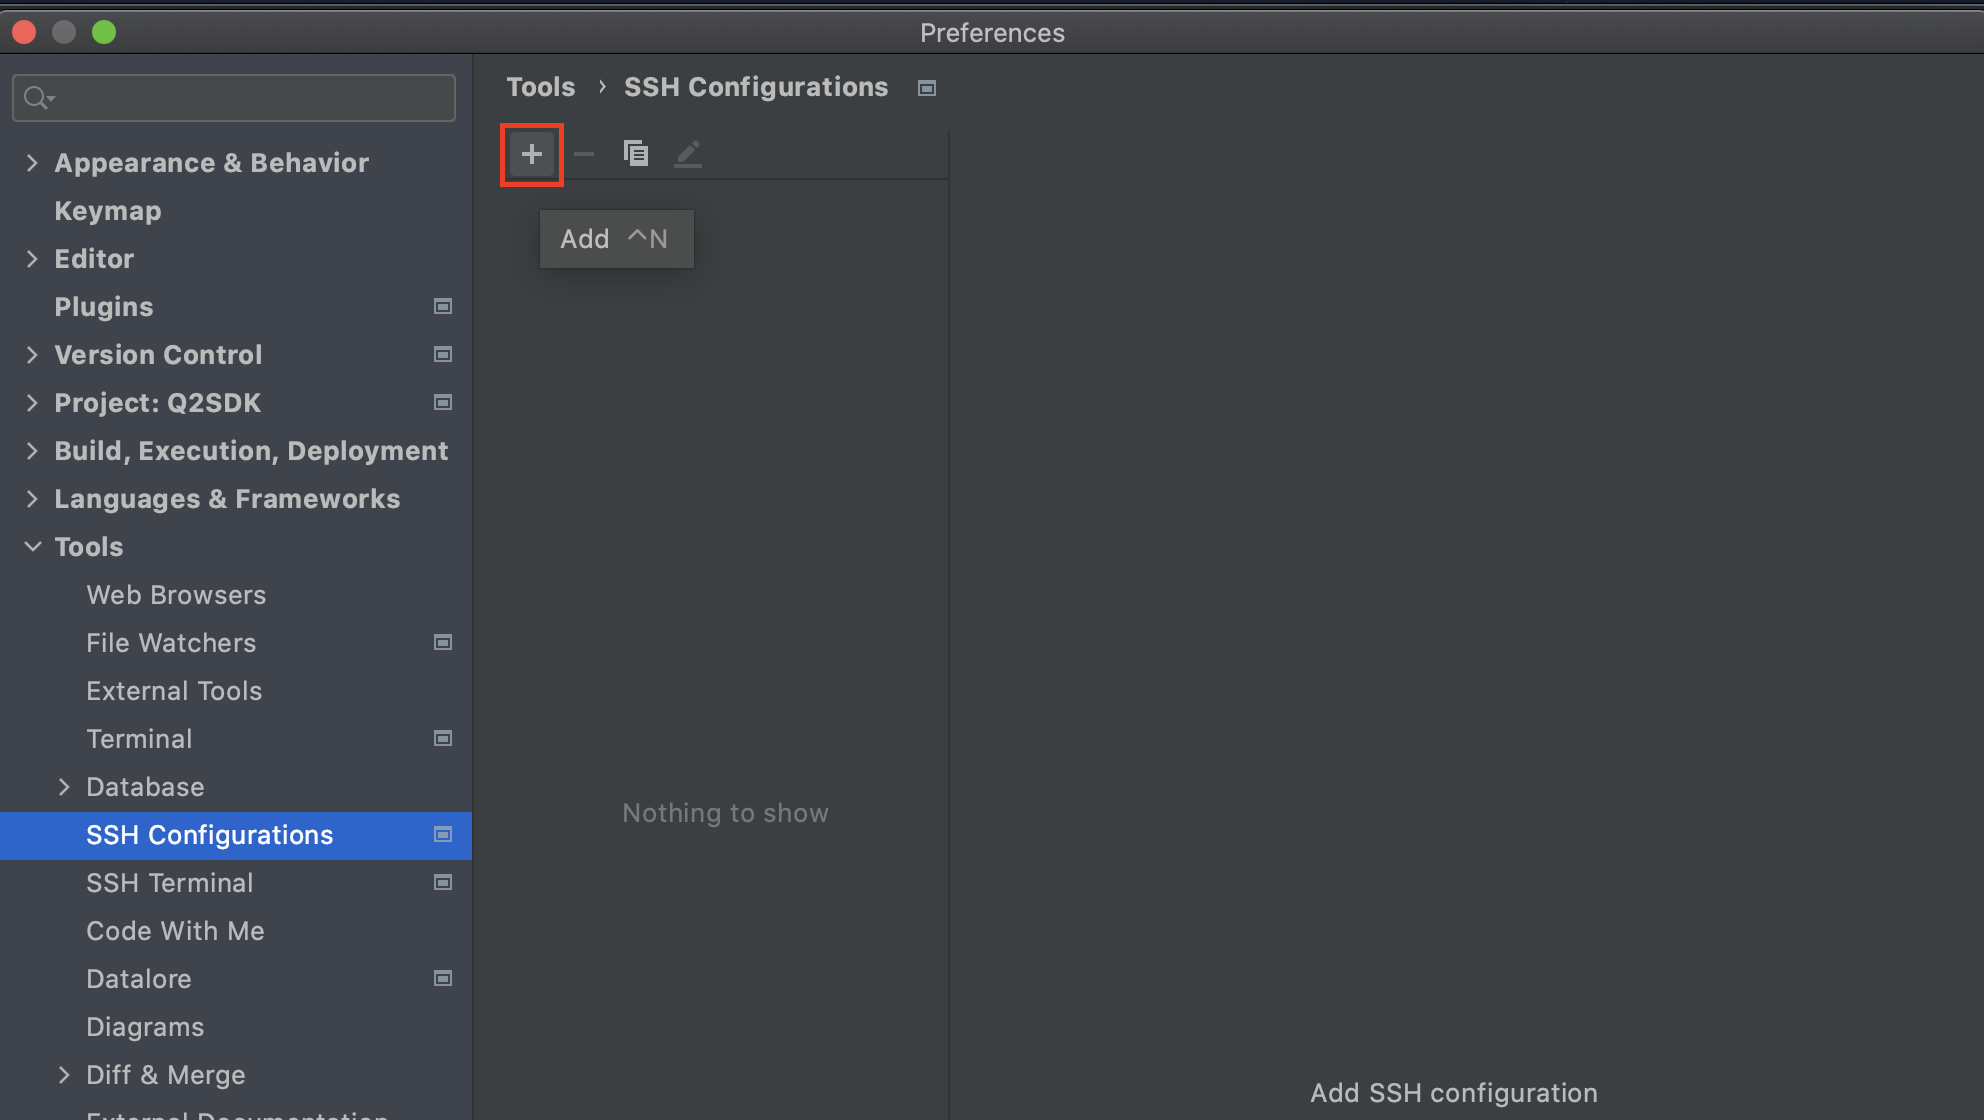
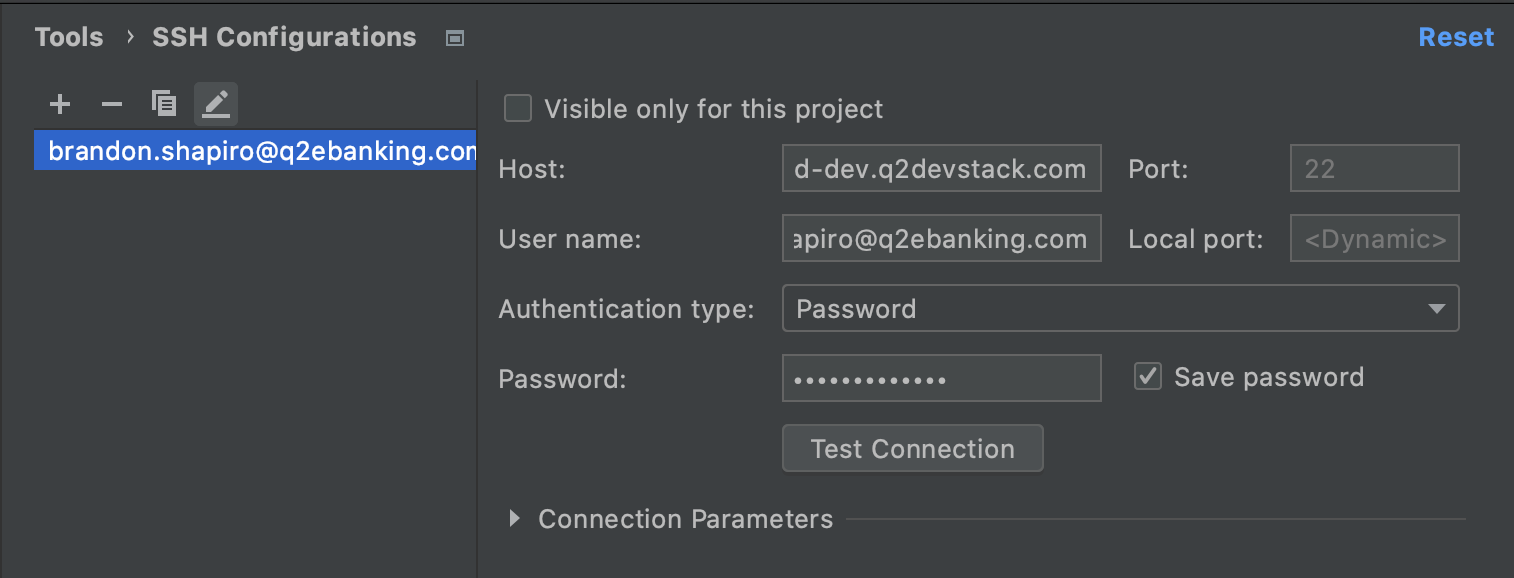
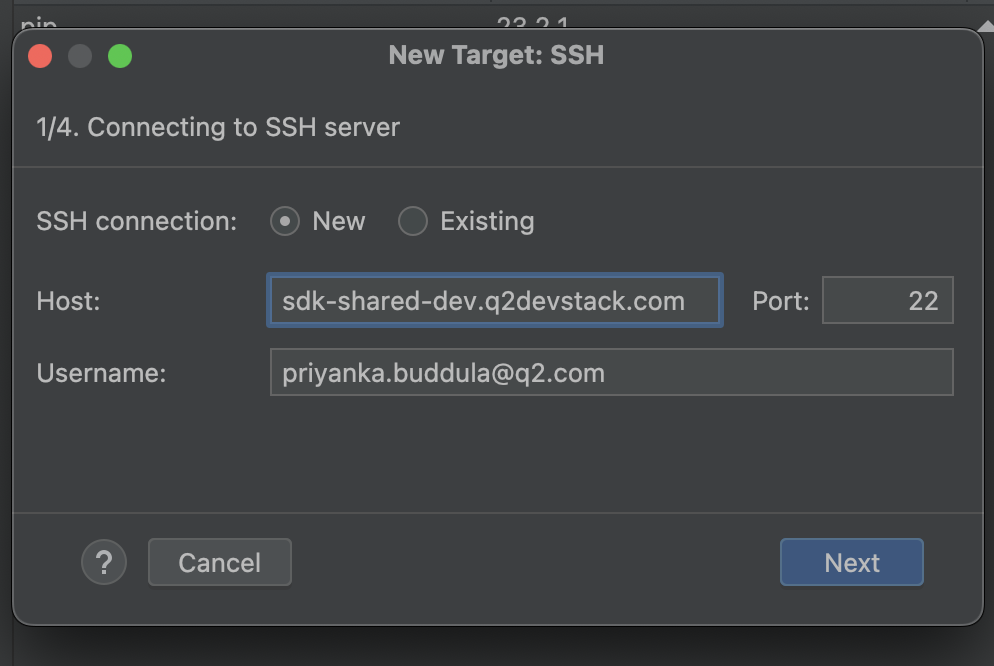
Add your SSH configuration by opening the PyCharm preferences/settings, navigating to Tools > SSH Configurations, and selecting the Add button.
Set the following:
Host: sdk-shared-dev.q2devstack.com
Username: your Q2 Developer Portal username (provided in the welcome email)
Password: your Q2 Developer Portal password
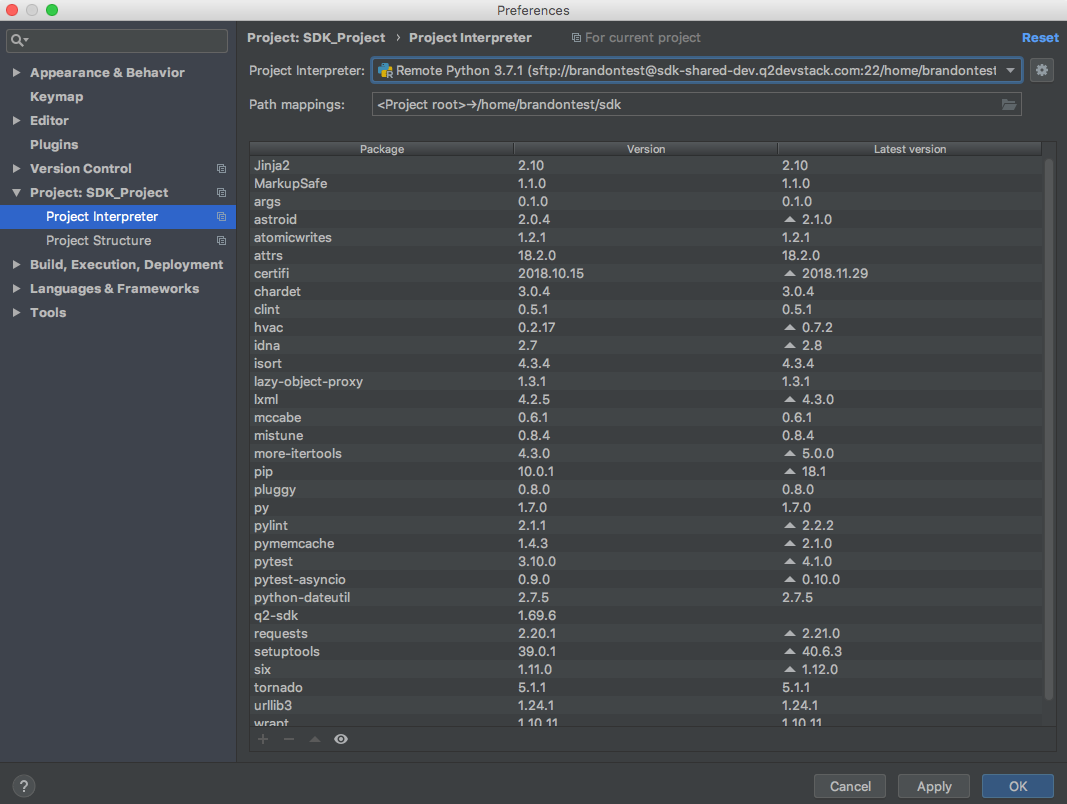
Configure your remote project interpreter for the remote Python environment in the preferences/settings by navigating to Project > Project Interpreter.
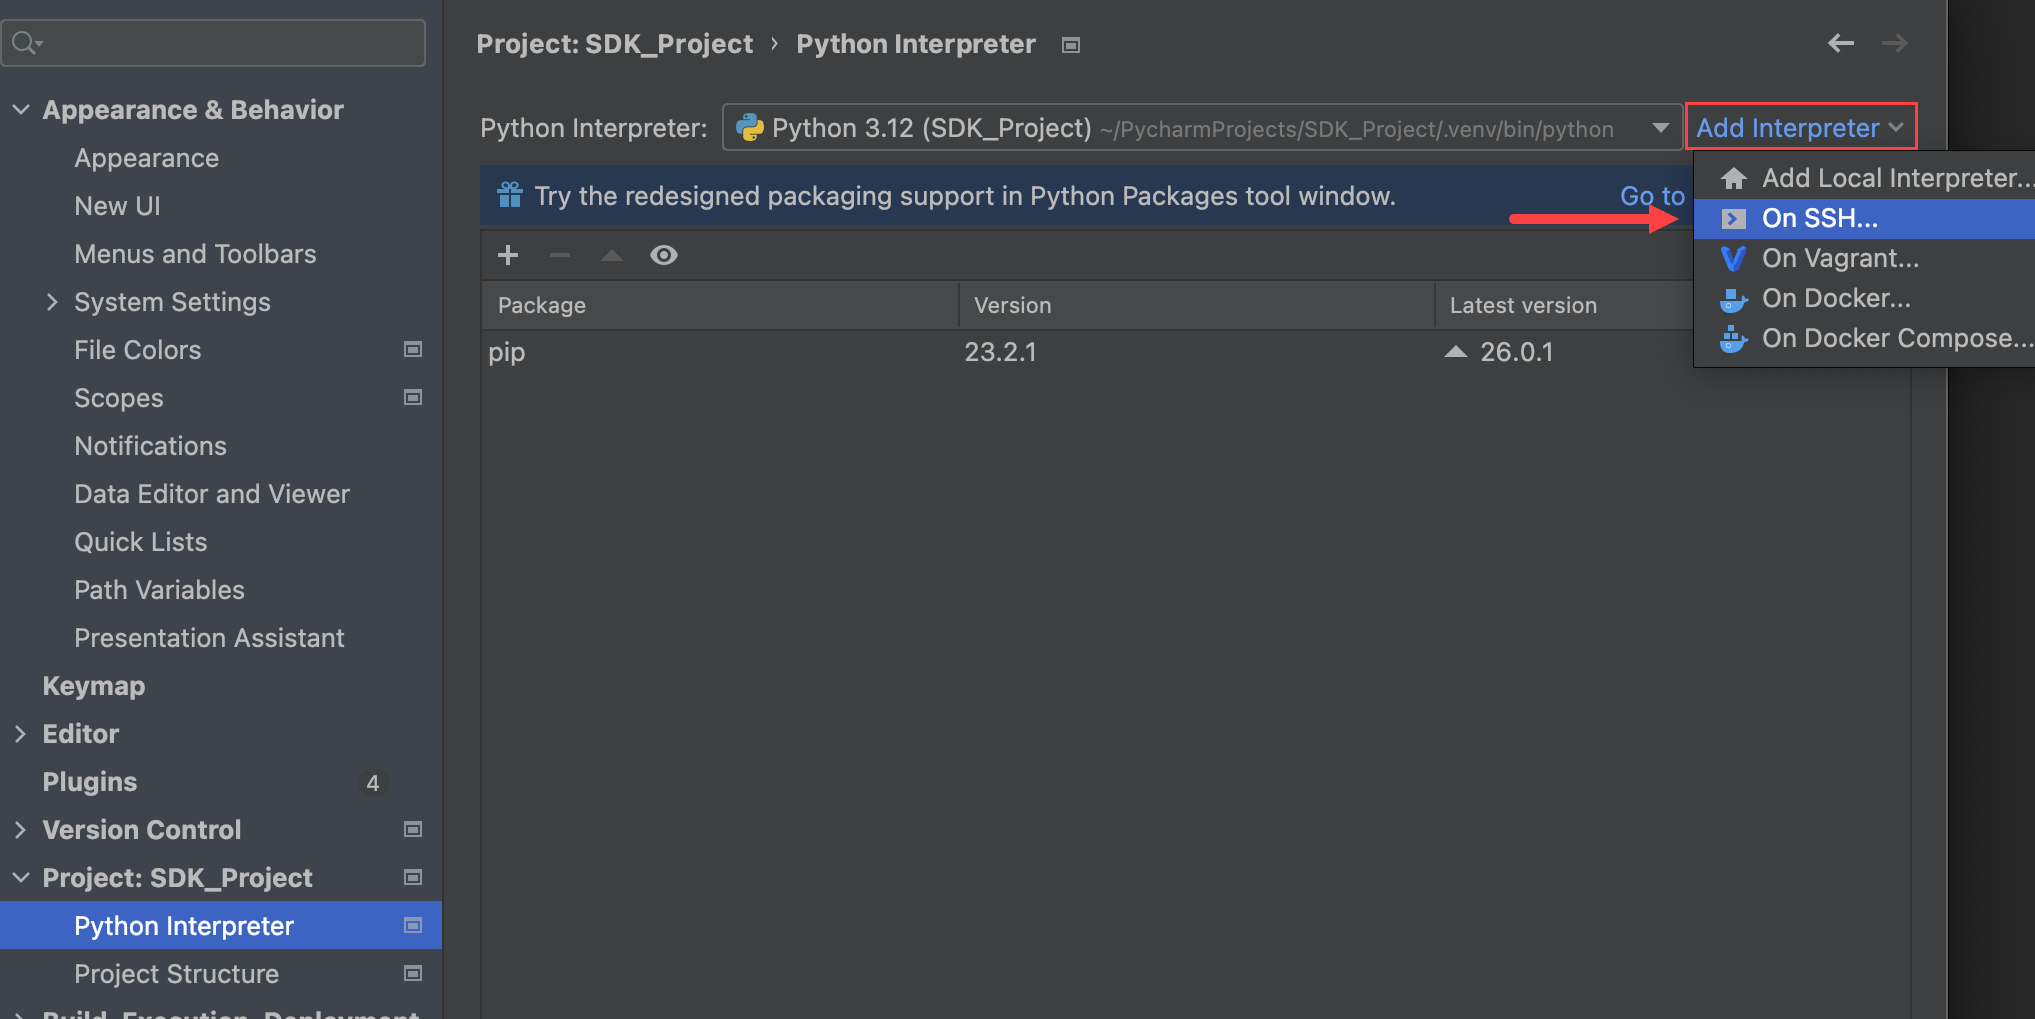
Select Add interpreter > On SSH… then select your SSH configuration as an existing SSH connection.
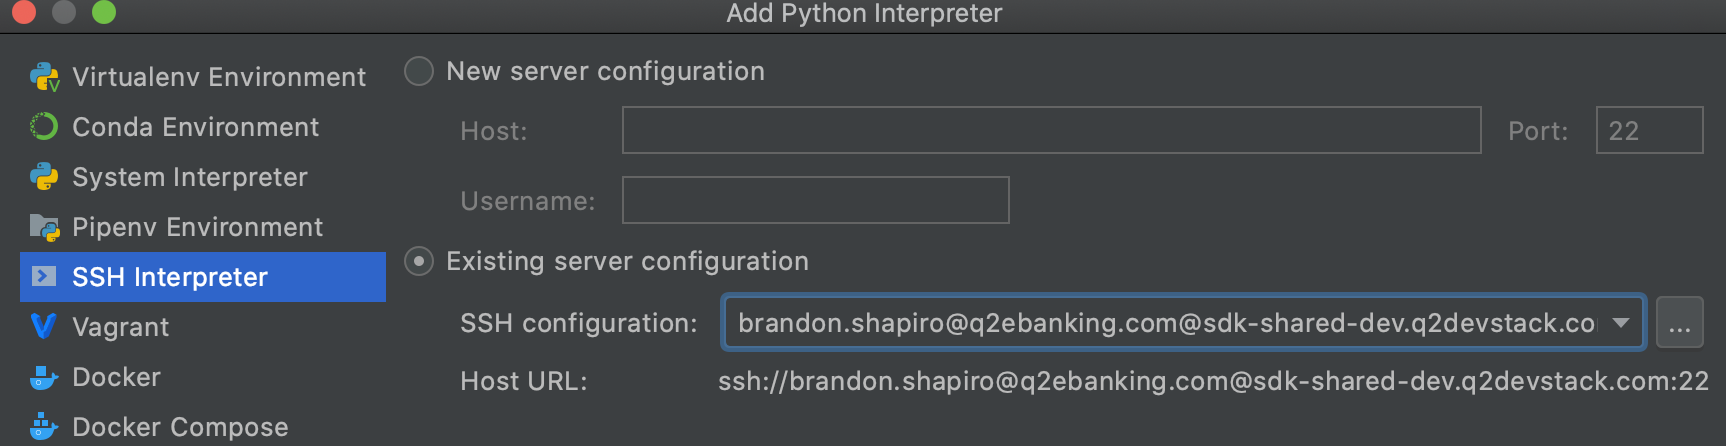
Connect to the SSH server using your credentials.
Set the following:
Location:
/home/<username>/sdk/.venv/bin/python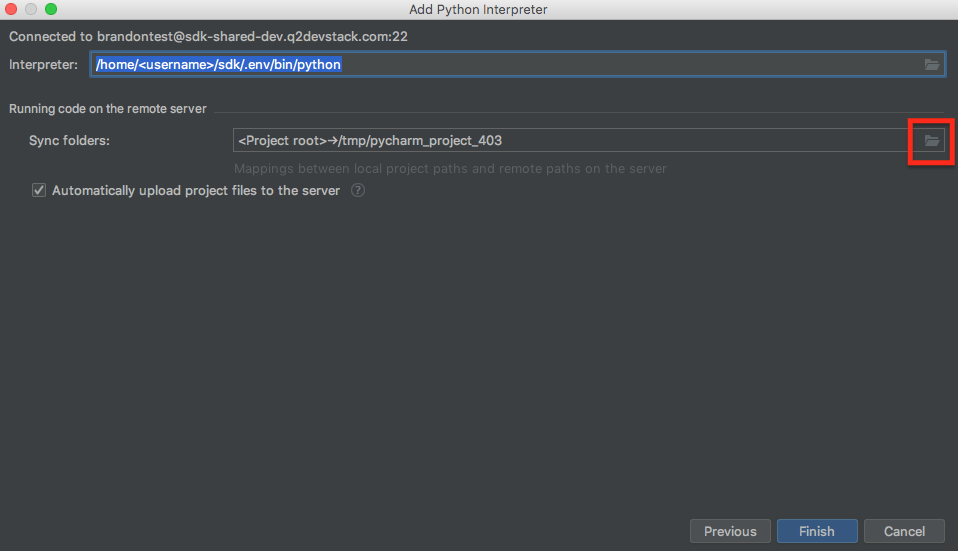
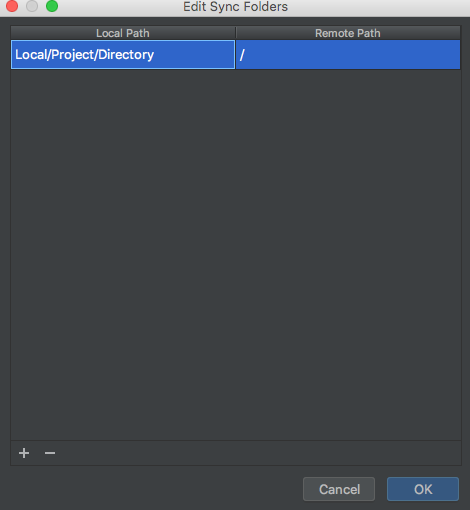
Sync Folders: set the remote path to “/”.
Select Create after configuring the settings. Your Project Interpreter should look like this:
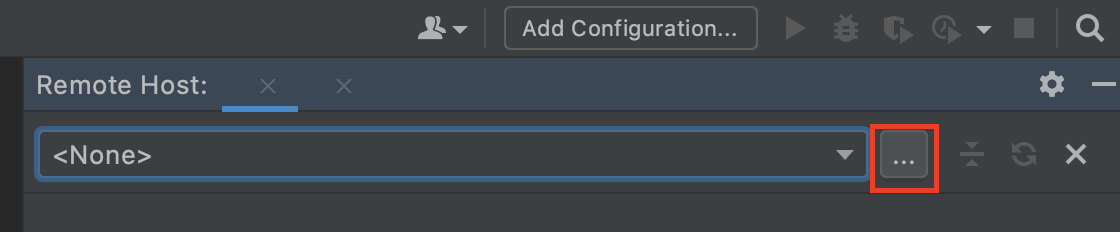
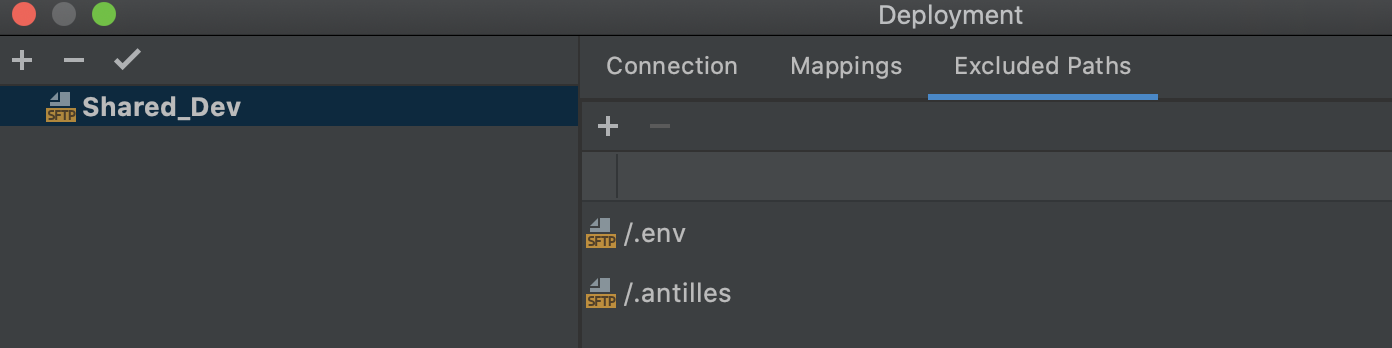
After adding the remote interpreter, you can configure your remote host. Select the Remote Host tab (Tools > Deployment > Browse Remote Host) and select the More options icon (…) or press Shift+Enter.
Make the following changes:
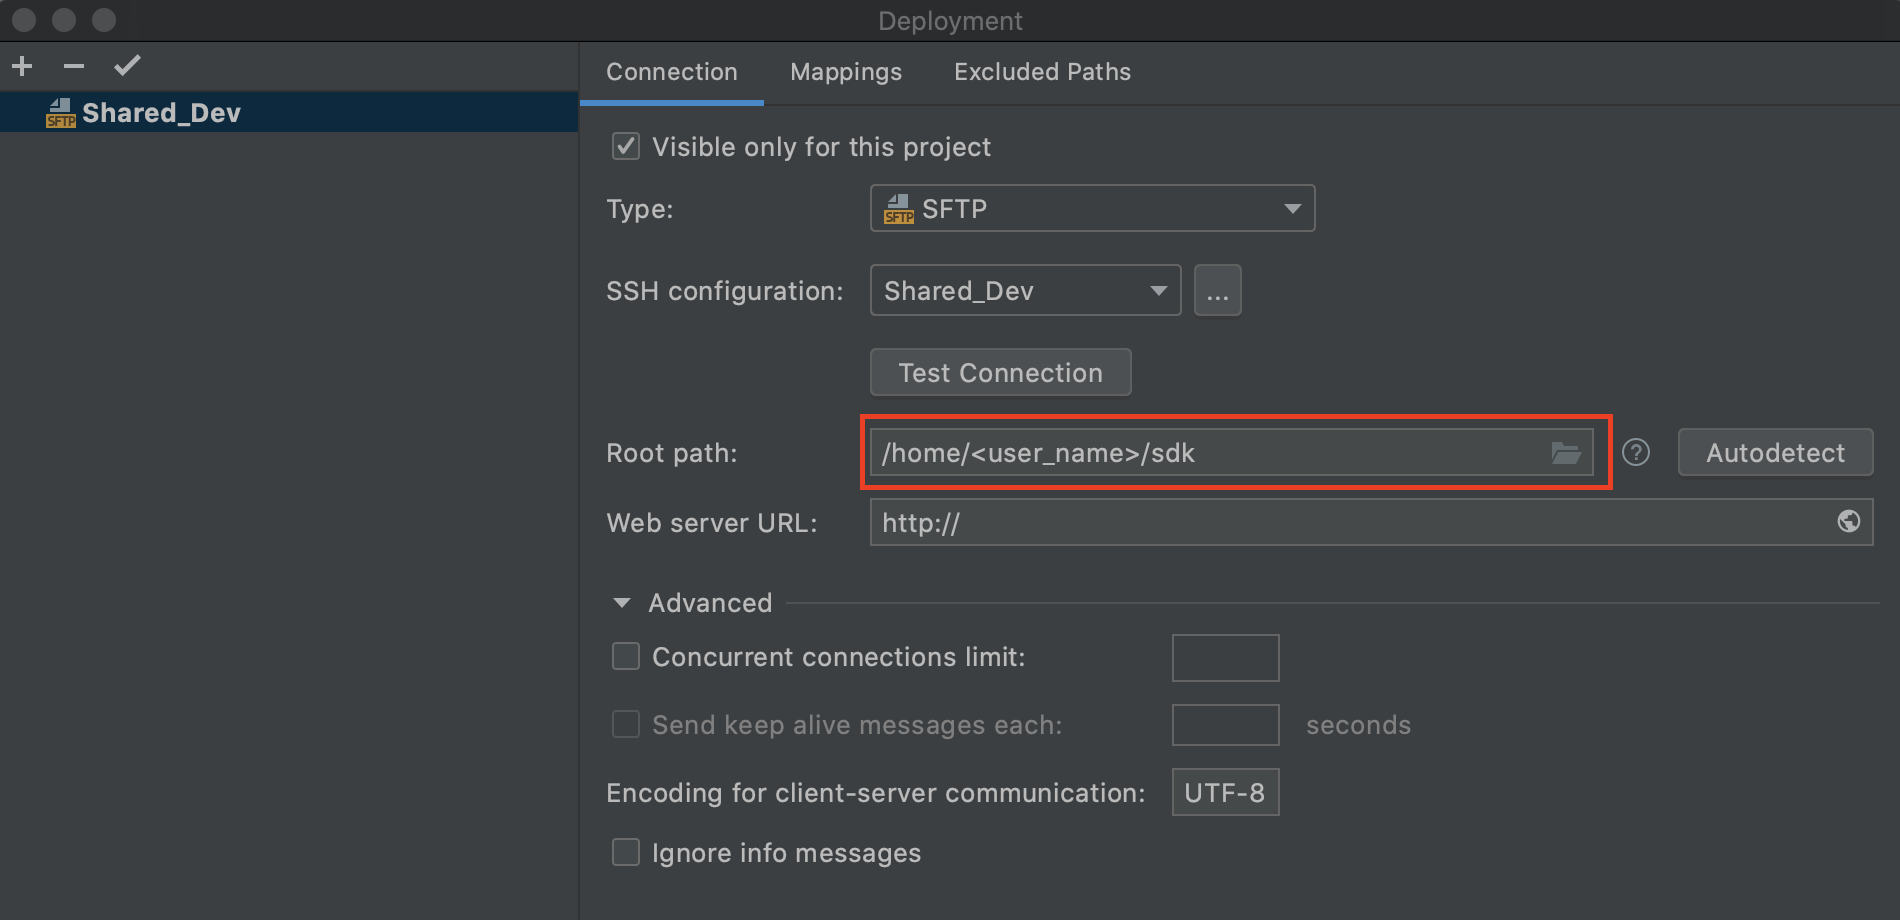
Set the root path to your SDK directory on your local machine.
Add .env and .antilles to the Excluded Paths.
Configure your database connection. Open the Database tab, select +, and then select Data Source > Microsoft SQL Server.
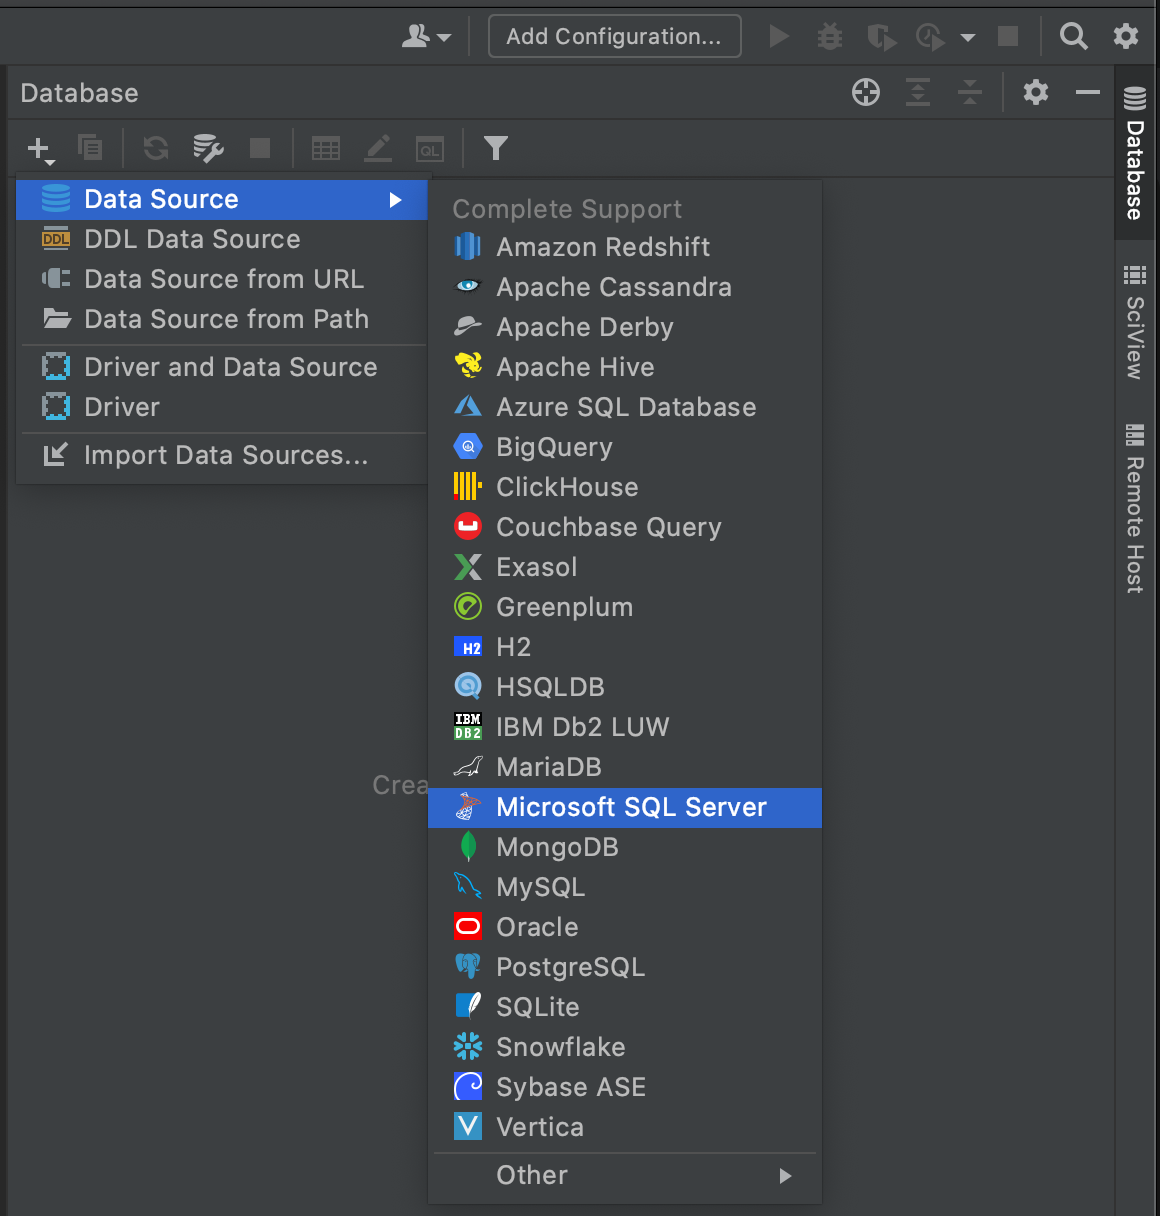
Set the following:
Configure the database port and user using your personal settings.

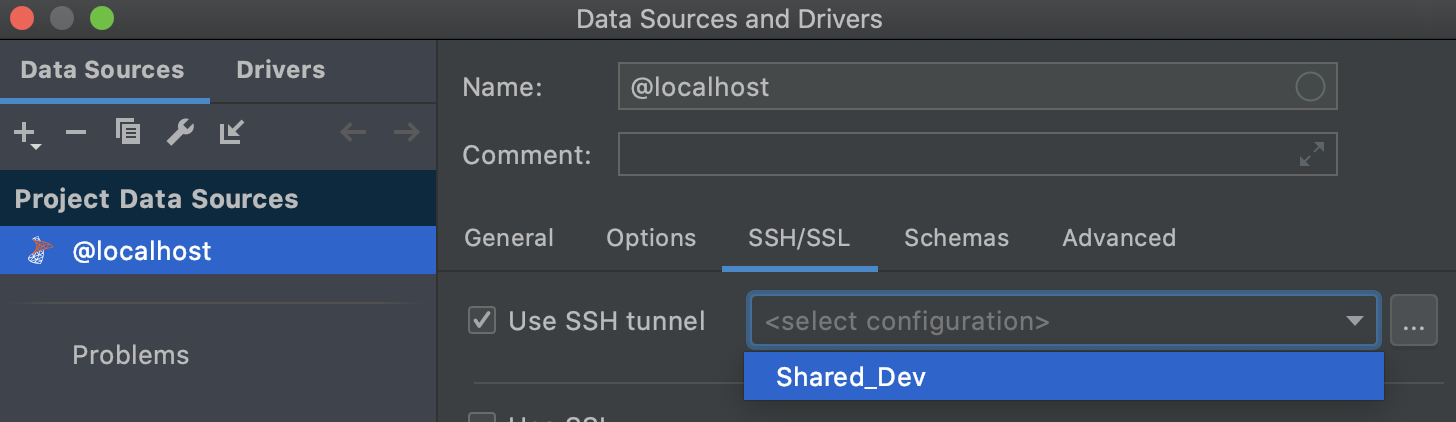
In the SSH/SSL tab, check Use SSH tunnel and select your existing SSH configuration.
In the Schemas tab, select your database and all schemas.


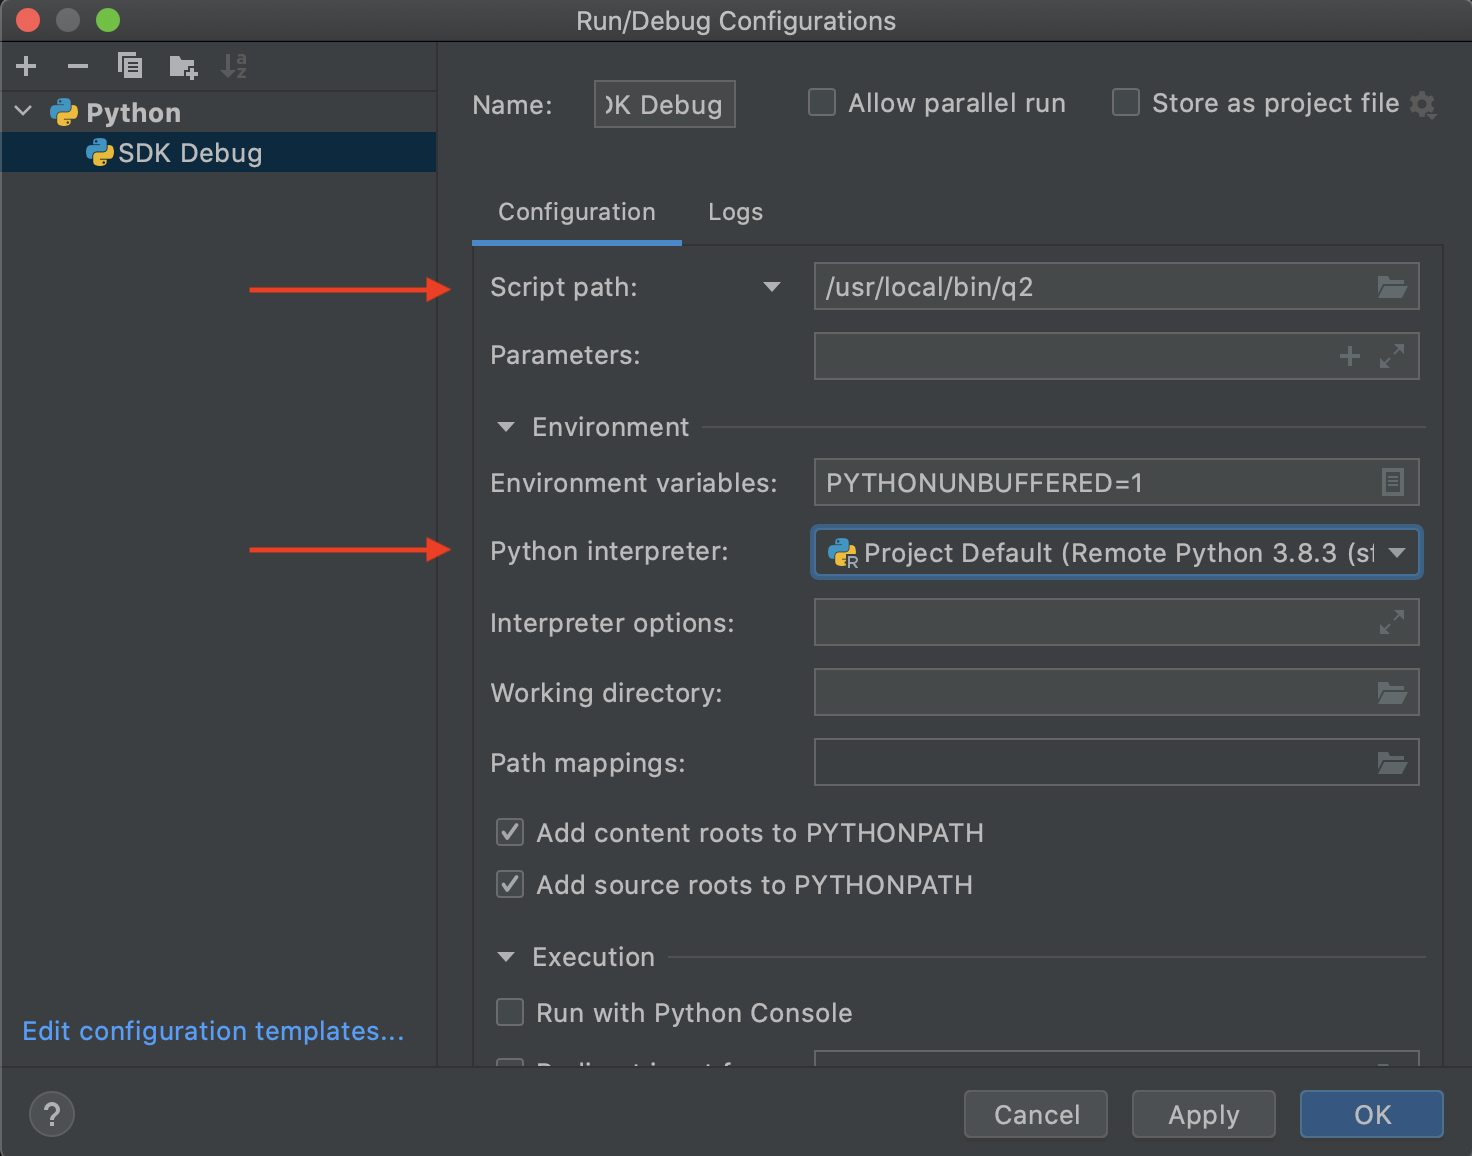
Add a remote debugger. In the Run/Debug Configuration dropdown, select Edit Configurations…, then select Add New Run Configuration and select Python.

Set the following:
Set the interpreter to your desired Python version.
For the file to run, select script from the dropdown menu, then add the path to the debug script to run.
Add any relevant script parameters you want to use.
The PyCharm environment is now set up and ready for you to begin development.
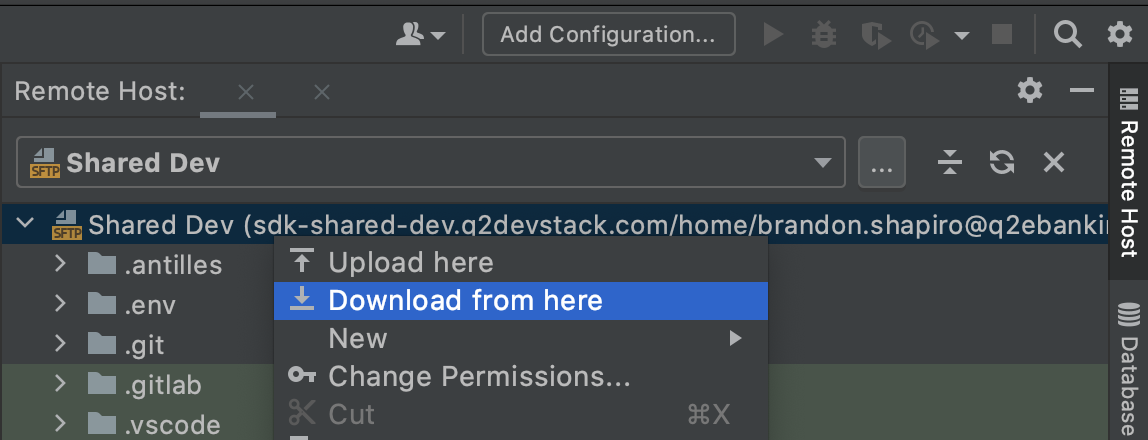
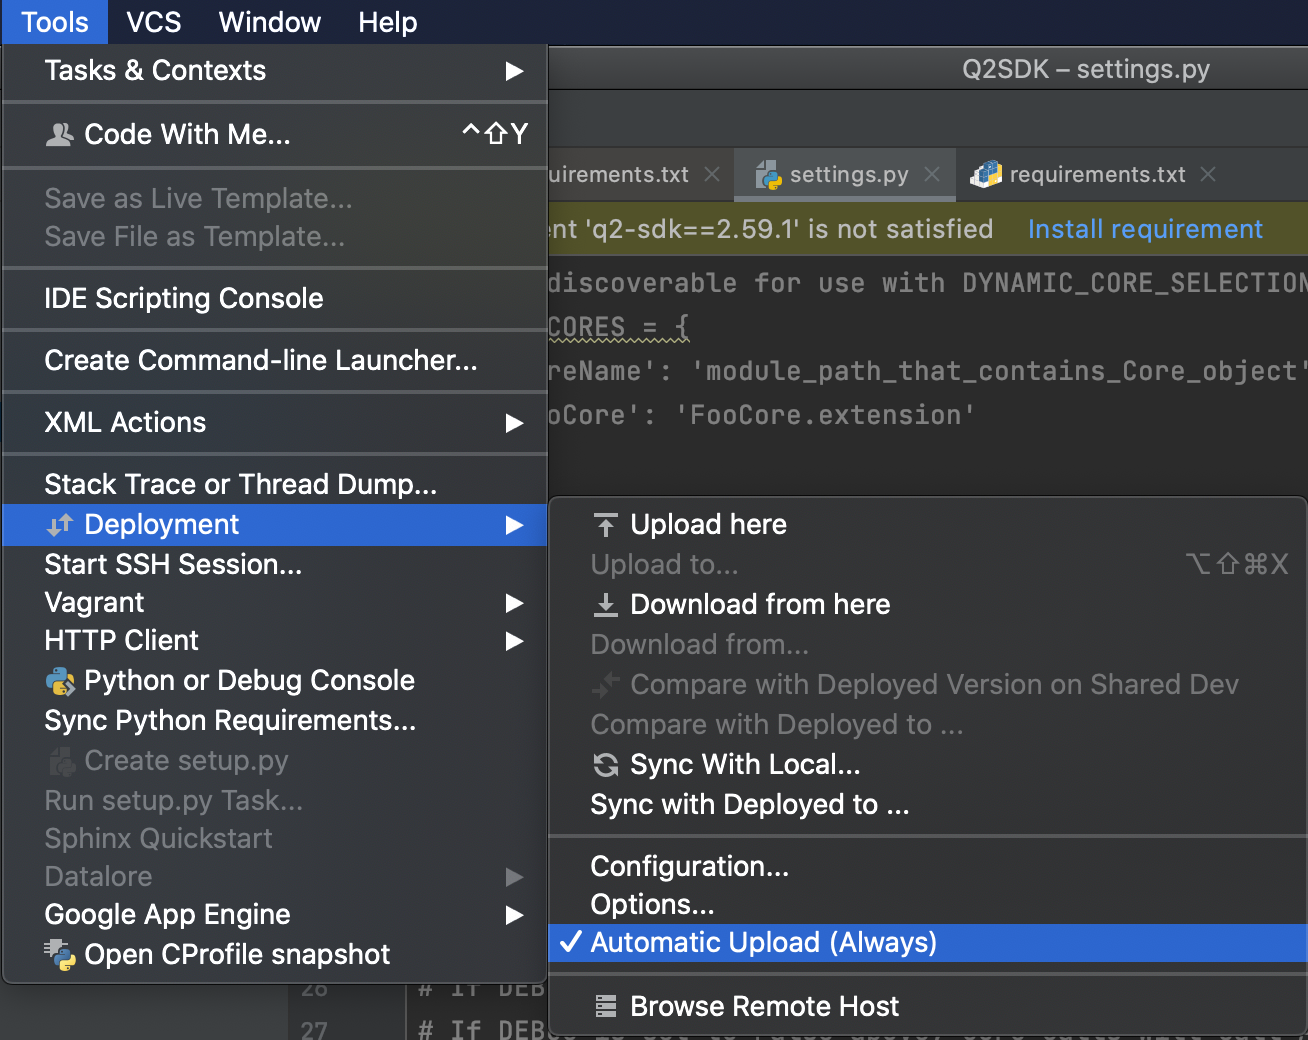
You can view the remote files by opening the Tools menu and selecting Deployment > Browse Remote Host. You can download these files and edit them locally by right-clicking them and selecting Download from here.
Local changes will automatically be uploaded to the remote host. You can verify this by opening the Tools menu and verifying that Deployment > Automatic Upload (Always) is checked.
To access the remote server from the command line, open the Tools menu, select Start SSH Session… and select your deployment name.