Audit Action Extension Tutorial
The Caliper SDK enables you to create extensions that respond asynchronously to specific Online Banking events, such as user actions or transaction updates. Note that HQ processes these requests asynchronously, meaning extensions cannot alter the digital banking workflow. While Audit Action extensions are straightforward to develop, they offer versatile applications for a wide range of purposes.
Note
There are over a thousand different audit action events that can be subscribed to. You can see the various audit actions by querying the Q2_AuditAction table or by using the CLI command q2 db get_audit_actions. Please be cautious when subscribing to a large number of audit actions, as this can lead to performance issues. It is recommended to only subscribe to the audit actions that are necessary for your extension’s functionality. If you find that you need to subscribe to a large number of audit actions (50+), please reach out to us via the developer portal to discuss your use-case.
Determining the Audit Action
If you know that you want to subscribe to a certain action in online banking, but don’t know the specific ShortName of the AuditAction, you can see which AuditActions are triggered by looking up your session in the Q2_Audit table.
Let’s say we want our subscribe to the creation of Funds Transfers.
First, log into digital banking with the Browser Dev tools open and the Network tab visible.
Navigate to the Funds Transfer page. At this point, it’s helpful to clear the Network activity so that its easier to follow the API calls that are about to happen.
Go ahead and complete the Funds Transfer form and hit Submit/Approve button.
You should see a POST API call in the Network activity tab. Click that row.
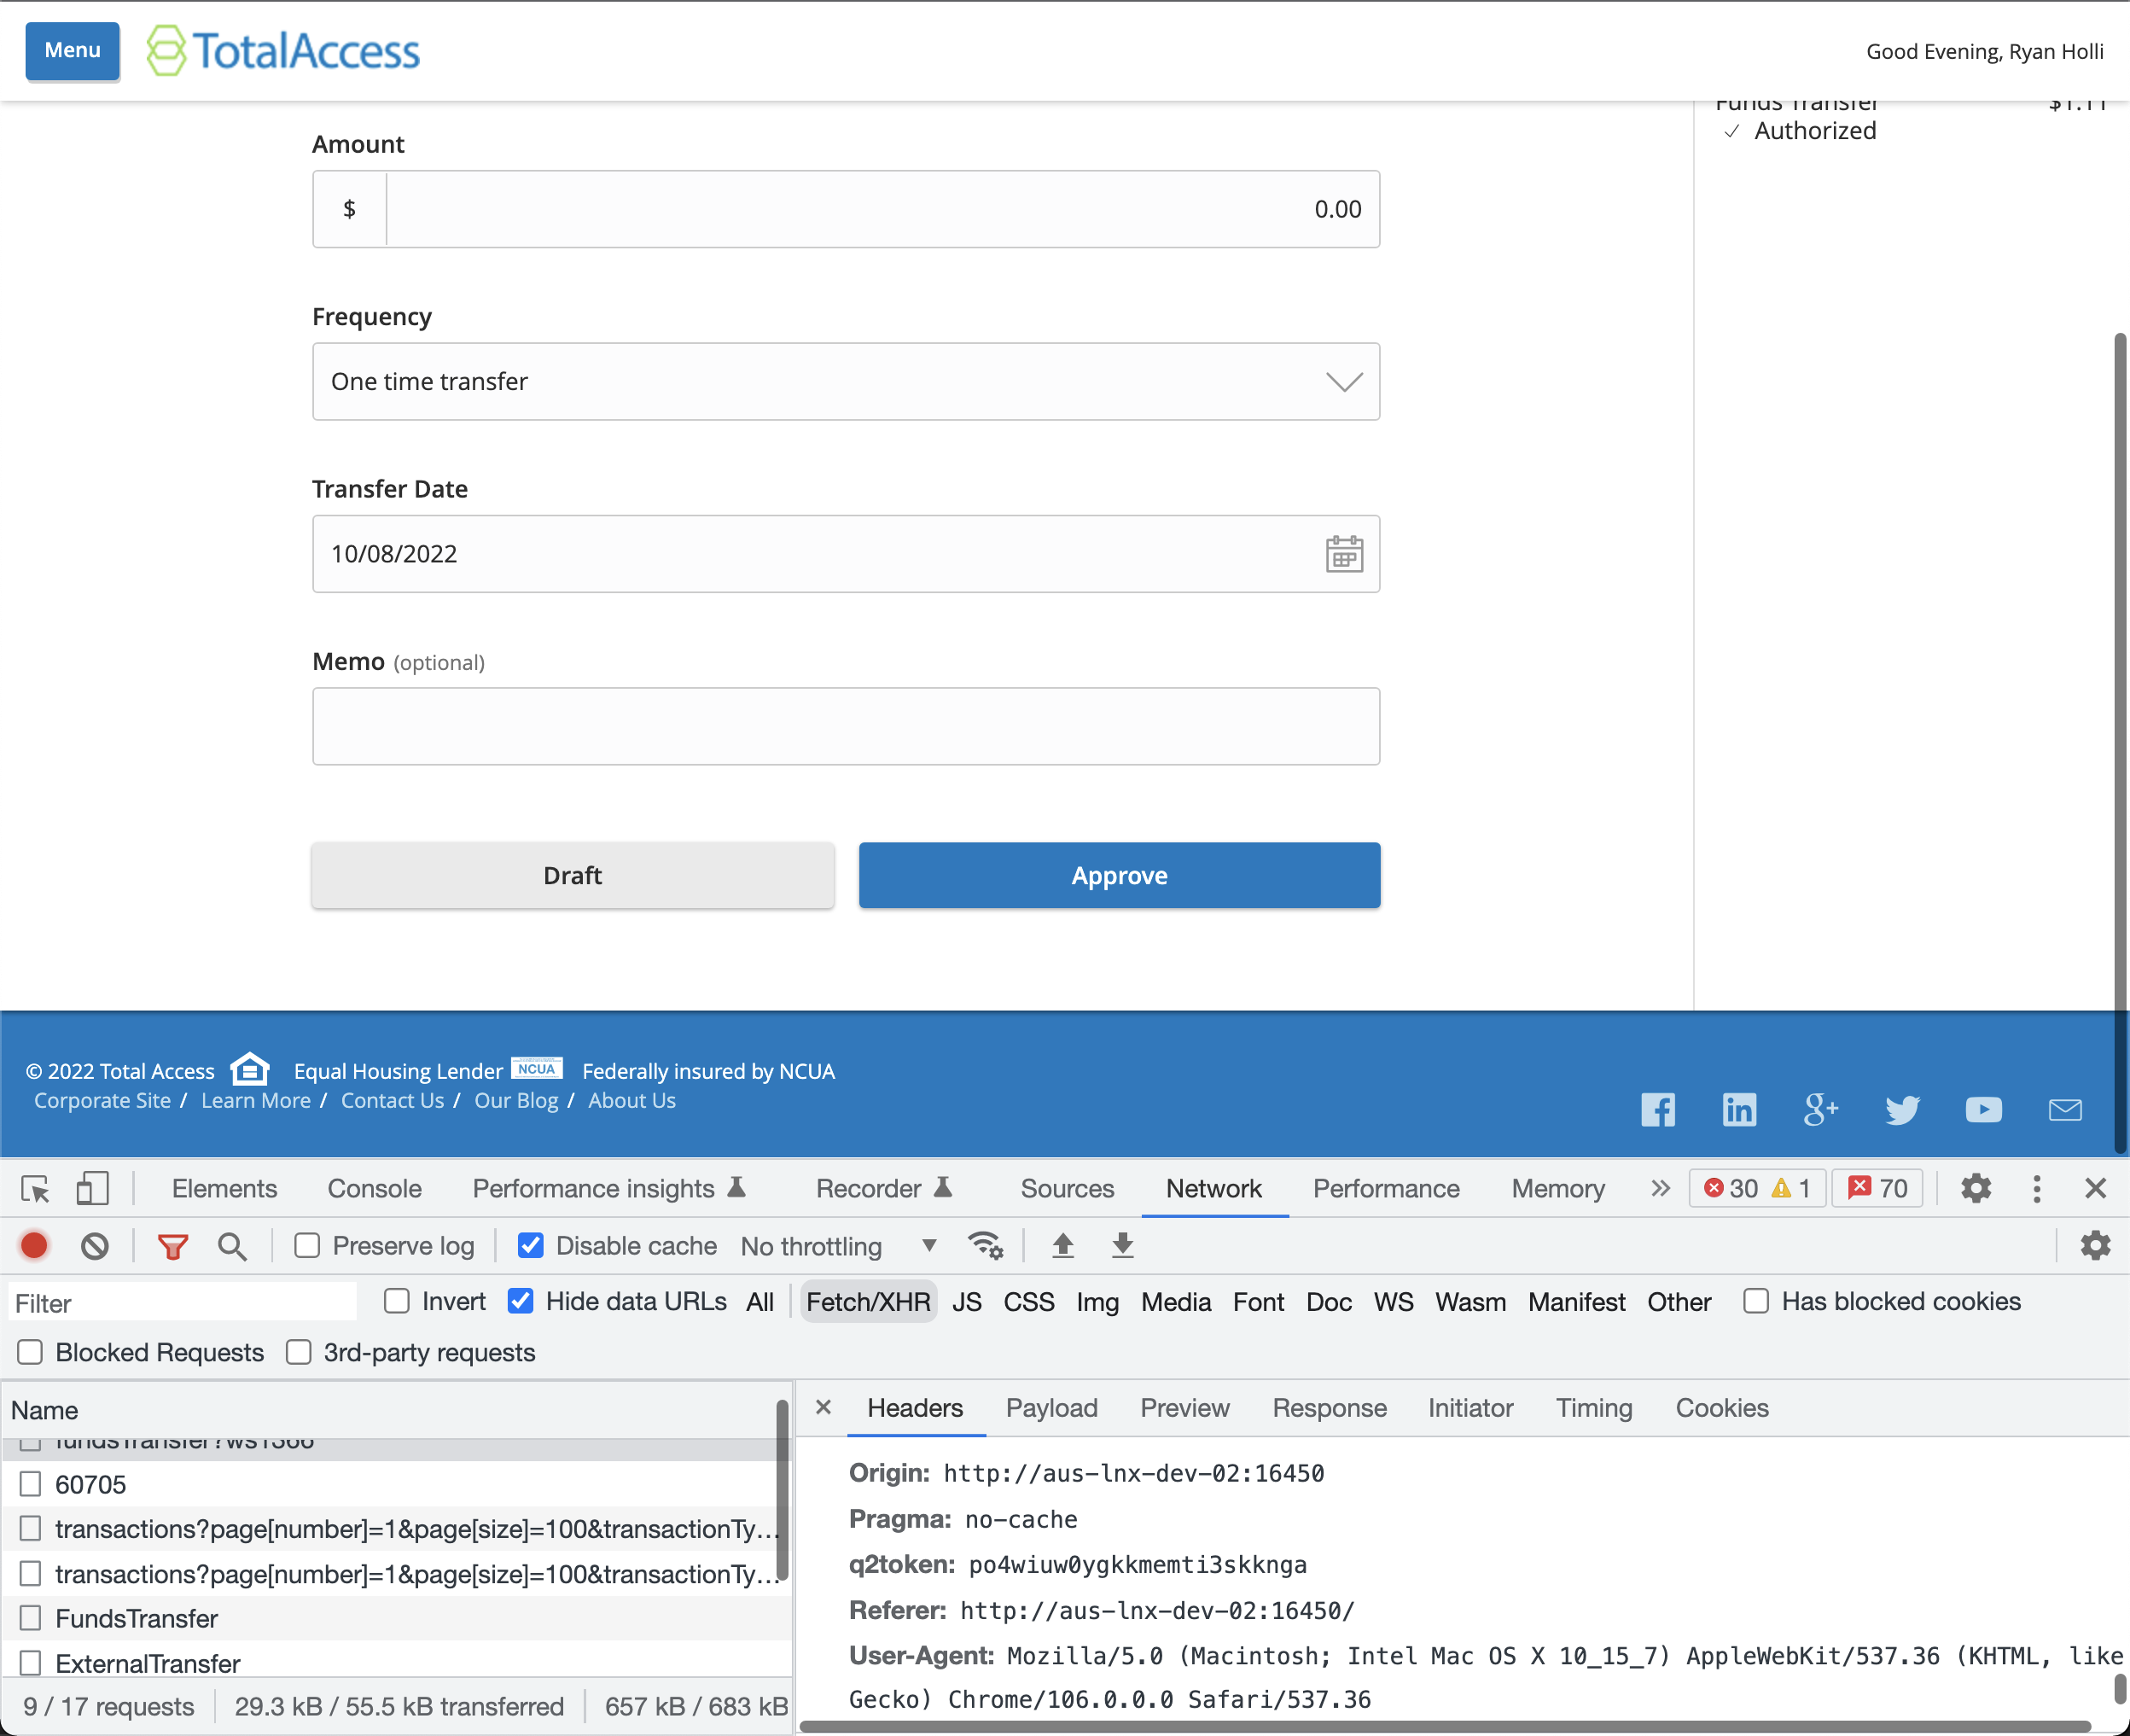
Inspect the request headers of that API call. Scroll till you see a header with the name q2token. Copy the value of q2token.
Next use the Caliper SDK CLI to get all AuditActions that have occurred for your online banking session:
$ q2 db get_audit_session <your_q2token_value_here>
If you scroll to the bottom you will see the series of AuditActions that happened when you submitted the Funds Transfer request.
First the Funds Transfer is created (AddFundsTransfer), then it is authorized (AuthorizeFundsTransfer).
At this point, it is your decision if you want to subscribe to the creation or the approval/authorization. For the purposes of this tutorial we will subscribe to the authorization.
Creation of Extension
Now that we know we want to subscribe to the AuthorizeFundsTransfer action, let’s create our extension, I’ll name it MyAuditWorker but you can name it anything you want:
$ q2 create_extension

New Extension Name: MyAuditWorker
What type of extension are you creating?

    1) Online (default)
    2) SSO (Third Party Integration)
    3) Ardent (API)
    4) Q2Console (Backoffice)
    5) Central (Legacy Backoffice)
    6) Adapter
    7) Audit Action <---------
    8) Custom Health Check
    9) Message Bus
    10) Caliper API Custom Endpoint
    11) Base Extension

Please make a selection and press Return [1]: 7
Audit Action

This has registered as an endpoint.
What type of audit action do you want to handle?
Only these audit actions will be sent to this extension
(Provide a comma separated list if more than one message type is needed): AuthorizeFundsTransfer

writing rendered jinja template to MyAuditWorker/extension.py
writing rendered jinja template to MyAuditWorker/urls.py
If you open up the extension.py that was created, you will see a rather empty handler file.
This handler file has similar capabilities as the traditional Tecton or Ardent handlers. You can have WEDGE_ADDRESS_CONFIGS, use Q2APIs and DbObjects.
Let’s go ahead and install this new extension. This is done just like any other handler type (-e is optional to specify the extension and skip the prompt):
$ q2 install -e MyAuditWorker

Successfully installed to audit action
With the extension installed, we are ready to try our new handler. Run q2 run
For the purposes of seeing our extension work, go ahead and just add a log line to the AuthorizeFundsTransfer function to see it being called:
async def AuthorizeFundsTransfer(self):
    """
    This is the hook where you can put your handling logic.

    self.audit_details contains the audit action data from hq.
    """
    self.logger.info('Got here!')
Save the file, log out and log back into digital banking, and then go and complete a Funds Transfer. You should see the following in your console:
2022-10-09T08:33:00.093 extension.MyAuditWorker INFO Q2 4837da4e9b8e45658fb5d2cba91a5de9 Got here!
If we decide that we want to subscribe to more Audit Actions, we can just add those to the AUDIT_ACTIONS list in extension.py. For this demo, go ahead and add SetAccountNickname:
class MyAuditWorkerHandler(Q2AuditActionRequestHandler):
    AUDIT_ACTIONS = ['AuthorizeFundsTransfer', 'SetAccountNickname']
Copy the function you have for AuthorizeFundsTransfer and name it SetAccountNickname:
async def SetAccountNickname(self):
    """
    This is the hook where you can put your handling logic.

    self.audit_details contains the audit action data from hq.
    """
    self.logger.info('Got here!')
We need to register our extension for that new Audit Action. This is done by using the q2 update_installed command:
q2 update_installed -e MyAuditWorker

URL [http://192.168.1.1:1989/MyAuditWorker]:
Using configs from extension MyAuditWorker

UPDATES TO PERFORM
==================
AuditActions: ['SetAccountNickname'] => ['AuthorizeFundsTransfer', 'SetAccountNickname']

Press Enter to apply changes
MyAuditWorker updated
Start your server again with q2 run.
Log out and back in to digital banking. Navigate to the Settings -> Account Preferences page and change the nickname of one of the accounts.
You should see a log line in your console.
Audit Details
Audit handlers will receive lots of valuable information on the incoming request.
There is a standard object that will be available on self.audit_details. Then there is further information specific to the type of audit action in self.audit_details.details.
This is an optional field that not all AuditActions will have. Additionally the data in this field will vary from audit action to audit action.
You can find more information about the AuditDetails object here