Enhanced Single Sign Ons in Online Banking
This guide will discuss how an Enhanced SSO implementation works in Q2 online banking and is for when you are signing the user into a web application where you can make changes to the HTML that is returned in the browser. Enhanced SSOs require a few additions to the webpage(s) that will be loaded inside of the Tecton iframe. Loading the Tecton library and connecting to the platform from your site gives you access to the Tecton capabilities and UI components and allows your SSO to more seamlessly integrate with the online banking platform, but most importantly, it sets up Q2 Discover and any additional scripts configured for the FIs environment such as those that enable analytics and co-browsing.
If you do not have the ability to include Tecton’s javascript library on the web application you are signing the user into, you will be unable to take advantage of the enhanced SSO capabilities. You can still follow our standard SSO Guide that works for all web applications.
Let’s create the Enhanced SSO extension:
q2 create_extension
New Extension Name: MyEnhancedSSO
What type of extension are you creating?

    1) Online (default)
    2) SSO (Third Party Integration) <--------
    3) Ardent (API)
    4) Q2Console (Backoffice)
    5) Central (Legacy Backoffice)
    6) Adapter
    7) Audit Action
    8) Custom Health Check
    9) Message Bus
    10) Caliper API Custom Endpoint
    11) Base Extension

Please make a selection and press Return [1]: 2

Select SSO type to generate

    1) Standard SSO
    2) Enhanced SSO with Tecton <--------

Please make a selection and press Return: 2
User Experience
When an end user logs into their online banking account, they are authenticated via the Q2 system and a session is established. Before being granted a fully authenticated session, the user may be taken through multi-factor authentication, T&C acceptance, password update, address update, or other processes.
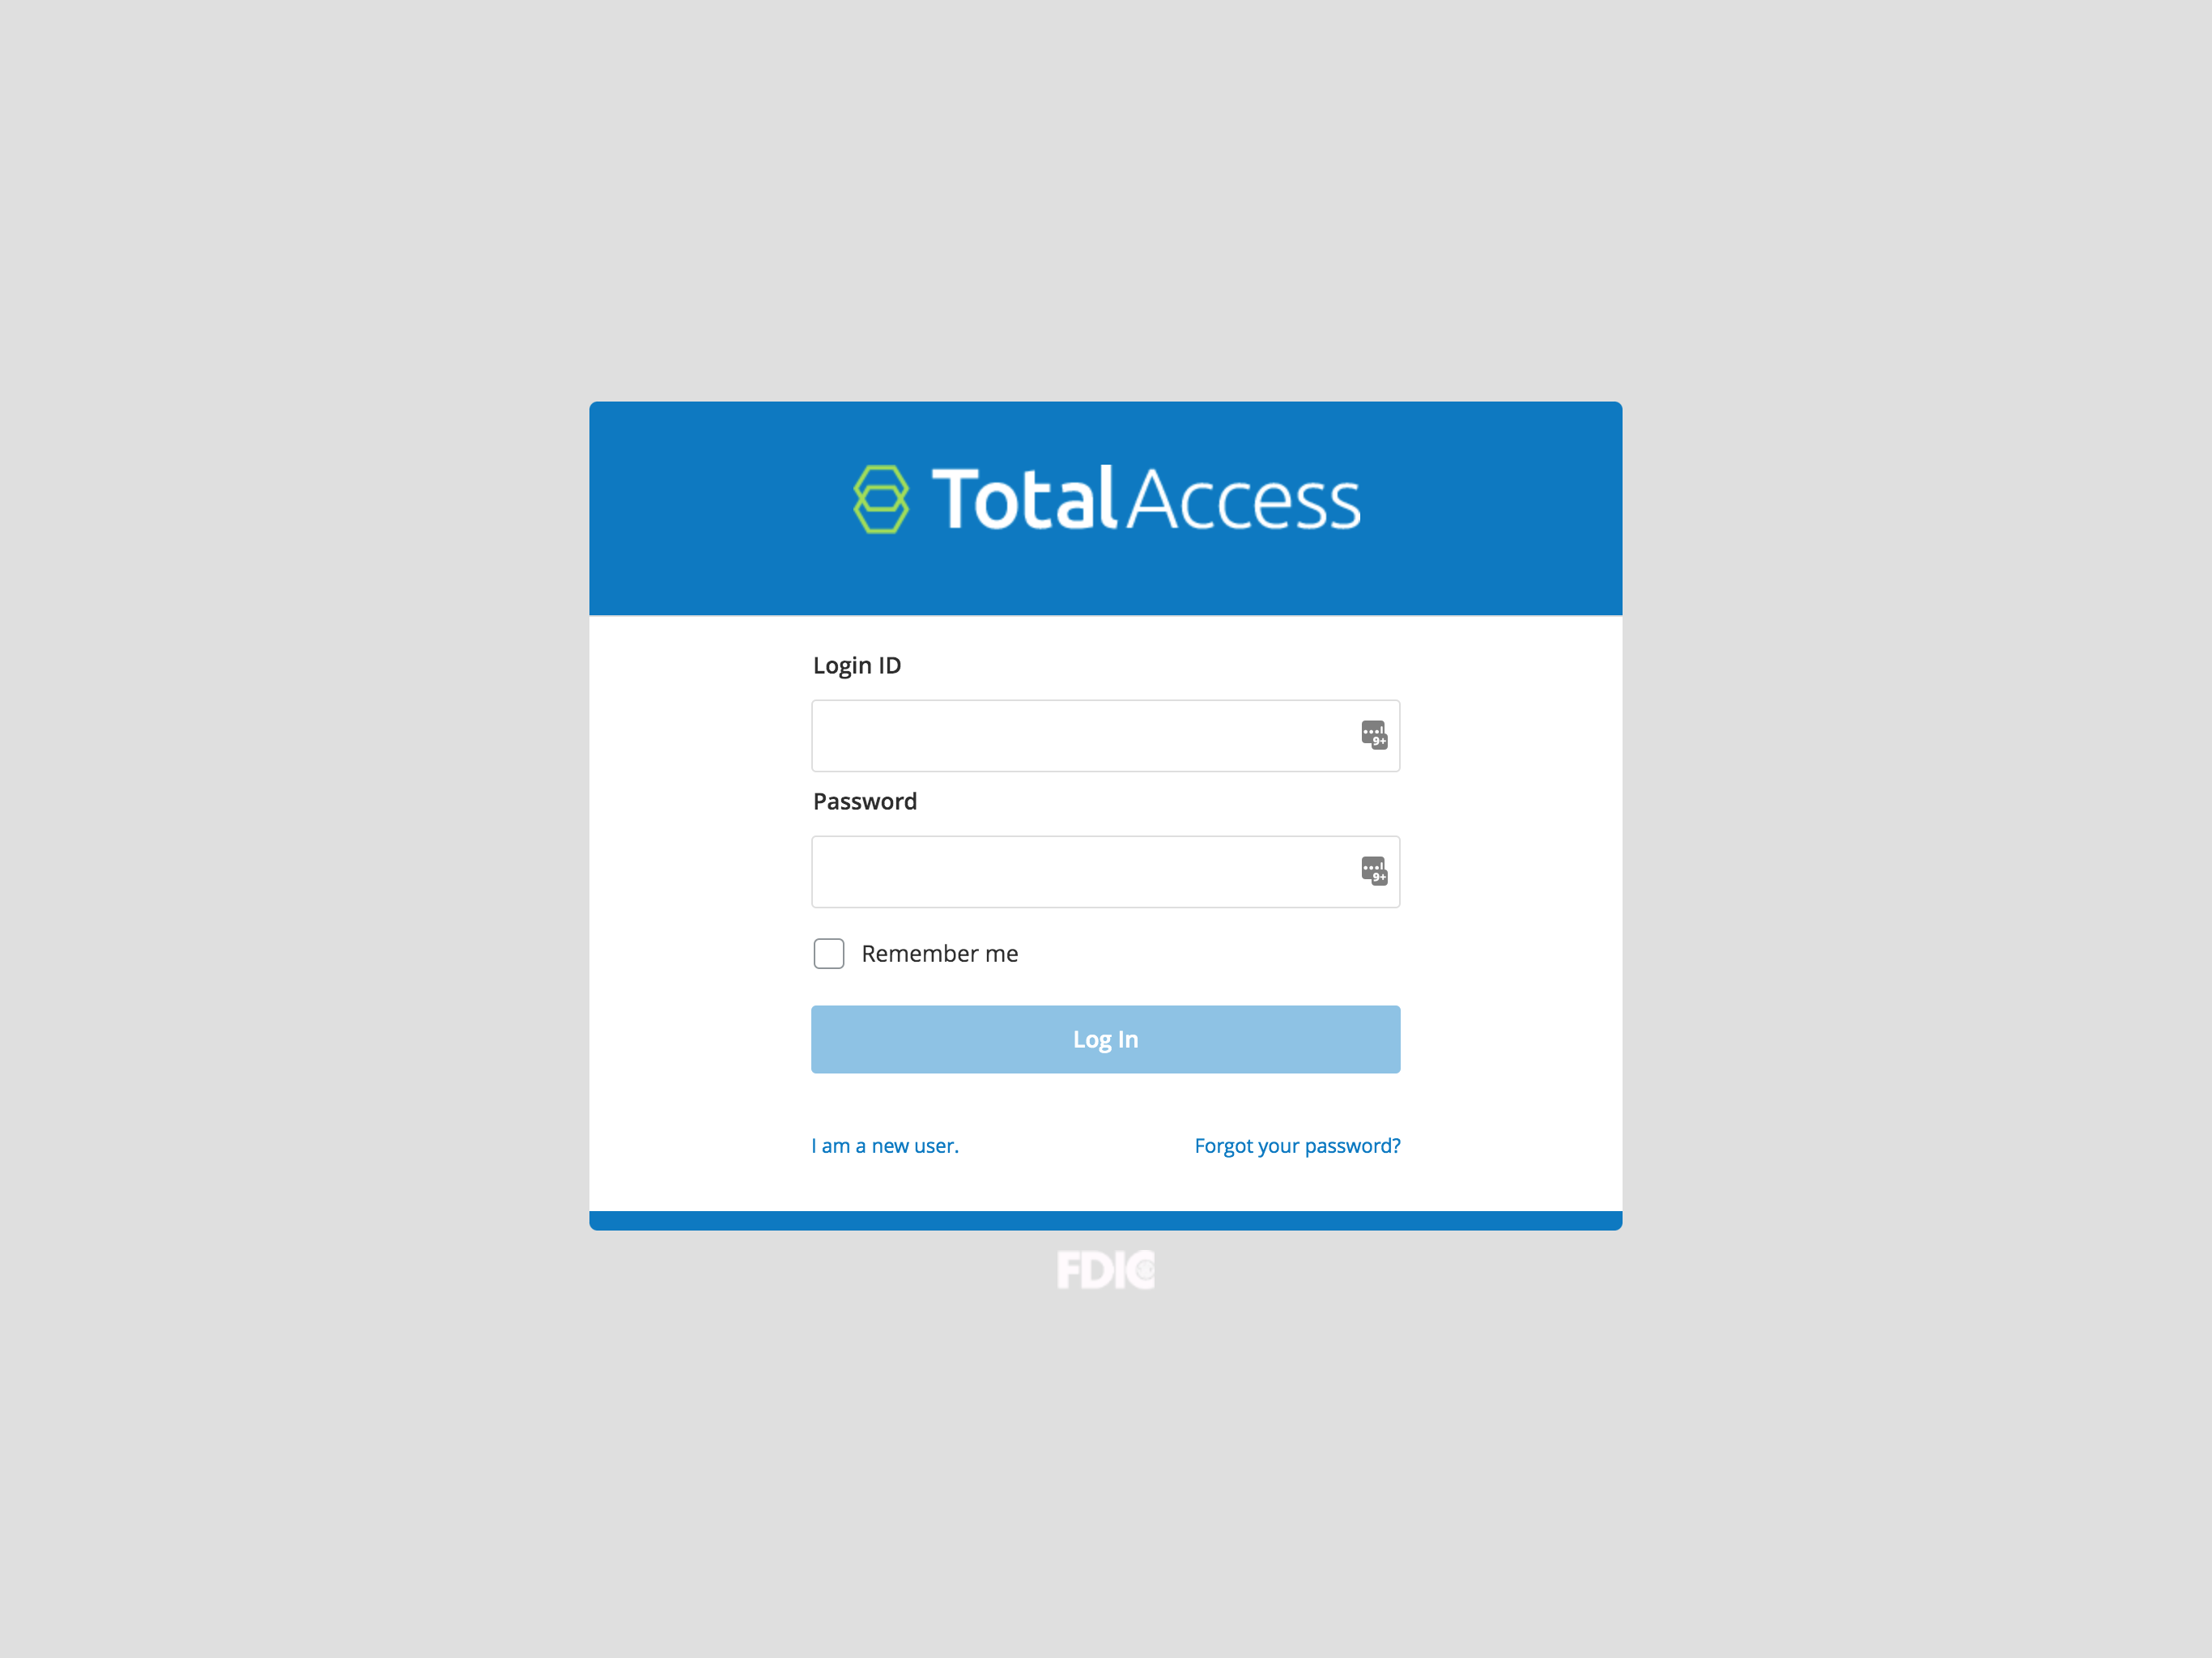
Shown, the user is taken through the login process (Q2 calls this the “interstitial page”).
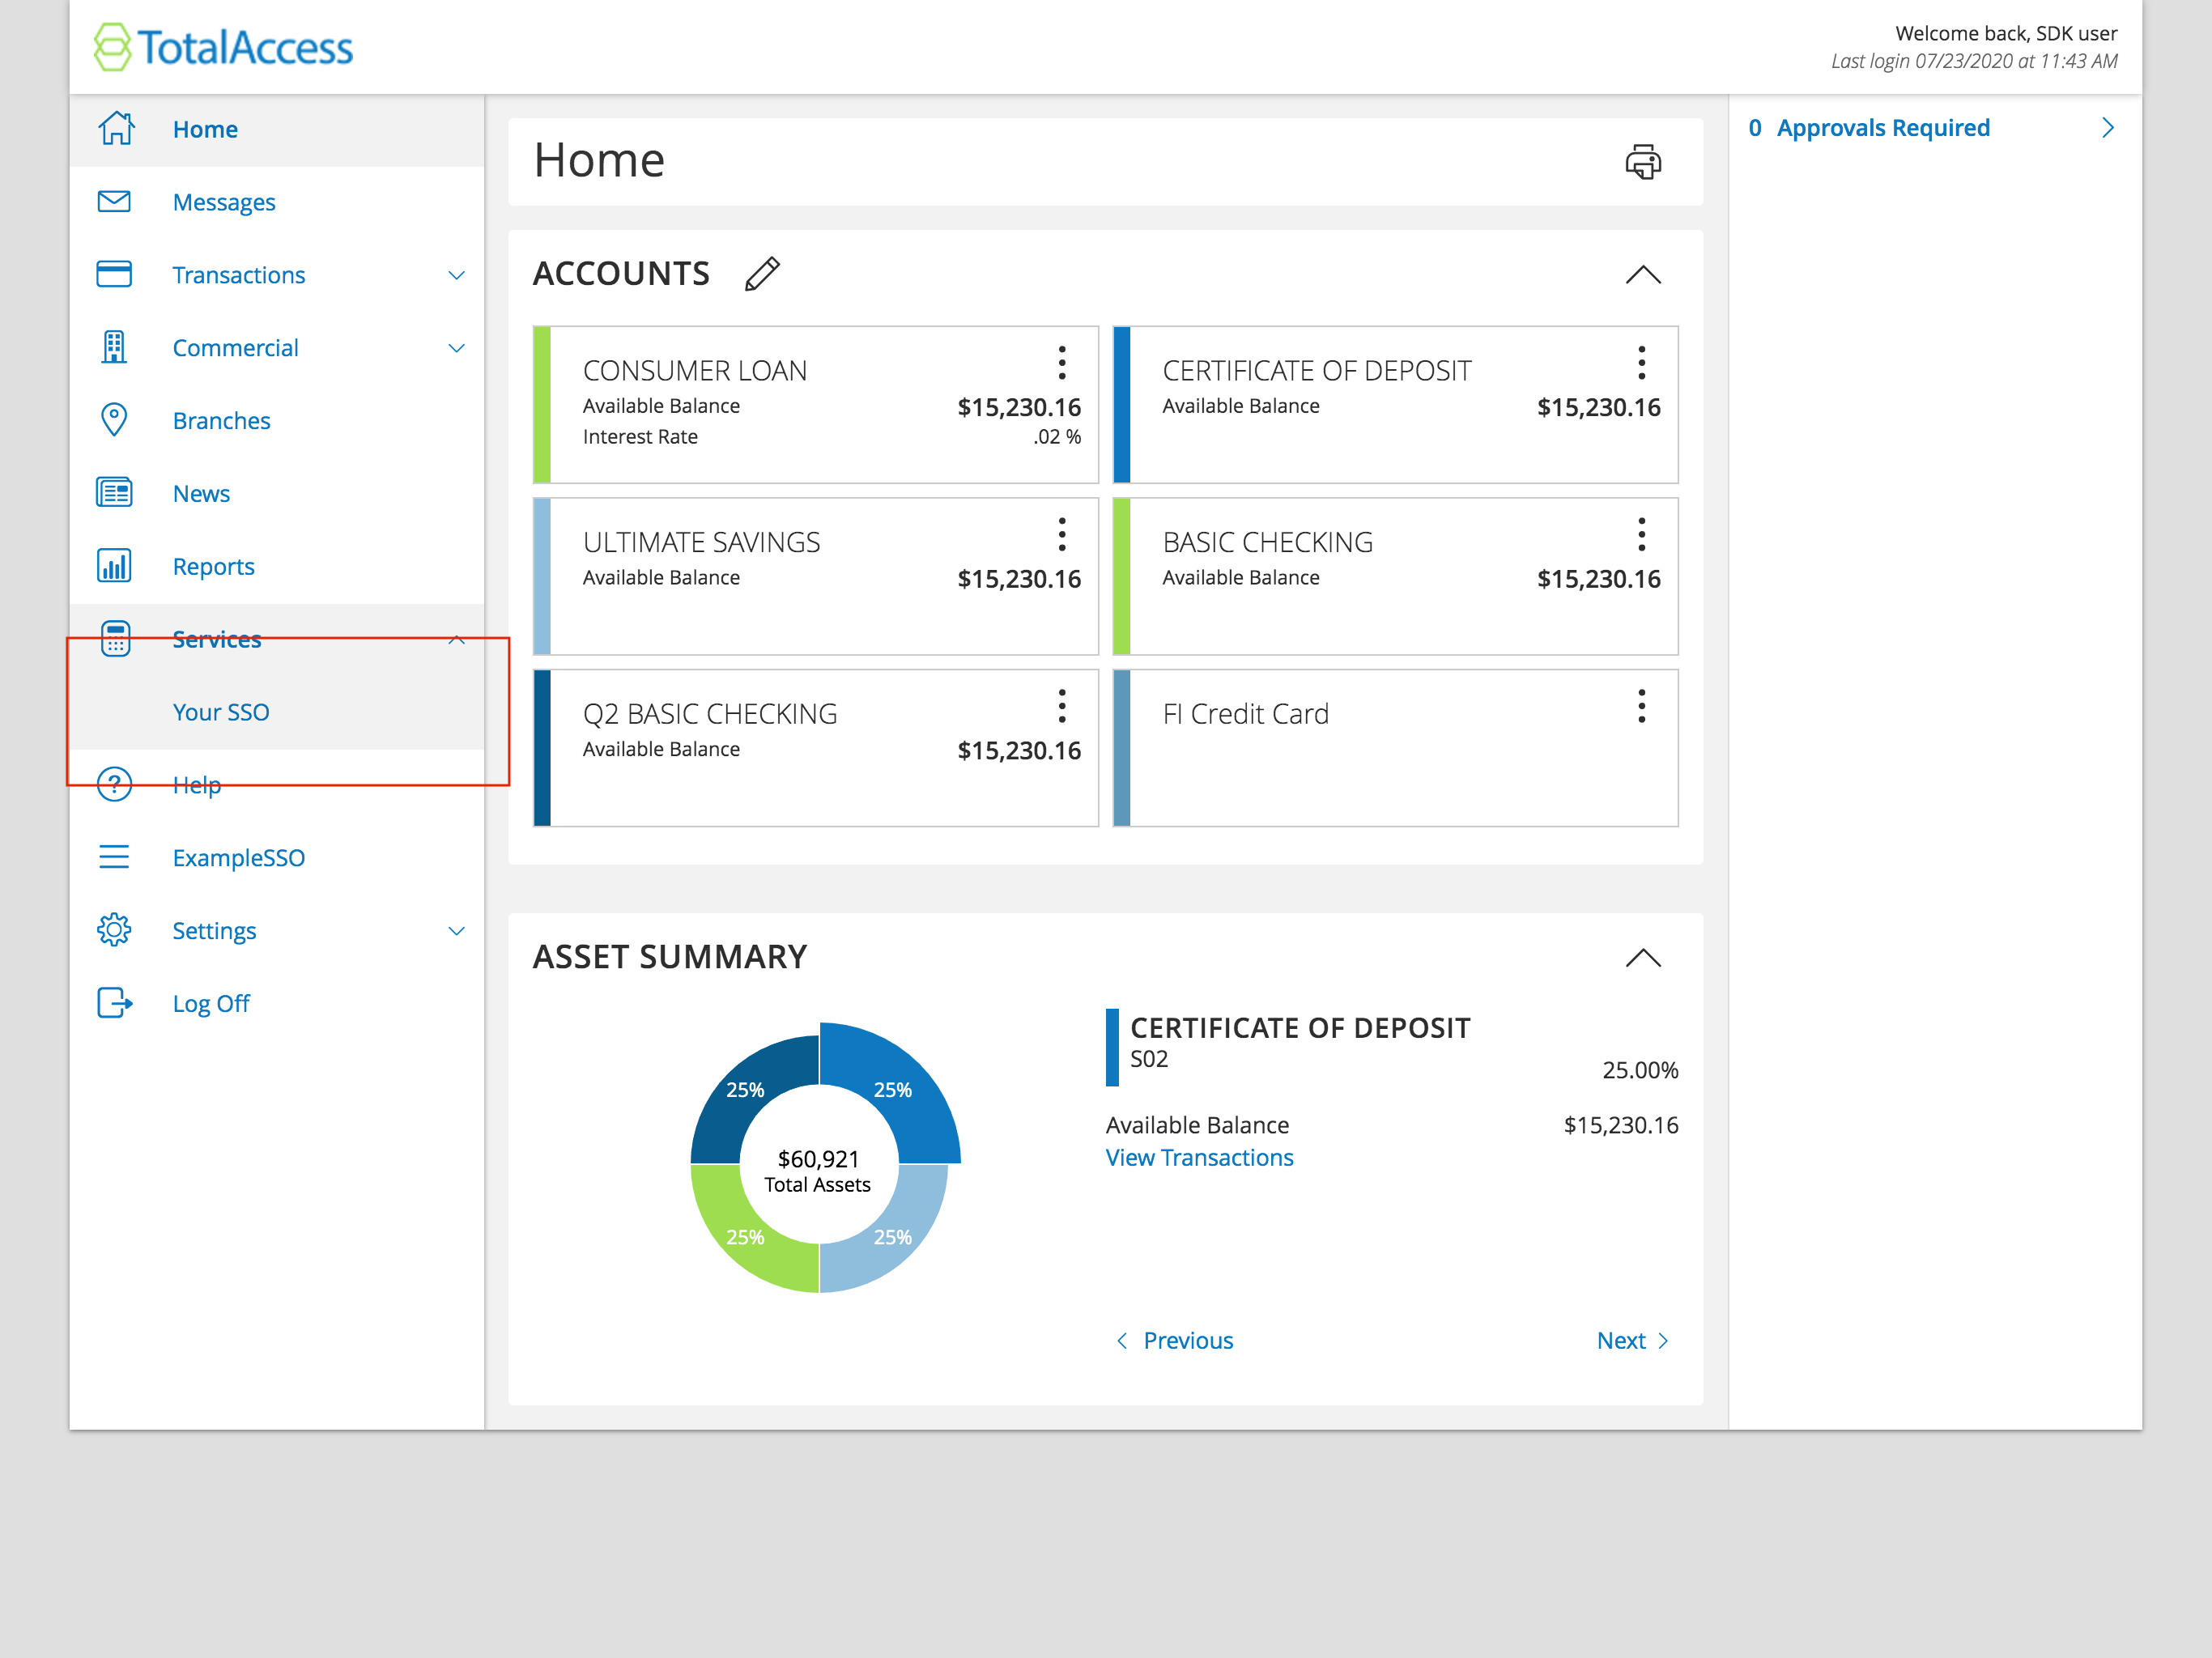
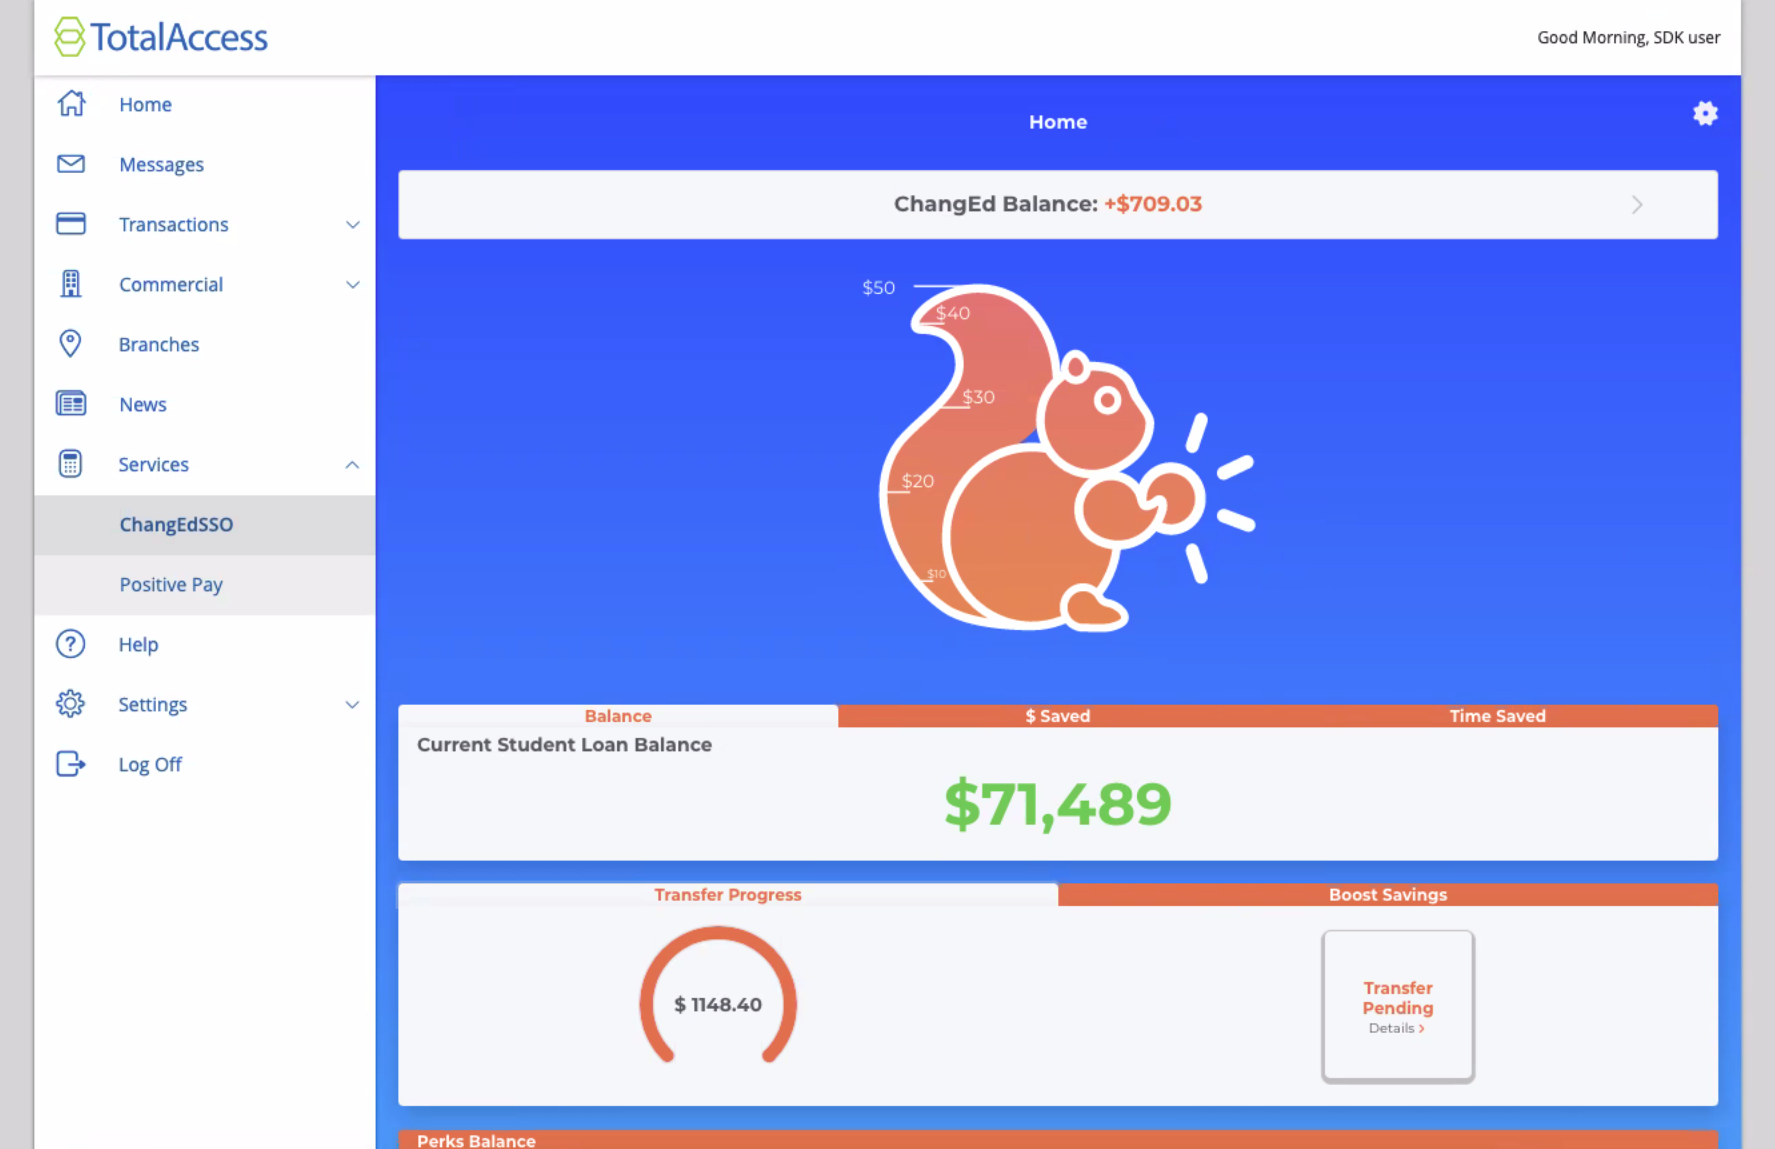
Once the user accesses online banking, they will arrive at the Account Overview page. This is a standard online banking screen with accounts and balances. From this screen (or any other screen of online banking) they will be able to access your SSO via a menu item, as shown above in the red box.
When the user clicks this link it will navigate to a new page with an iframe in the main content area (highlighted in the blue box below).
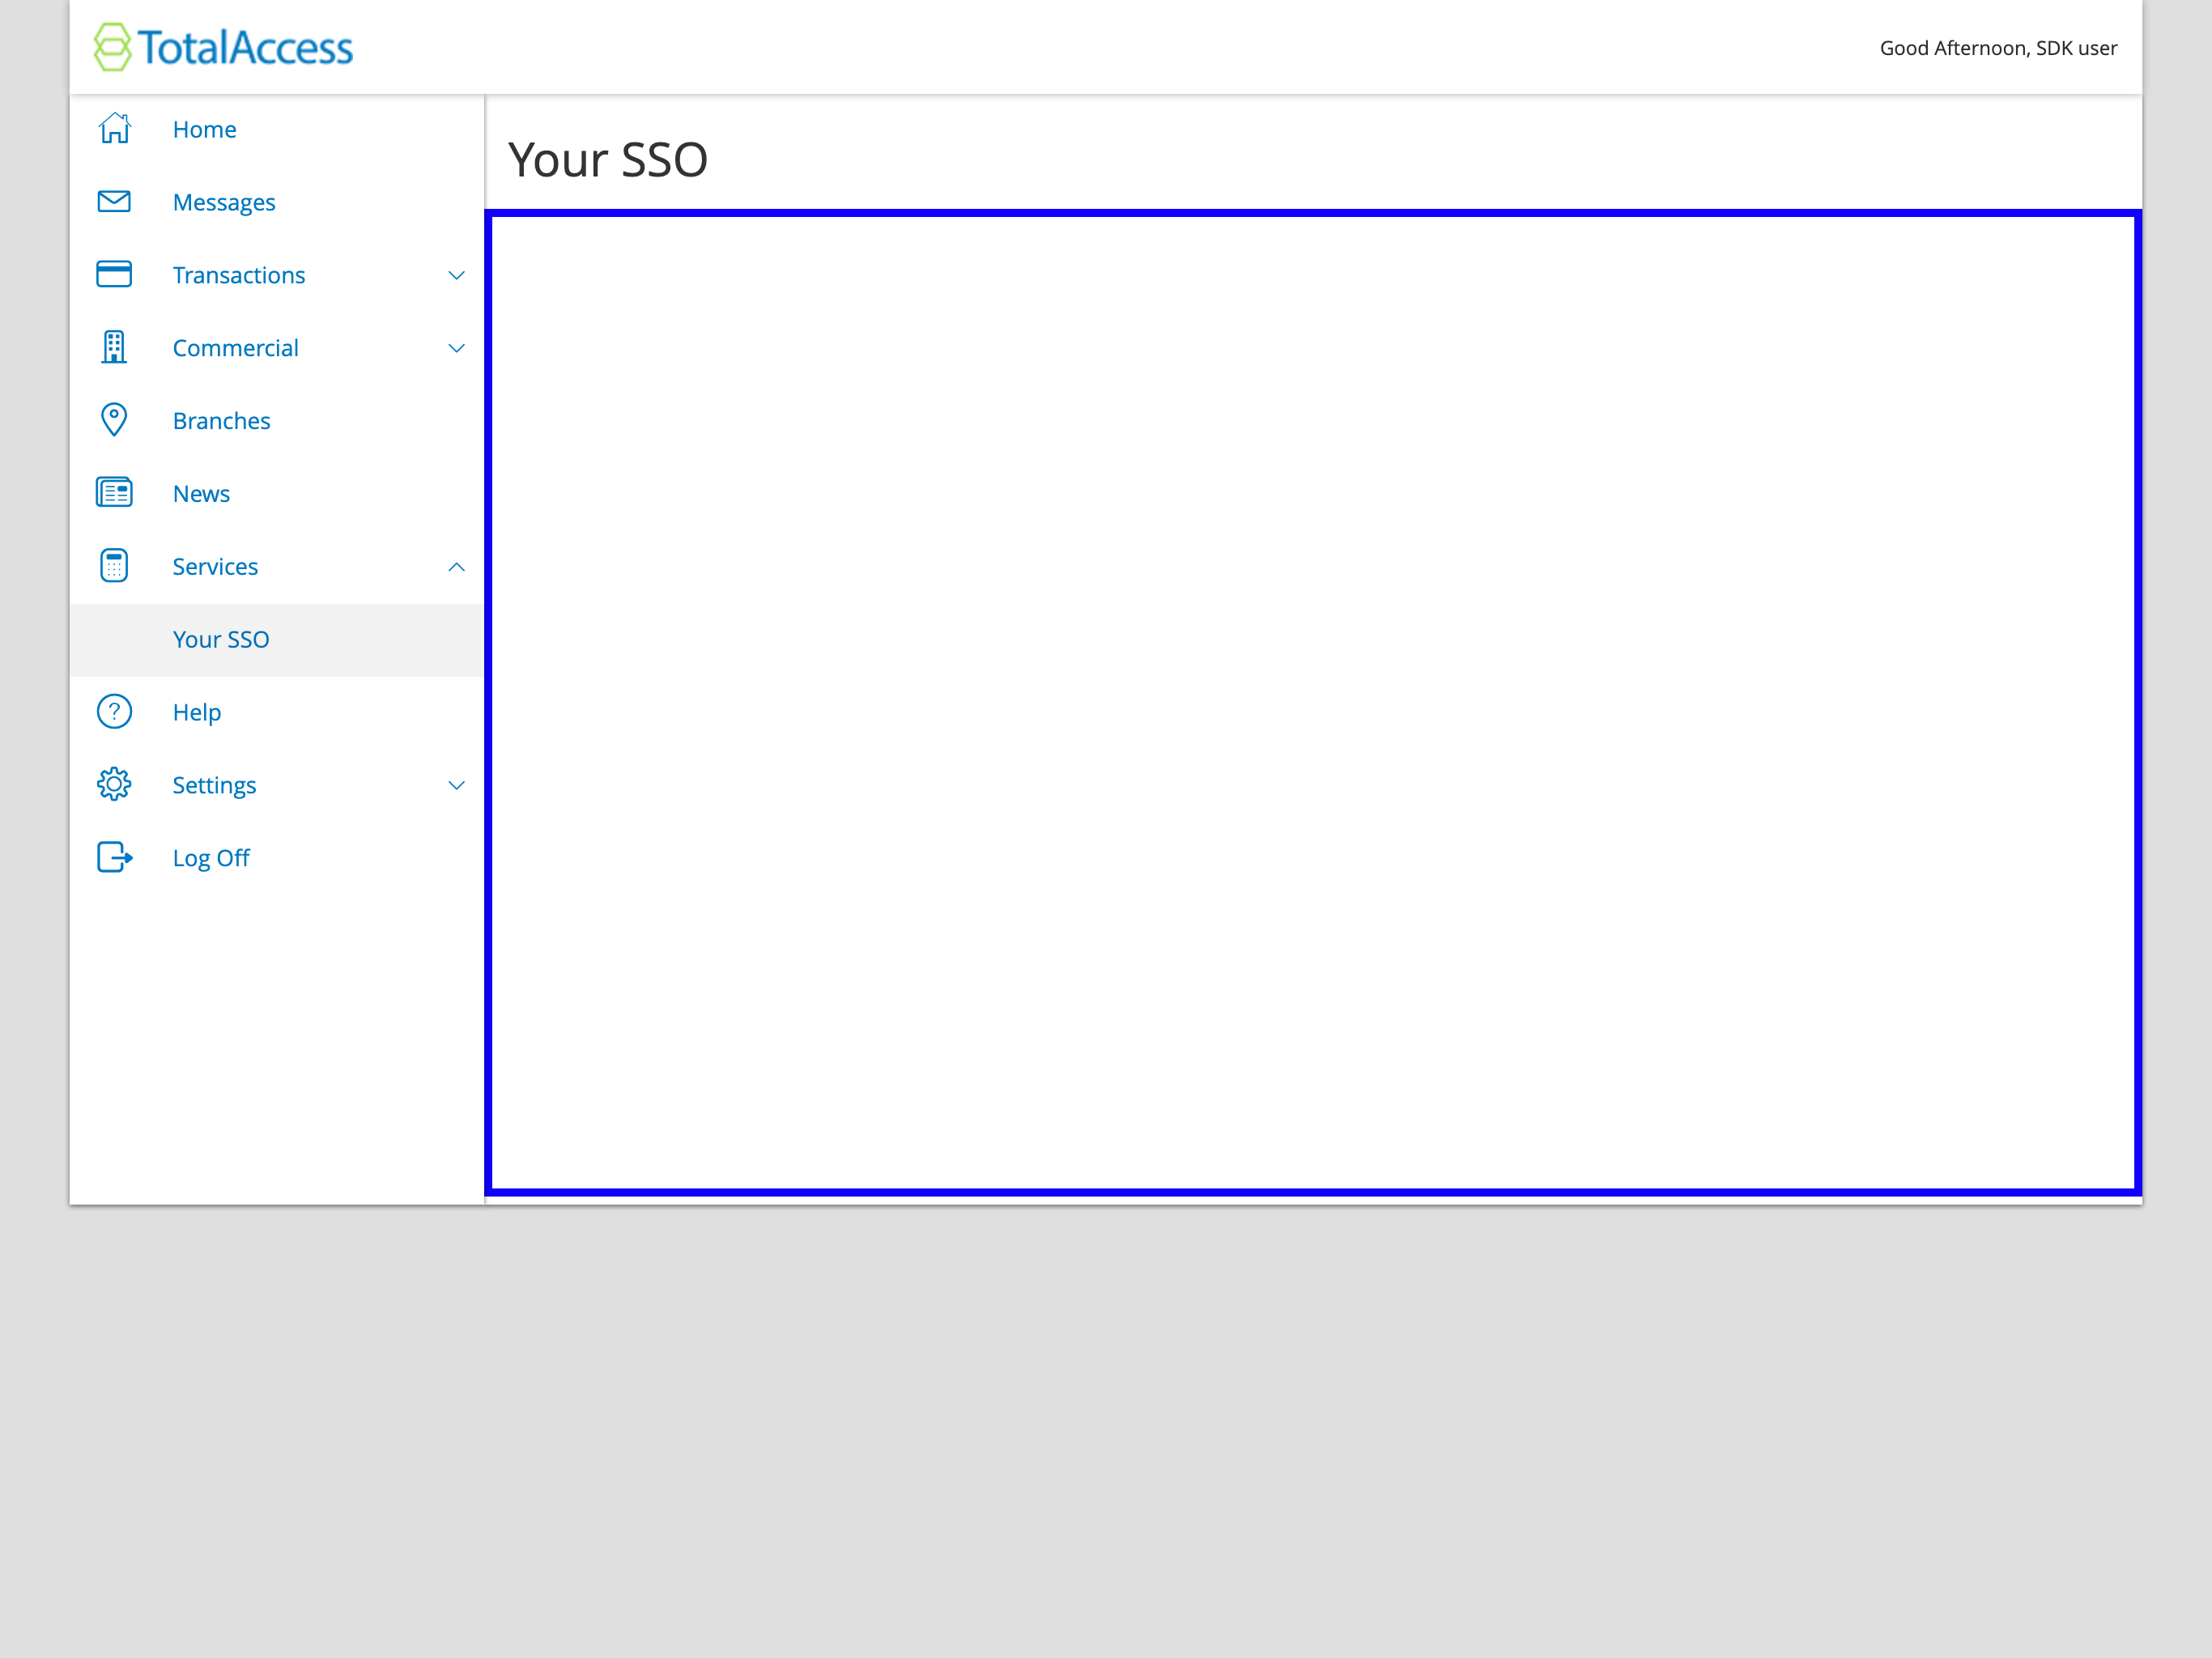
Example of a SSO flow is outlined below:
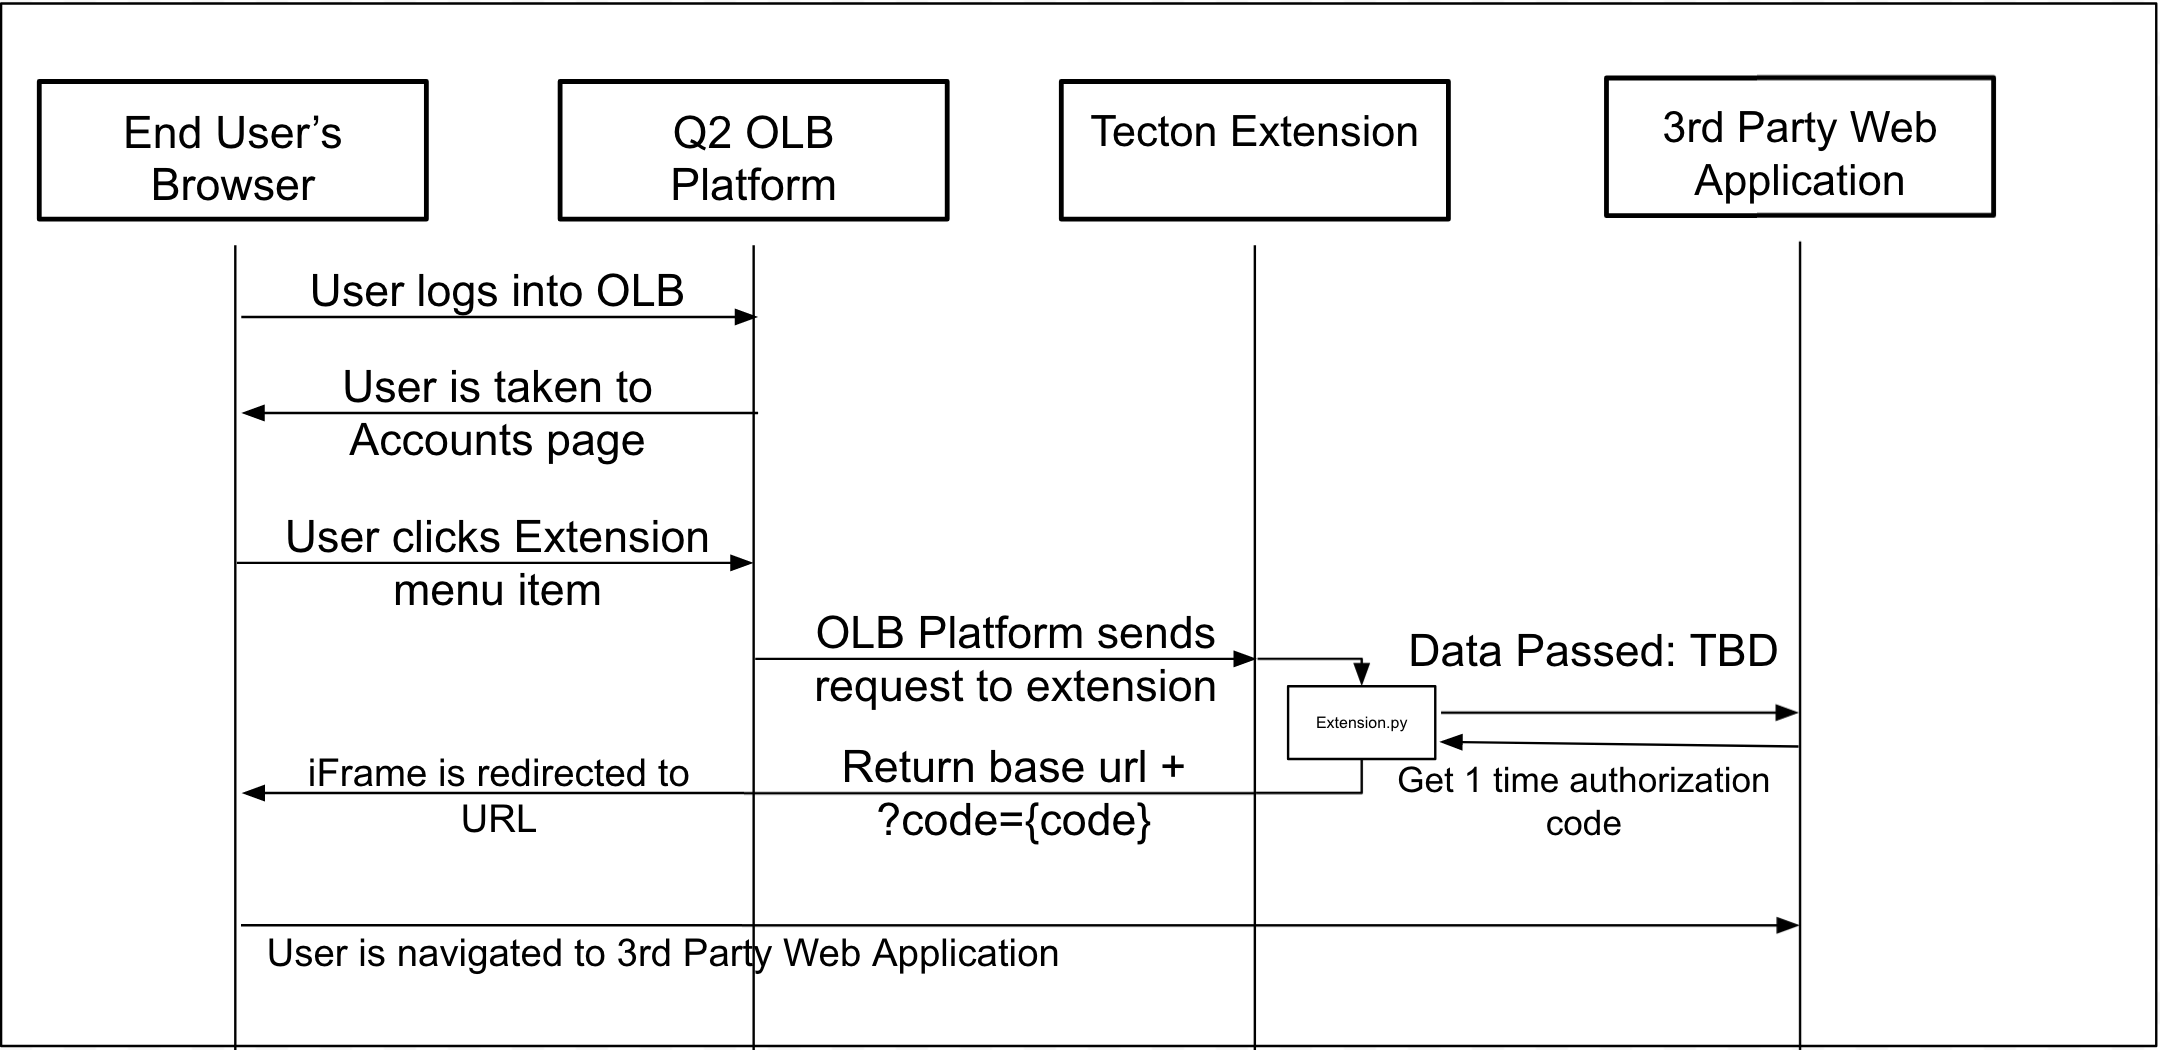
The end result is a seamless iframe within the main content area of digital banking.
Authentication Considerations
In a true SSO system as described above, the user does not register a username or password in your system. Your server endpoints will trust the Q2 system’s request (via IP whitelisting, request signing, etc.) to automatically authenticate them on. Hence, a “single sign on”. Since they won’t have a specific username and password, users will no longer be able to log into your service directly– they will need to log in to online banking to access the service.
There are a number of standardized technologies that could be implemented to achieve this. Alternatively, there are many more customized implementations.
One industry standard is SAML 2.0. SAML 2.0 is used in the SSO tutorial in the Caliper SDK documentation (https://docs.q2developer.com/tutorials/sso/index.html).
Alternatively, a SAML-like implementation that uses JWT instead of XML is very common. This uses a Public/Private key setup to ensure the contents of a request have not been tampered with and originate from a trusted source.
HMAC (https://en.wikipedia.org/wiki/HMAC) signing of the payload validates that the request is generated from your code and can be trusted– this can replace the username and password a user would normally provide.
Redirecting the iFrame
The HTML returned from your Tecton Client or Server side rendered extension will be placed inside an iFrame. To accomplish an enhanced SSO setup you will need to redirect the iFrame to your web application. Two common ways to do this are:
Javascript Redirecting
<script>
    window.location = "{{destination_url}}";
</script>
Here the extension.py is generating a single use URL to automatically authenticate the user into your web application. However you need to generate
the URL is up to you and what your web application requires. Ultimately that URL will be sent to the template and used in a simple window.location redirect;
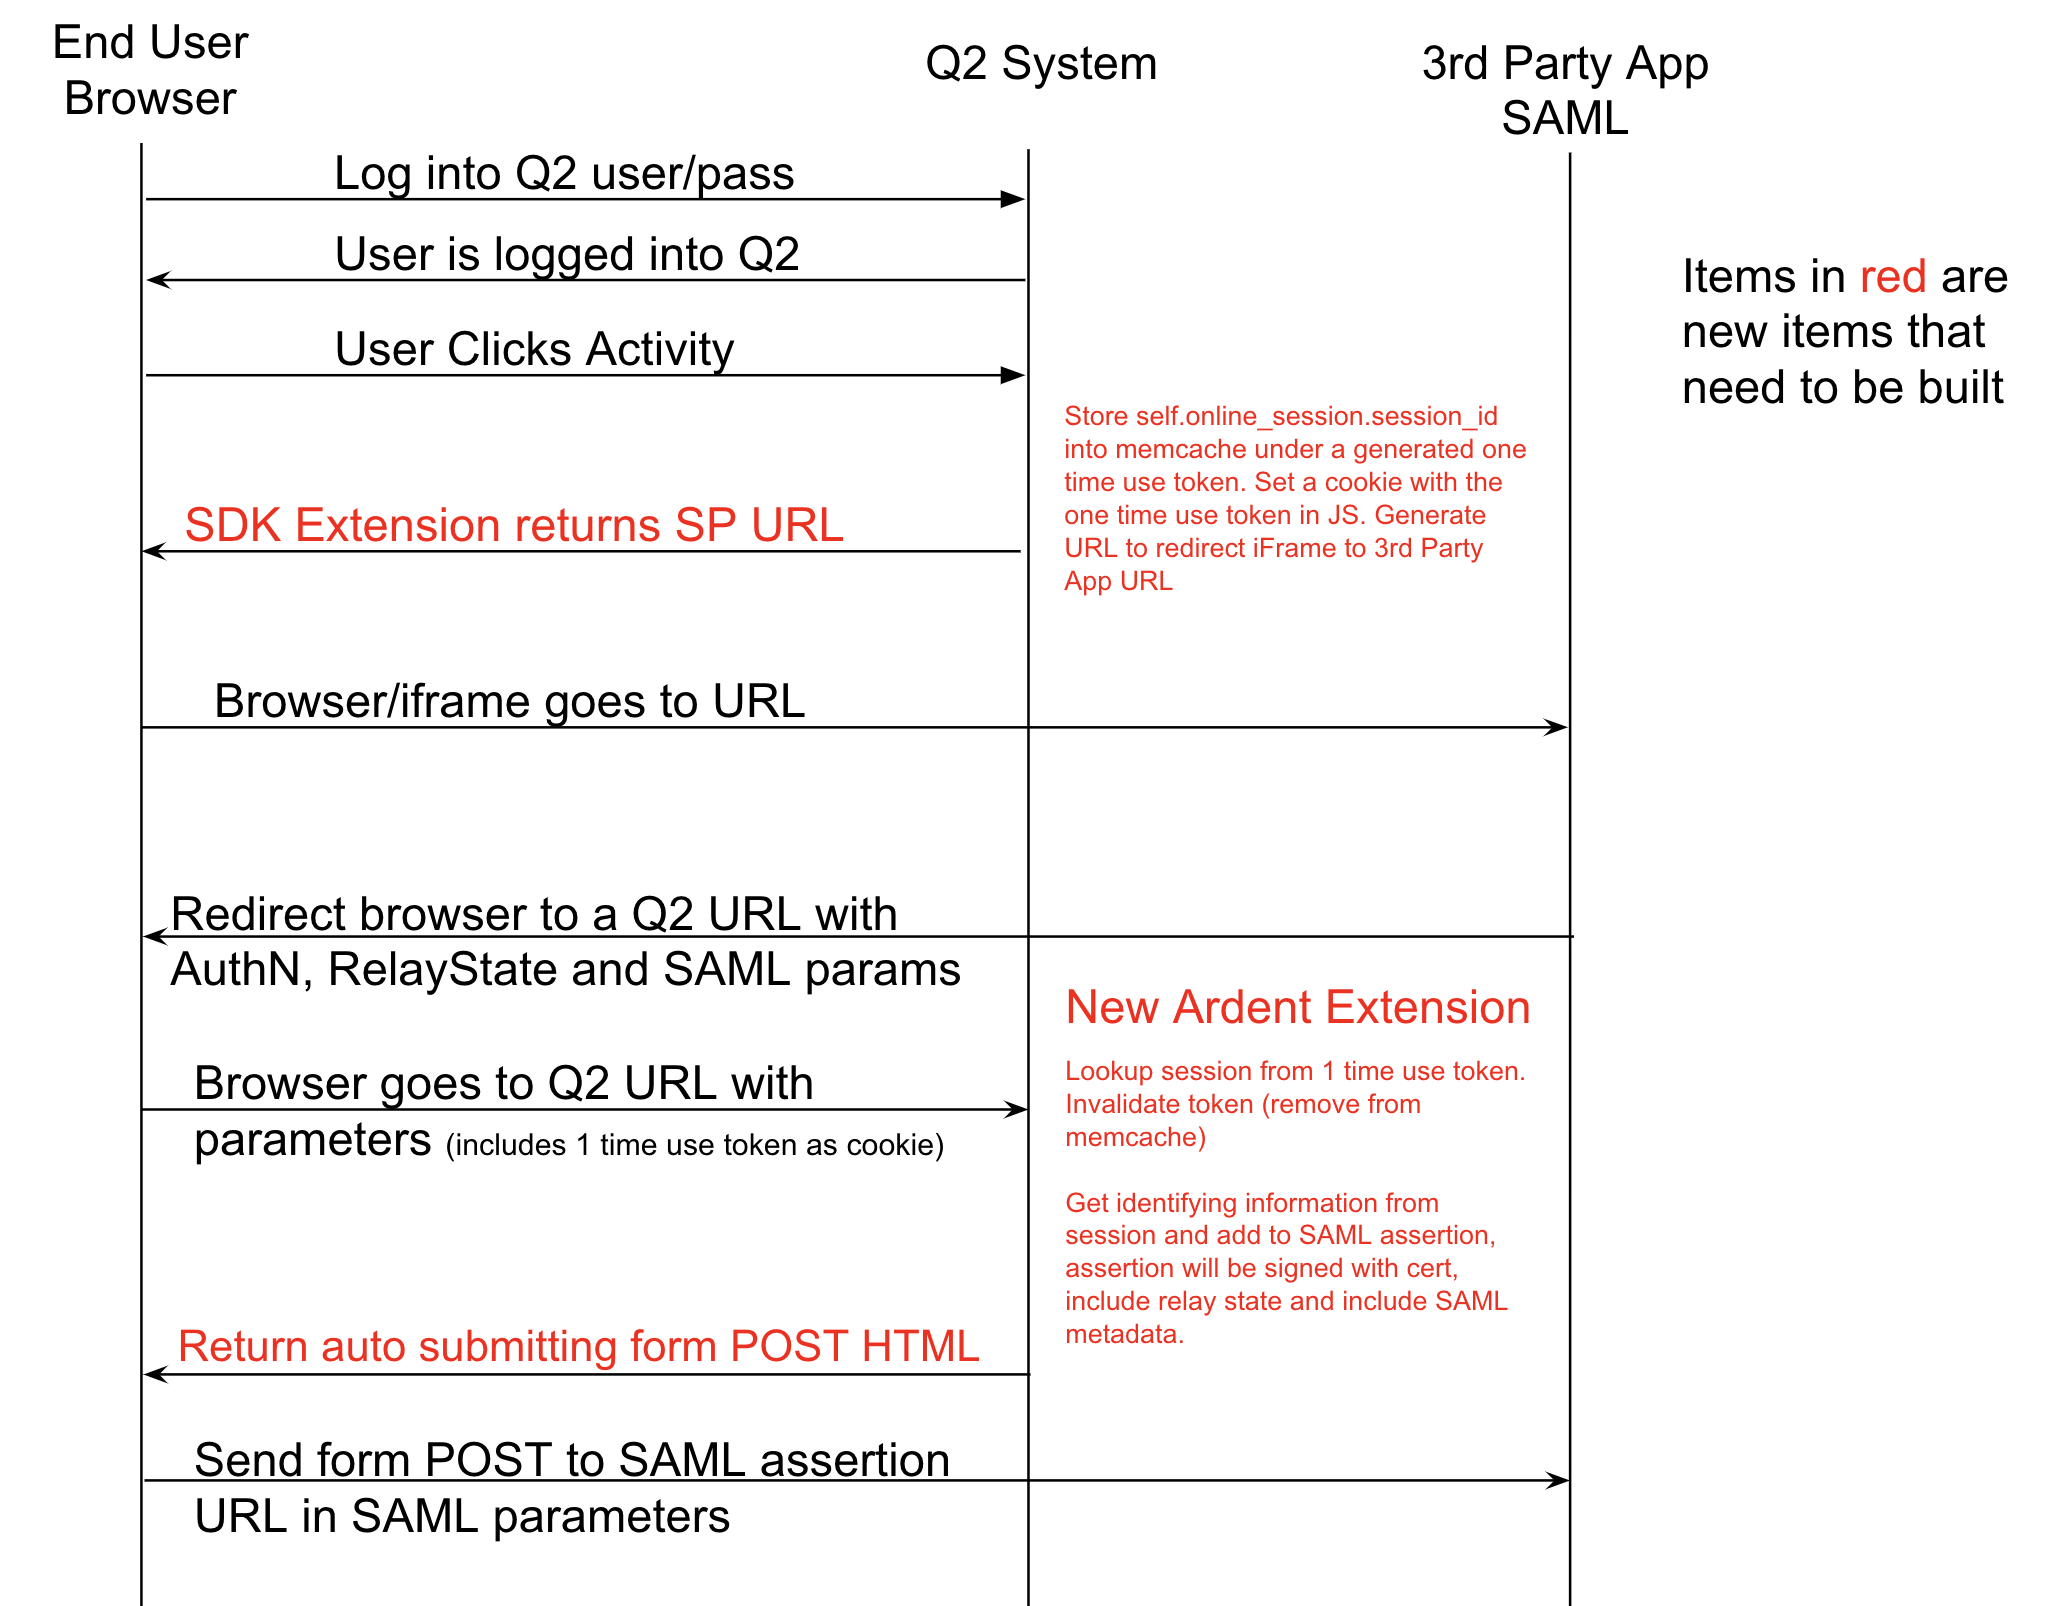
SAML POST
<form method="post"
      action="{{url}}">
    <input type="hidden"
           name="SAMLResponse"
           value="{{saml_response}}" />

    <input type="hidden"
           name="RelayState"
           id="RelayState"
           value="{{relay_state}}" />
</form>

<script>
    var win = window.opener || window.parent;
    if (win) {
       var queryString = win.location.search;
       var params = new URLSearchParams(queryString);
       var q = params.get("RelayState");
       if (q) {
              document.querySelector('#RelayState').value = q;
       }
    }
    window.onload = function () { document.forms[0].submit(); }
</script>
If your web application requires a SAML payload to login. Please read through our SSO Guide to understand how you can construct a SAML payload.
Once you’ve constructed the SAMLResponse you will send it to a template like the one shown above. This template will place the SAMLResponse into a <form> tag
and use javascript to automatically submit it to url. This will cause the iFrame to redirect to url.
Notes on OpenID
Note
OAuth 2.0 is not an SSO implementation. OAuth 2.0 is an authorization framework, not an authentication framework.
OpenID connect is a common protocol added to OAuth 2.0 to add authentication. OpenID Connect does not currently support an identity provider-initiated SSO design– it only supports a service provider-initiated design.
Although Q2’s online banking platform does not have a built-in OpenID Connect implementation, it’s possible that a identity provider-initiated SSO could be simulated using the a strategy similar to Okta’s Bookmark App strategy.
The above example is of a service provider-initiated workflow. A similar design could be accomplished for the OpenID Connect flows: authorization, implicit, or hybrid.
Required additions to HTML of SSO Application
First, load this javascript in the <body> of the web pages that will be loaded as part of the enhanced SSO.
This is the source code that the page (destination_url) should have, which you redirected from your extension code above using window.location = "{{destination_url}}".
<!DOCTYPE html>
<html lang="en">
    <head>
        <meta charset="UTF-8" />
        <meta name="viewport"
            content="width=device-width, initial-scale=1.0, minimum-scale=1.0, maximum-scale=2.0, user-scalable=yes" />
        <title>Enhanced SSO Content</title>
        <!-- The latest version of Tecton can be found at tecton.q2developer.com -->
        <script src="https://cdn1.onlineaccess1.com/cdn/base/tecton/v1.62.0/q2-tecton-sdk.js"></script>
        <script>
            var moduleIdParam = 'tct-id=tectonRoute.{extension name}.{entrypoint name}';

            var urlWithModuleId;
            if (window.location.search) {
                if (window.location.search.indexOf('tct-id') === -1) {
                    urlWithModuleId = window.location.href + '&' + moduleIdParam;
                }
            } else {
                urlWithModuleId = window.location.href + '?' + moduleIdParam
            }
            urlWithModuleId && window.history.pushState({ path: urlWithModuleId }, '', urlWithModuleId);

            window.tecton = {};
            window.tecton.connected = Tecton.connect({}).then(function (capabilities) {
                window.tecton.actions = capabilities.actions;
                window.tecton.sources = capabilities.sources;
                // this will turn off the spinner and show the iframe.
                // if you want to defer this then remove this line but call it somewhere else.
                capabilities.actions.setFetching(false);
            });
        </script>
    </head>
    <body data-tecton-module>
        <div>This is my content</div>
    </body>
</html>
Warning
Your web application cannot block iframes with
X-FRAME-OPTIONS: DENYorContent-Security-Policy: frame-ancestors 'none';Your web application cannot depend on cookies for authentication as browsers are starting to cookies in iframe’s of 3rd party domains.
Don’t use
height: 100vhthat can cause infinite height grow, it should resize the platform scroll automatically, also usingresizeIframe(https://tecton.q2developer.com/capabilities/resizeIframe) would help if needed.Don’t use your own
iframein the extension code, the Enhanced SSO extension itself will be running on Q2’s iframe already, using nestediframecould cause resize issues.
If the web application you are signing into meets the requirements above, you can proceed with this guide.
Note
You will need to substitute your extension name and entry point in the code above where it has {extension name}.{entrypoint name}.
When you navigate in digital banking to your extension, take the two path parameters at the end replace the two place holder values.
For example, if the url is: #/extension/TestExtension/Main then you would change the value to tct-id=tectonRoute.TestExtension.Main.
If you are configuring an Enhanced SSO as a widget, then you will need to use a slightly different outlet id that is dynamically built.
Instead of tct-id=tectonRoute.TestExtension.Main you would use tct-id=TestExtension_Main_widget.TestExtension.Main.
Next, add the attribute data-tecton-module to the <body> tag of your web applications html.
<body data-tecton-module>
</body>
Finally, add the additionalDomains list to the root of the tecton feature config in the configuration/{extensionName}.py:
Warning
Ensure your additional domains do not have trailing slashes, or Tecton may not load correctly.
FEATURE = {
    "core": False,
    "additionalDomains": ["https://www.myssoedapplication.com"],
    "modules": {
        "Main": {
            # leave whatever else is here, only add the "additionalDomains" line
        }
    }
}