Single Sign Ons in Online Banking
This guide will discuss how a basic SSO implementation works in Q2 online banking. If you have the ability to include Tecton’s javascript library on the web application you are signing the user into it is worth exploring the Enhanced SSO Guide guide as it provides a better and more embedded user experience.
This guide is for when you are signing the user into a web application where you cannot make changes to the HTML.
User Experience
When an end user logs into their online banking account, they are authenticated via the Q2 system and a session is established. Before being granted a fully authenticated session, the user may be taken through multi-factor authentication, T&C acceptance, password update, address update, or other processes.
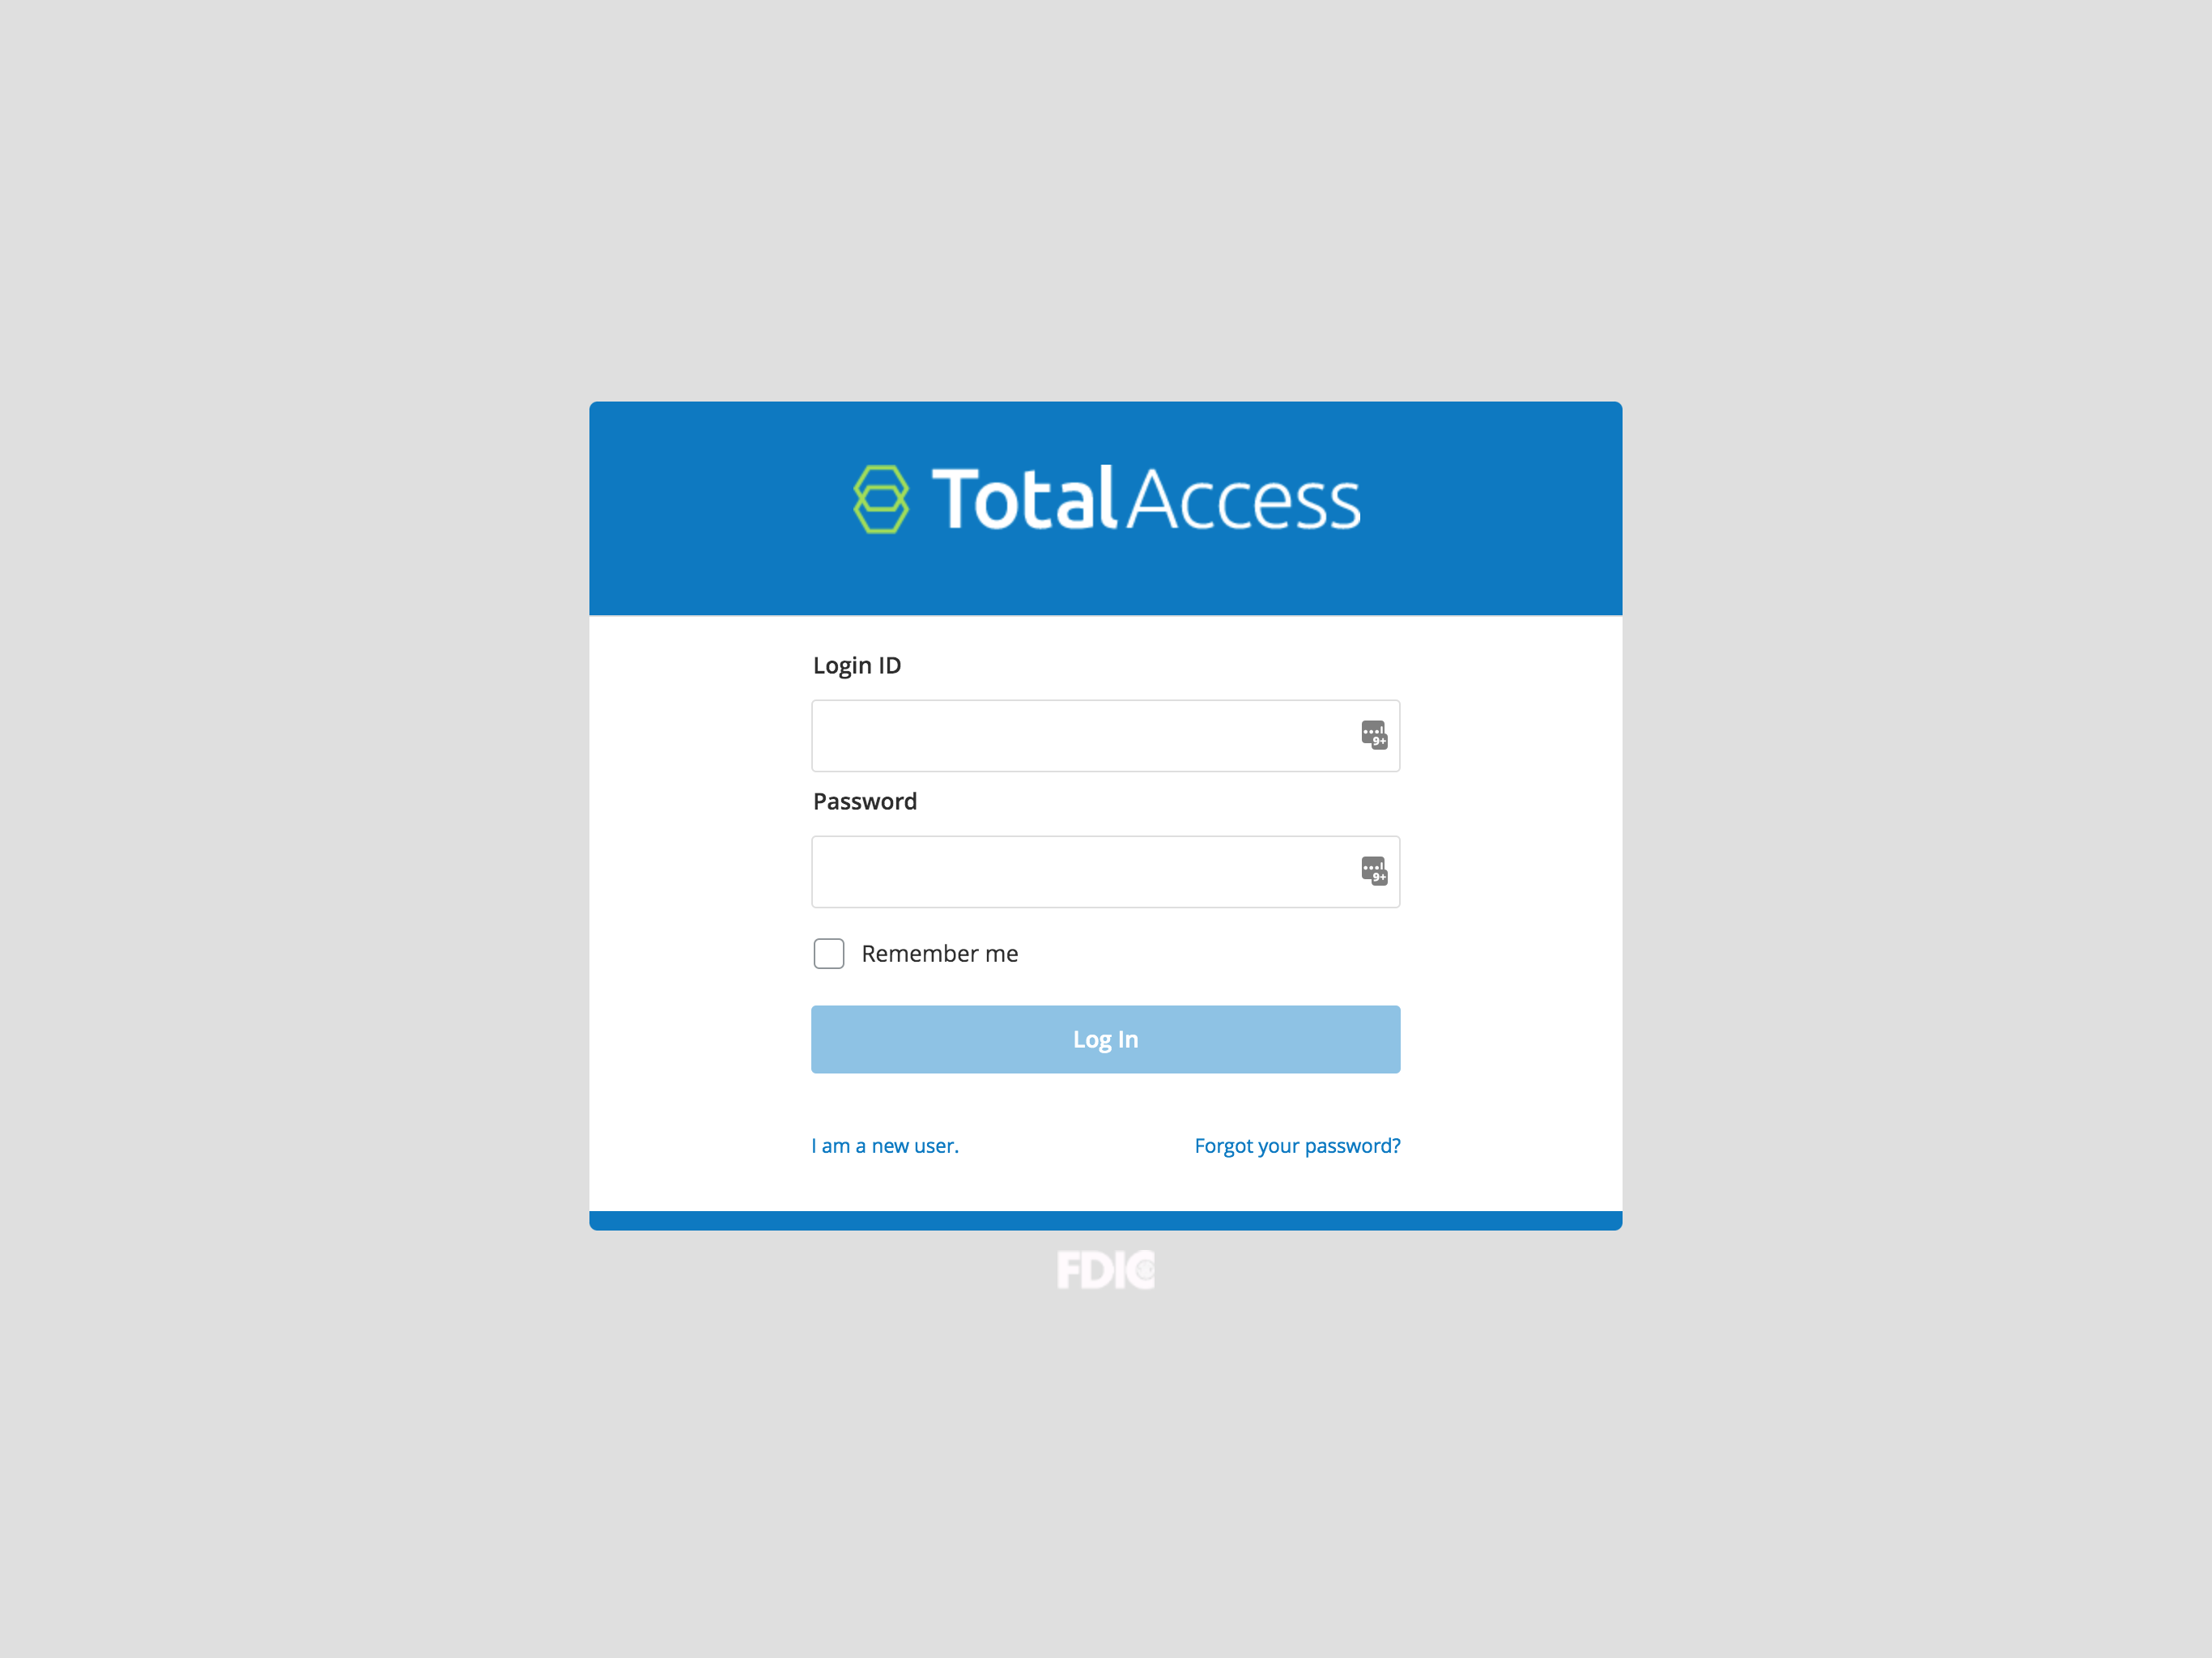

Shown, the user is taken through the login process (Q2 calls this the “interstitial page”).
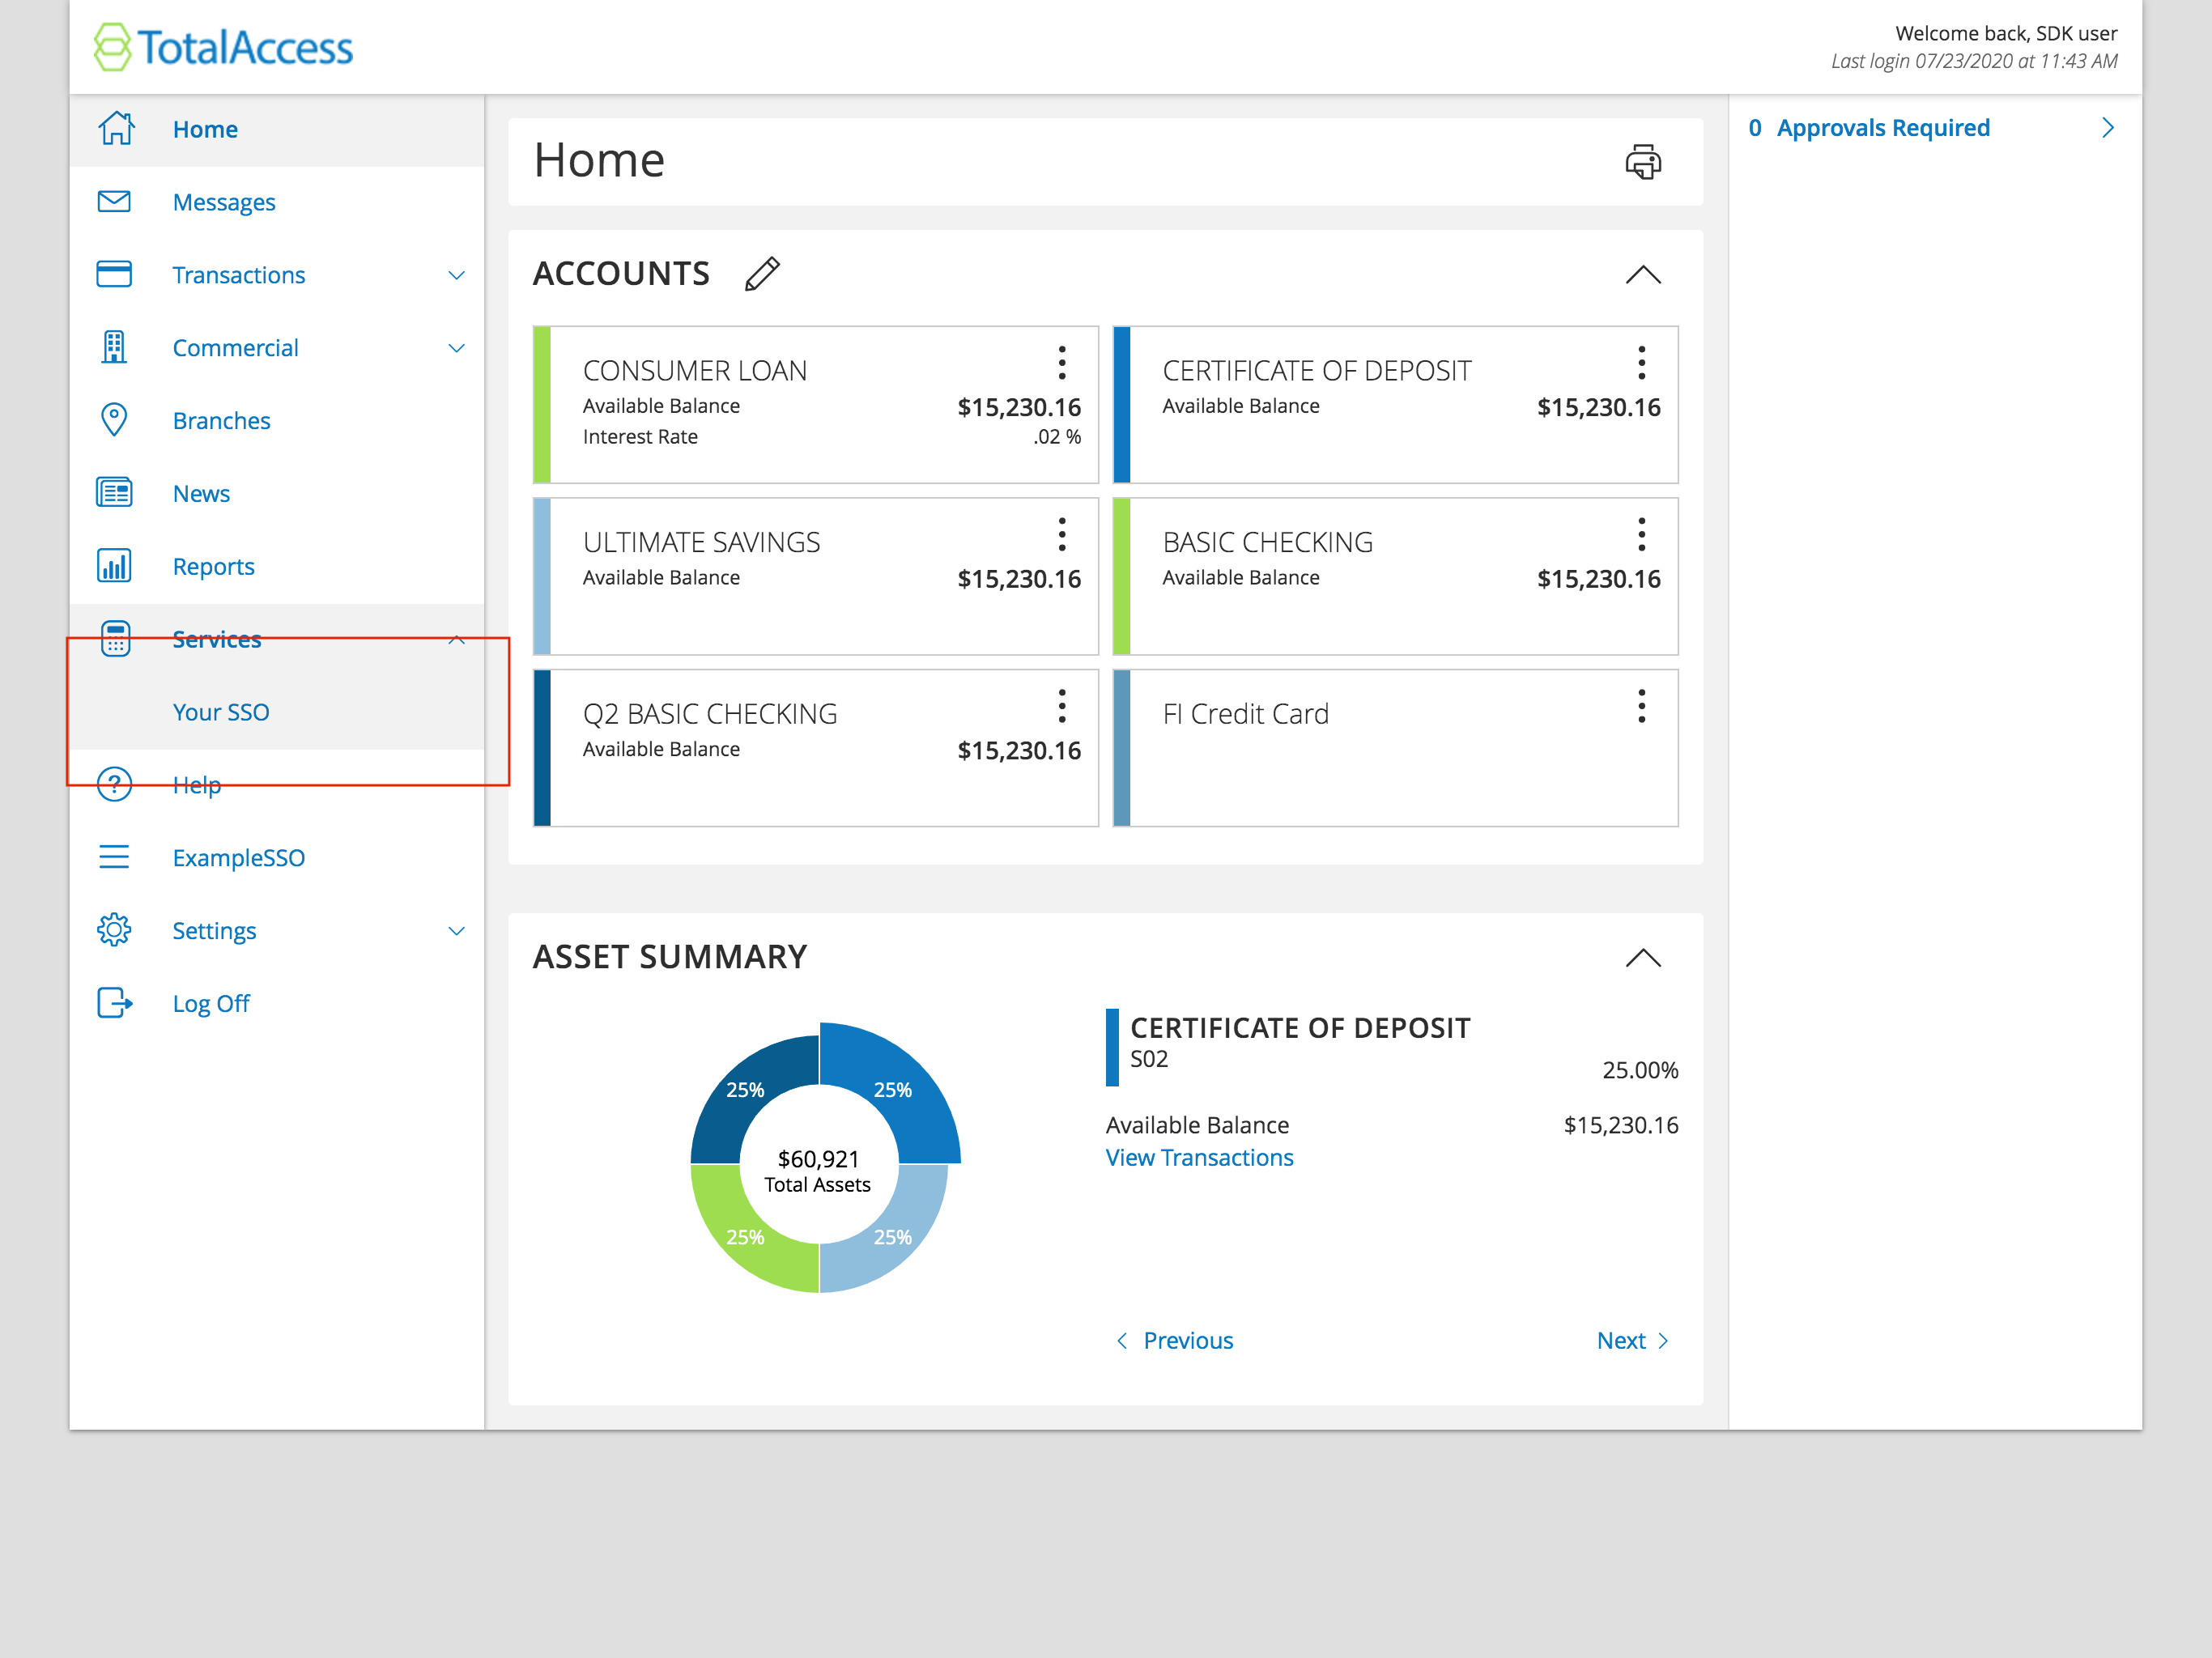
Once the user accesses online banking, they will arrive at the Account Overview page. This is a standard online banking screen with accounts and balances. From this screen (or any other screen of online banking) they will be able to access your SSO via a menu item, as shown above in the red box.
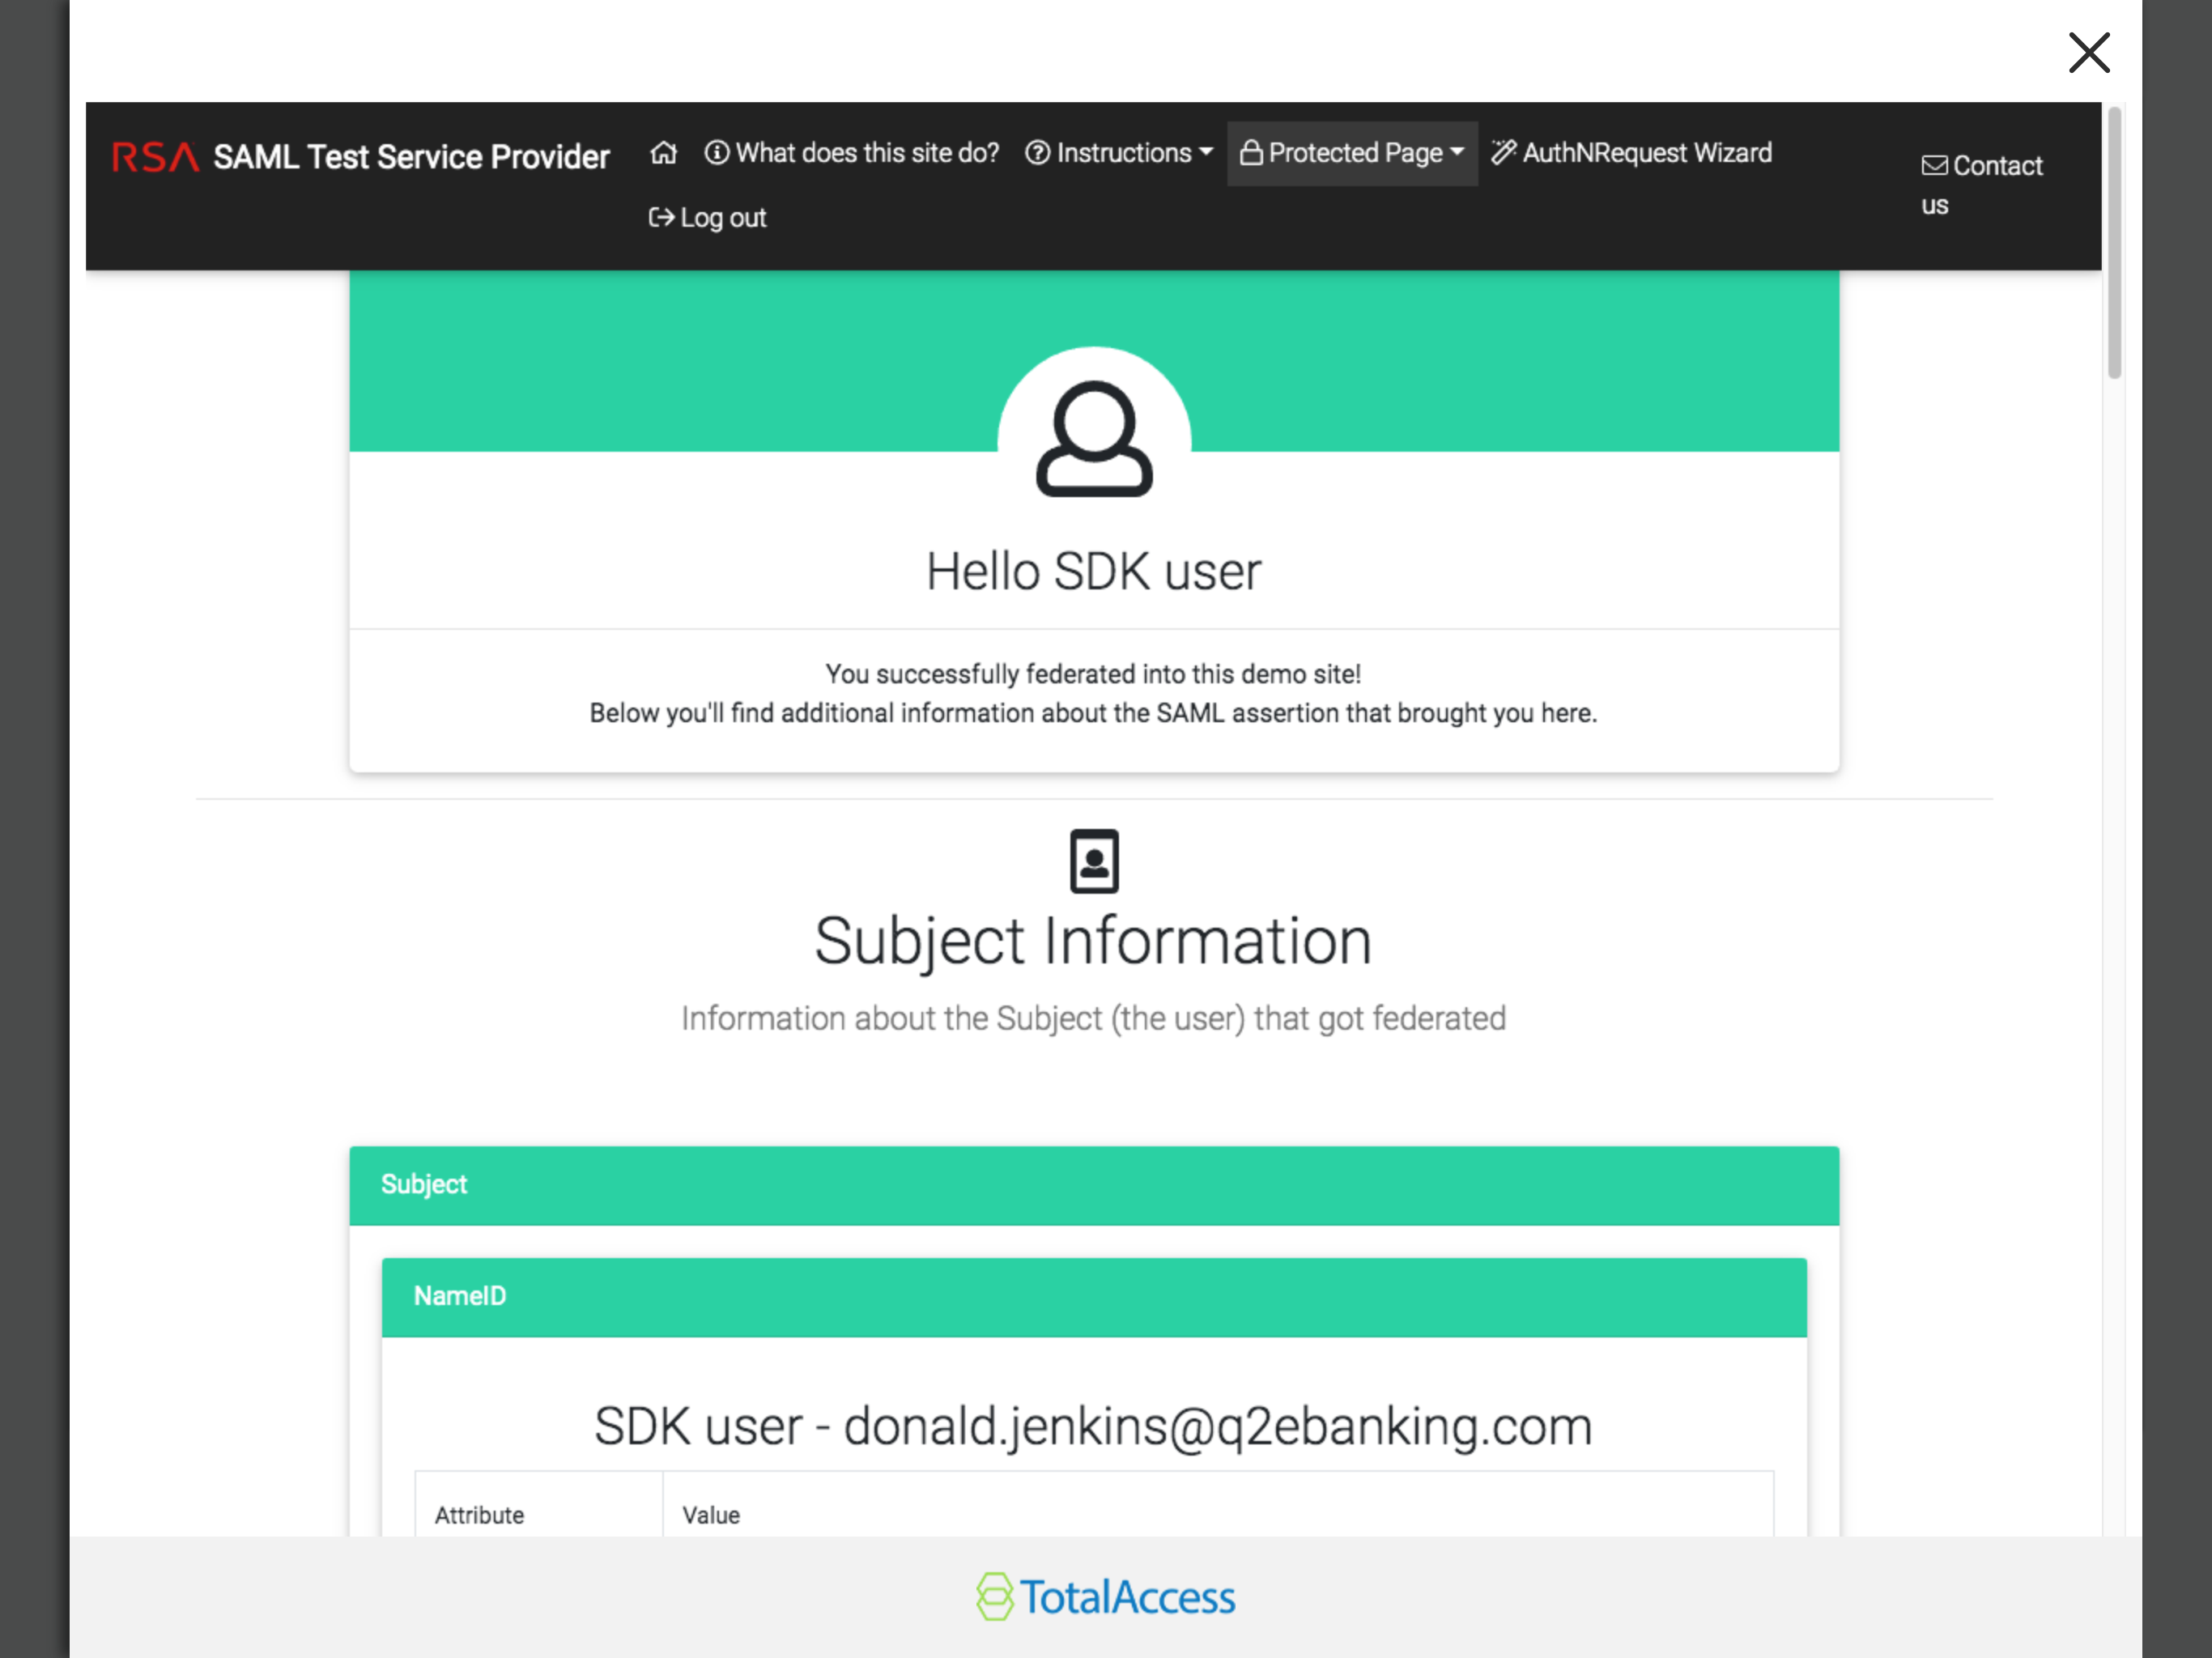
When the user clicks this link it will launch either an overpanel (shown in the screenshot below) or a new tab
(depending on the value of RENDER_IN_NEW_WINDOW in your extension.py class). When this iFrame or new tab opens,
the code in your Caliper SDK extension will execute. On mobile devices, the SSO will always be opened in a new tab.
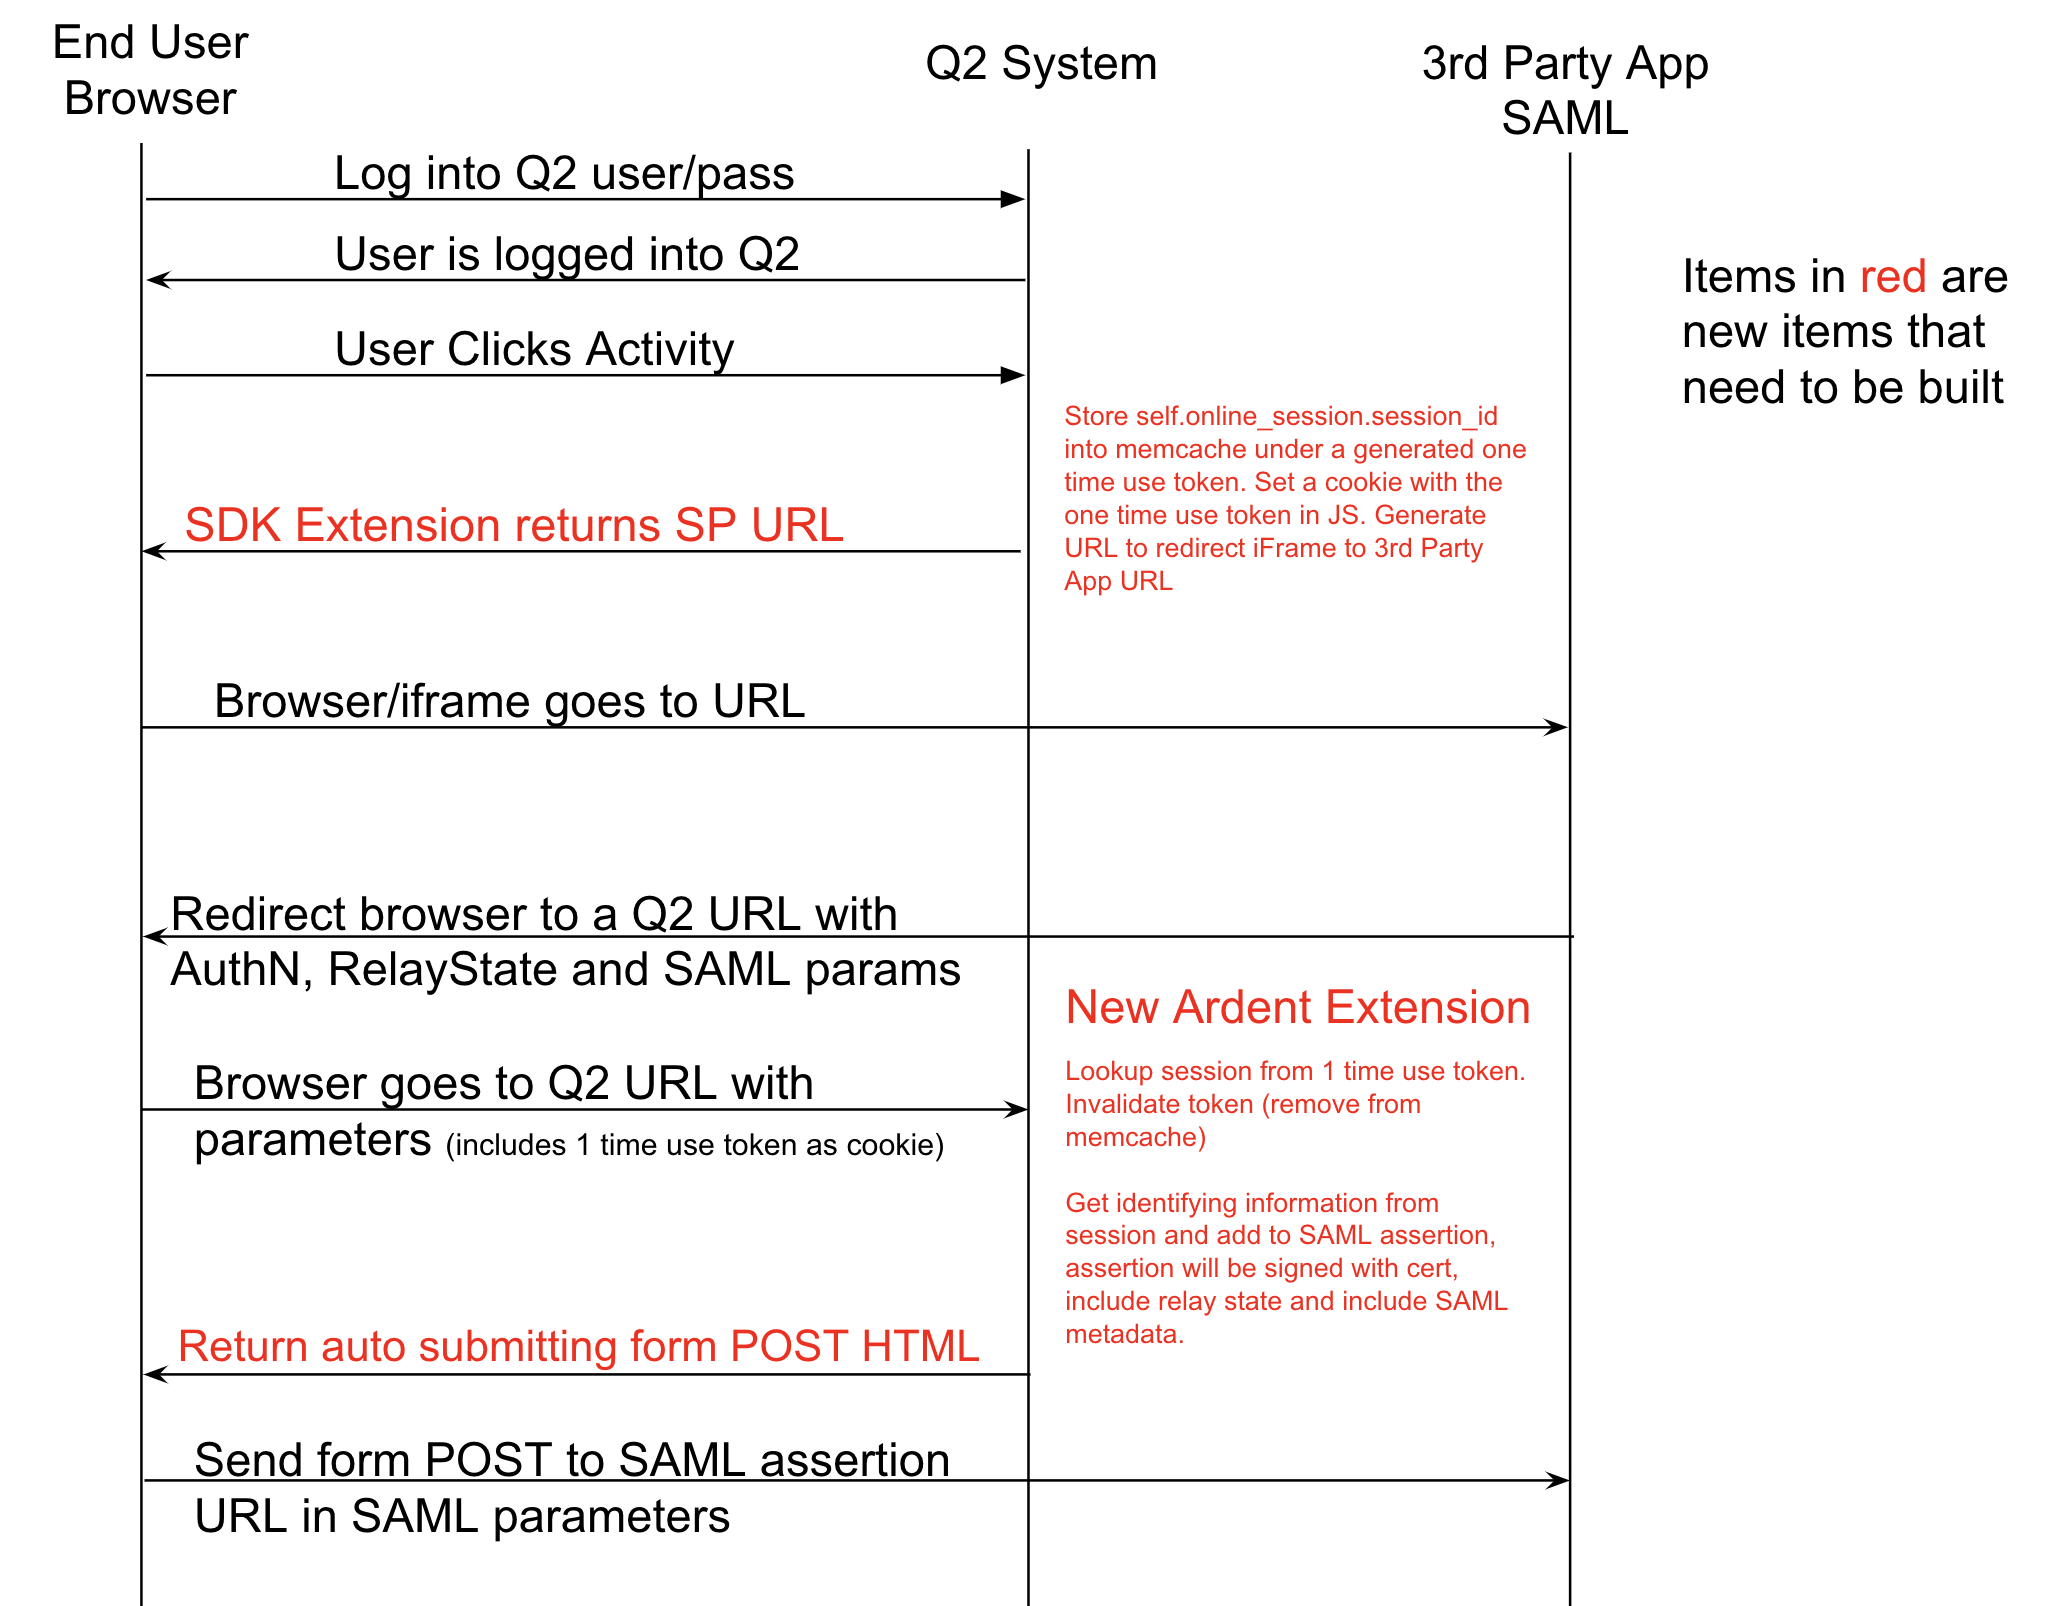
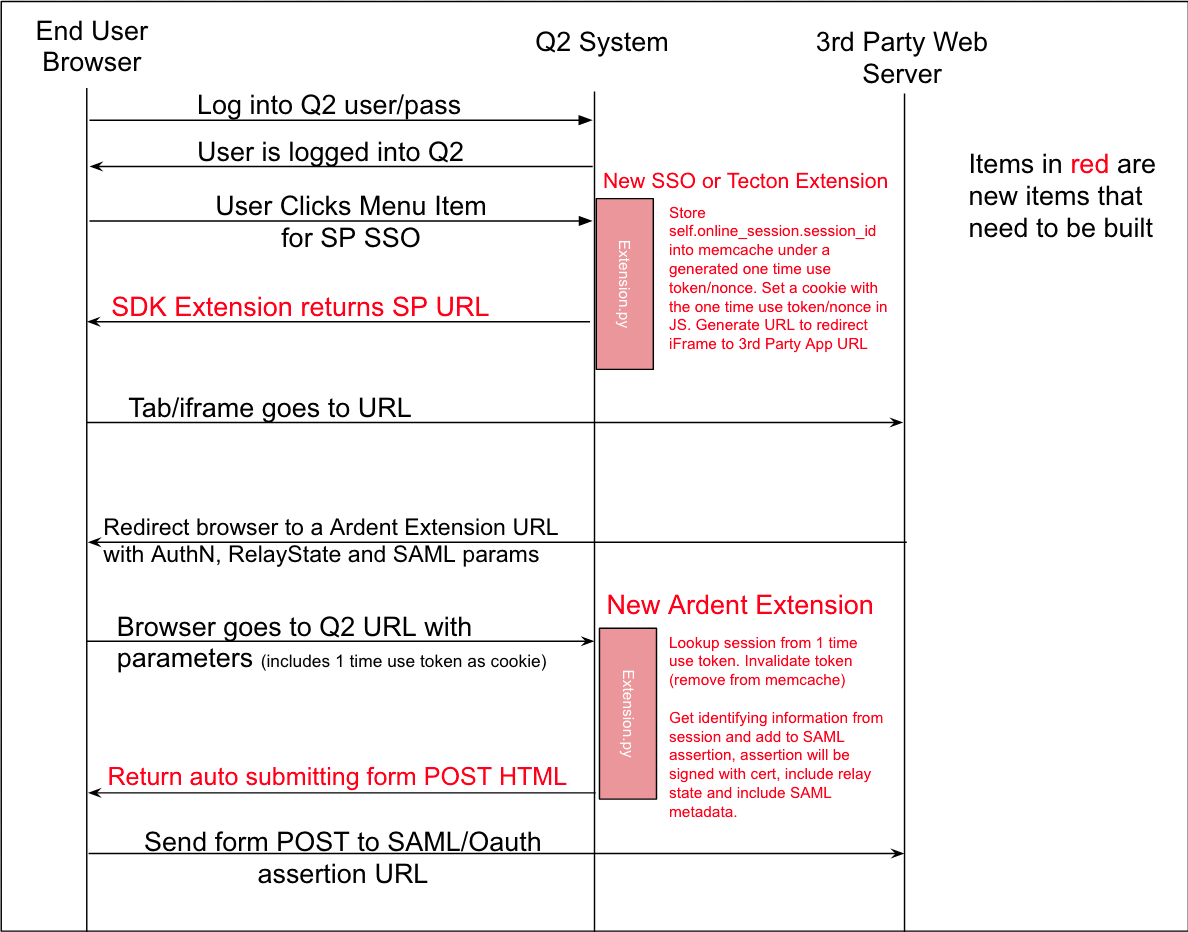
The flow is outlined below:
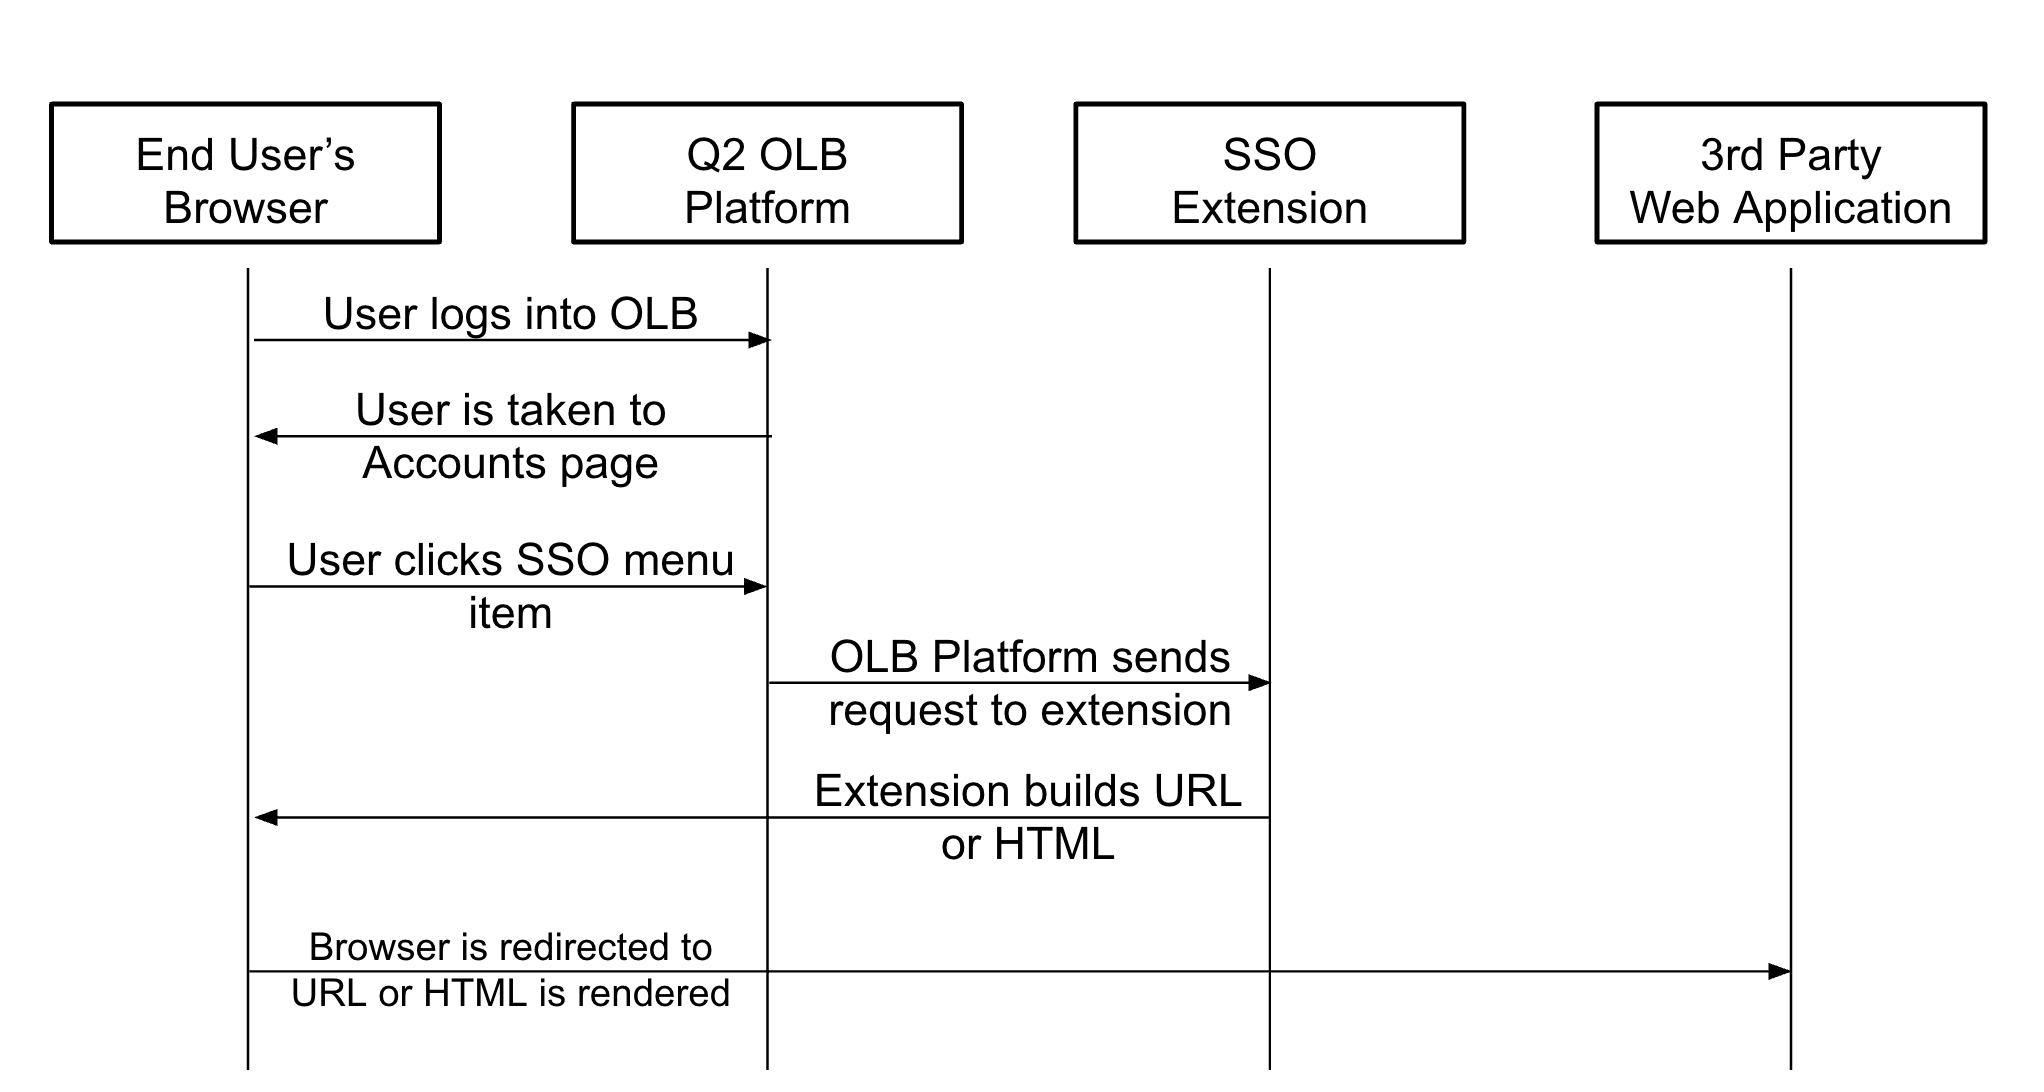
The end result is a seamless transition from online banking to a destination in your application.
Authentication Considerations
In a true SSO system as described above, the user does not register a username or password in your system. Your server endpoints will trust the Q2 system’s request (via IP whitelisting, request signing, etc.) to automatically authenticate them on. Hence, a “single sign on”. Since they won’t have a specific username and password, users will no longer be able to log into your service directly– they will need to log in to online banking to access the service.
There are a number of standardized technologies that could be implemented to achieve this. Alternatively, there are many more customized implementations.
One industry standard is SAML 2.0. SAML 2.0 is used in the SSO tutorial in the Caliper SDK documentation (https://docs.q2developer.com/tutorials/sso/index.html).
Alternatively, a SAML-like implementation that uses JWT instead of XML is very common. This uses a Public/Private key setup to ensure the contents of a request have not been tampered with and originate from a trusted source.
HMAC (https://en.wikipedia.org/wiki/HMAC) signing of the payload validates that the request is generated from your code and can be trusted– this can replace the username and password a user would normally provide.
Notes on OpenID
Note
OAuth 2.0 is not an SSO implementation. OAuth 2.0 is an authorization framework, not an authentication framework.
OpenID connect is a common protocol added to OAuth 2.0 to add authentication. OpenID Connect does not currently support an identity provider-initiated SSO design– it only supports a service provider-initiated design.
Although Q2’s online banking platform does not have a built-in OpenID Connect implementation, it’s possible that a identity provider-initiated SSO could be simulated using the a strategy similar to Okta’s Bookmark App strategy.
The above example is of a service provider-initiated workflow. A similar design could be accomplished for the OpenID Connect flows: authorization, implicit, or hybrid.
Deep Linking
The online banking application supports sending the user directly to an SSO after login, called “deep linking”. To do this, add a specific route to the end of the online banking URL.
For example, if the online banking environment’s URL is https://stack.q2developer.com/sdk/sdkteam/ardent/uux.aspx
you can deep link to an SSO by sending the user to https://stack.q2developer.com/sdk/sdkteam/ardent/uux.aspx#/ssoDirect/14.
The #/ssoDirect/14 will direct the online banking application to prompt the end user to login and
then, after login is completed, send them directly to the SSO with the VendorId of ‘14’ in the database.
The correct vendor ID will need to be known and included. It is not currently possible to reference the SSO by name.
Query Parameters (RelayState, response_type, response_mode, etc)
In order to implement some of the workflows described above, you will need to access parameters passed by service provider. These are passed to the Q2 system via URL query parameters that can then be accessed using JavaScript.
The online banking application will maintain the query parameters you initially pass it when you redirect the end user.
The deep linking functionality described above, combined with query parameters, can be used to pass a parameter called
RelayState.
The SSO.html.jinja2 file in the SSO tutorial includes some JavaScript that will search for the query
parameter RelayState (https://en.wikipedia.org/wiki/SAML_2.0#SAML_2.0_profiles) and add it to the SAML payload if found.
For example, if the end user is linked to https://stack.q2developer.com/sdk/sdkteam/ardent/uux.aspx?RelayState=dashboard#/ssoDirect/14,
the user will be first asked to login into online banking. After completing login, the SSO for vendor ID 14 will automatically be launched.
If the SSO for vendor ID uses the JavaScript provided in sso.html.jinja2 it will receive an HTML form POST with the parameter
SAMLResponse constructed in the extension as well as a RelayState parameter with the value of dashboard.
Note
Unfortunately the online banking application does not currently provide the query parameters to the Python code. The parameters will have to be accessed in the browser via JavaScript.
SP Initiated SSO Approximation
The way that Okta does this is that it creates a “bookmark” which will effectively send the user to a SP url (no authentication), the SP recognizes that and redirects the user back to an IdP URL, that IdP URL initiates the authentication request to the SP.
Basically the flow is still initiated from the user in the IdP but the IdP will just throw the user to the SP and have it redirect back.
Note
Convert a standard SSO extension into an Enhanced SSO: Guide