Wire Adapter Extension Tutorial
Wire transfers are a widely used, secure method of moving funds electronically between financial institutions. They are essential for real-time transactions, especially for high-value or time-sensitive payments, and offer faster processing compared to ACH transfers, which are processed in batches.
We support two primary types of wire transfer adapter extensions:
Domestic Wire Adapter: Facilitates wire transfers within the United States, connecting to domestic (U.S.) financial institutions.
International Wire Adapter: Manages wire transfers to foreign financial institutions.
2a. We also provide an FX Rates Adapter for international wire transfers, which can be utilized for displaying real-time foreign exchange rates, allowing for accurate currency conversion.
These adapters act as intermediaries, facilitating the communication between Q2 and external wire transfer providers for transaction processing.
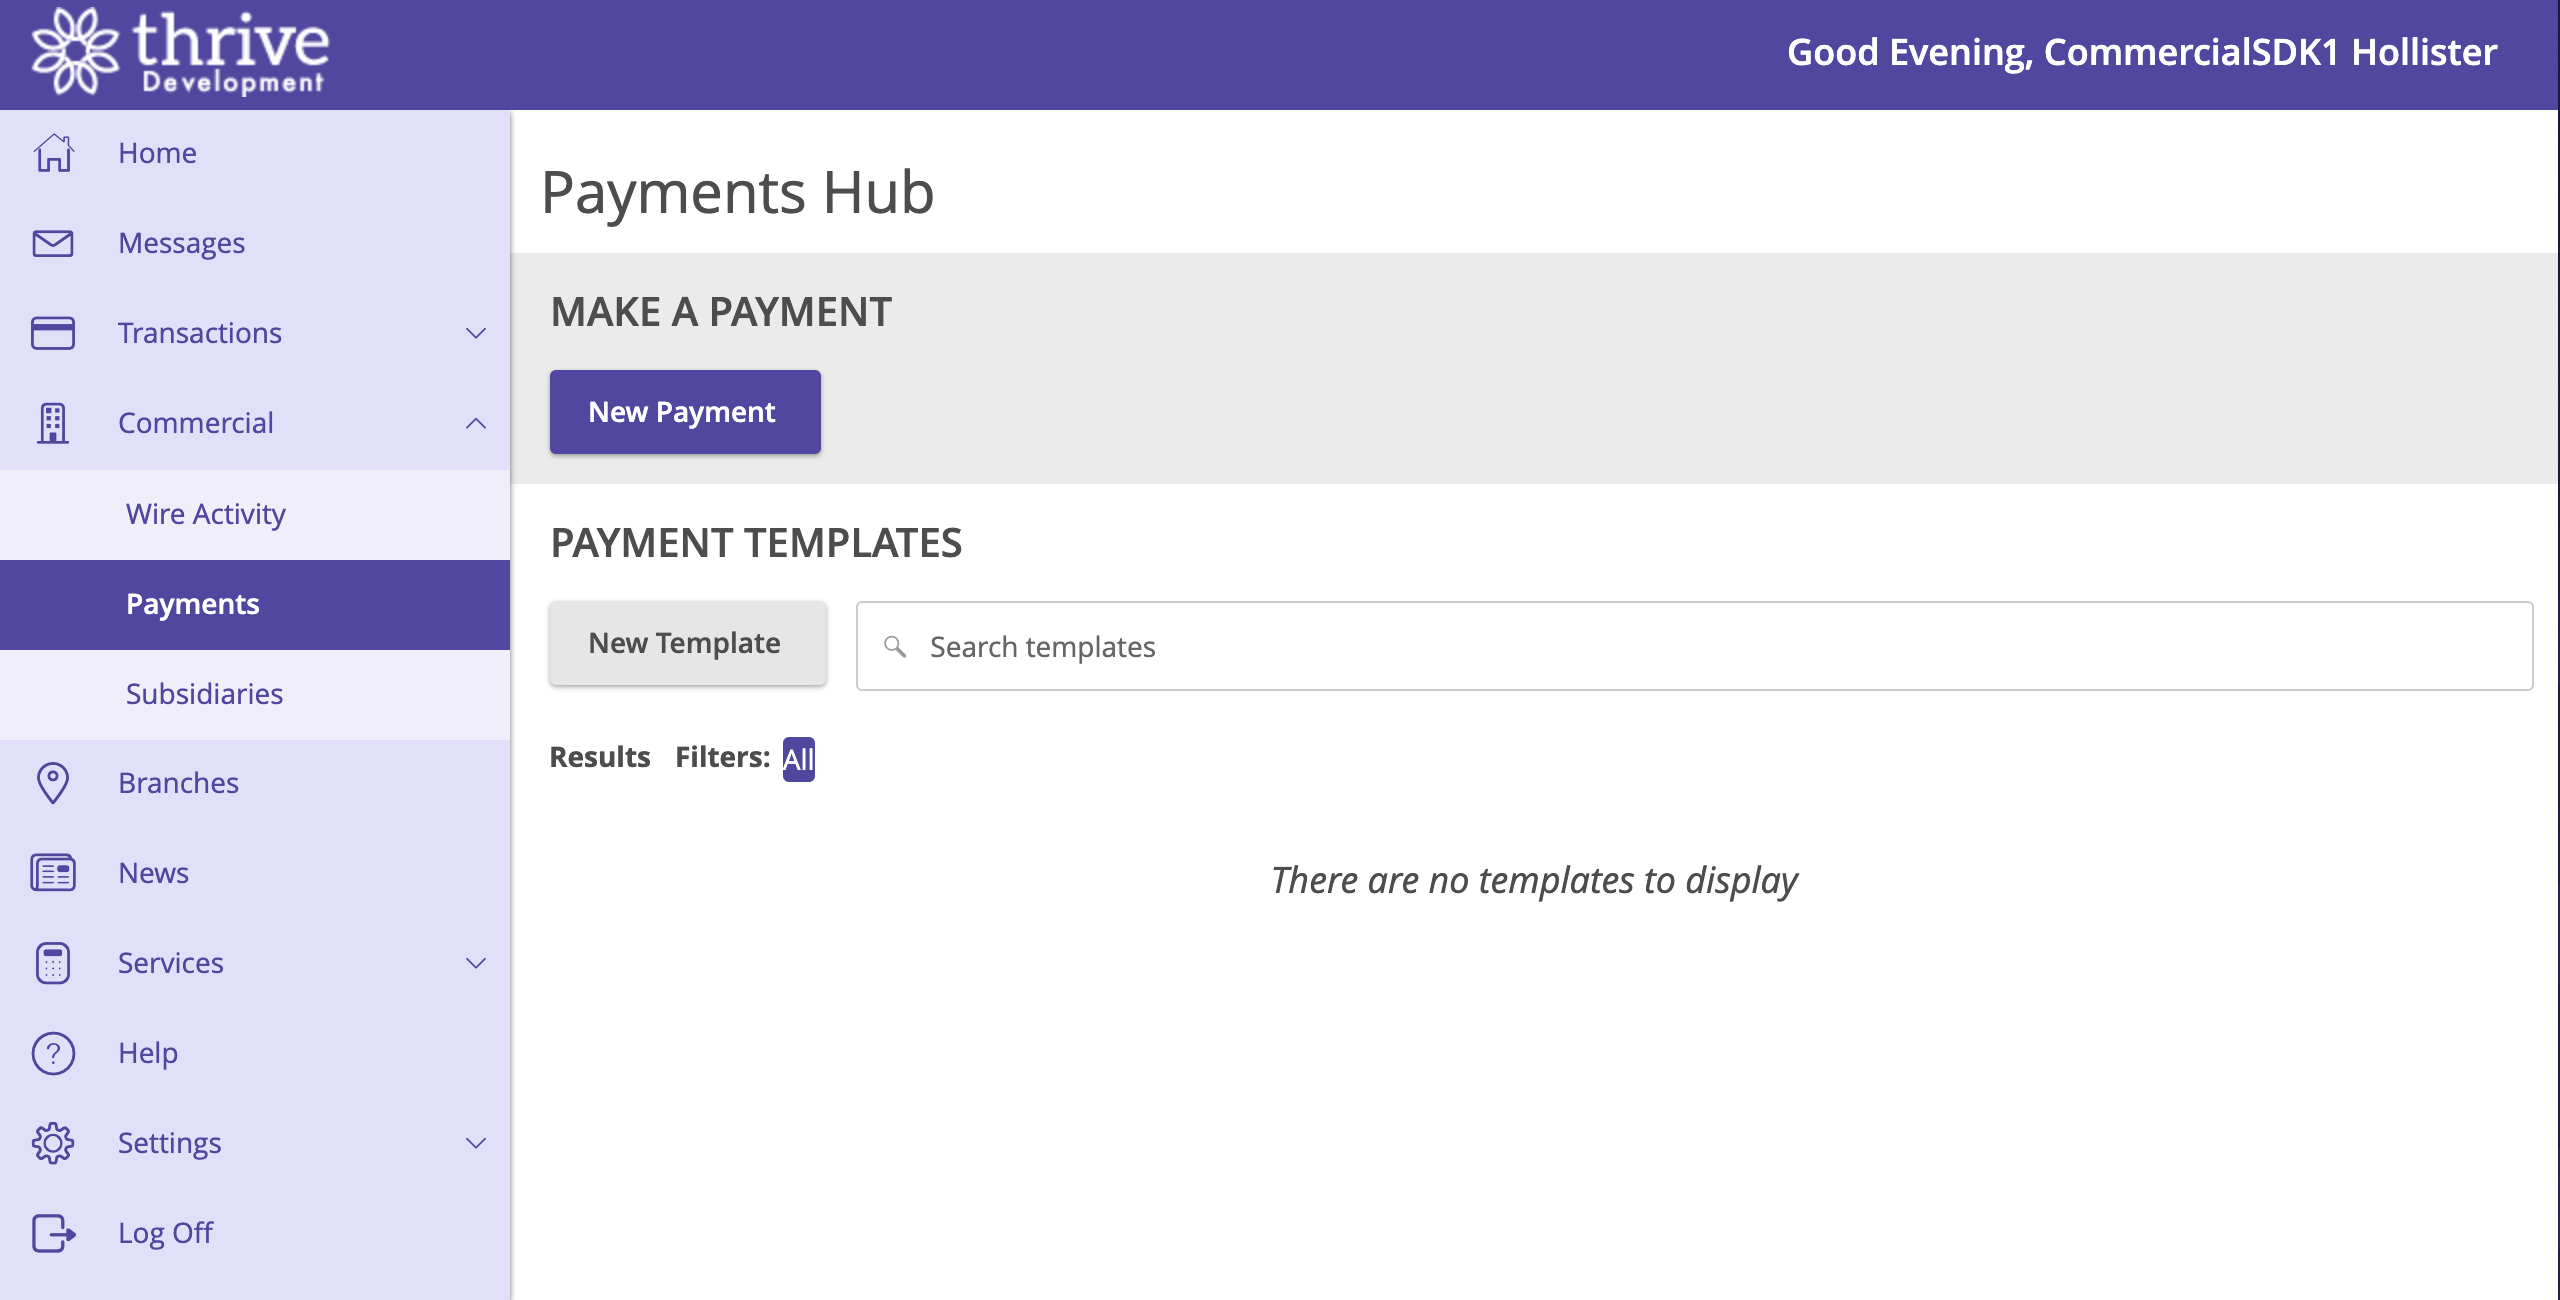
A wire adapter is invoked when attempting to make a wire transfer through the payments page:
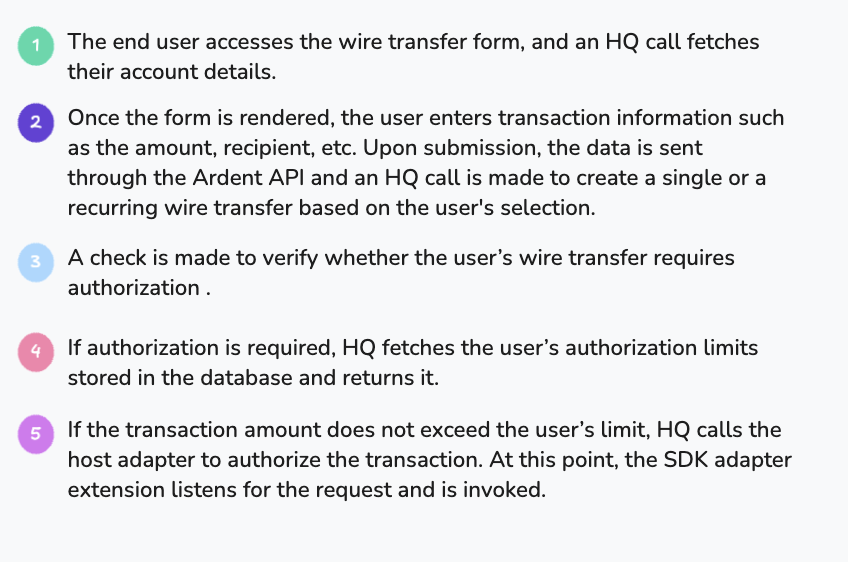
Architecture and Data Diagram
Before we dive into the code, let’s take a look at how wire adapter extensions fit into the broader Q2 architecture. The following diagrams illustrate the wire transfer request flow, from the user interface (UUX) to the wire adapter and back.
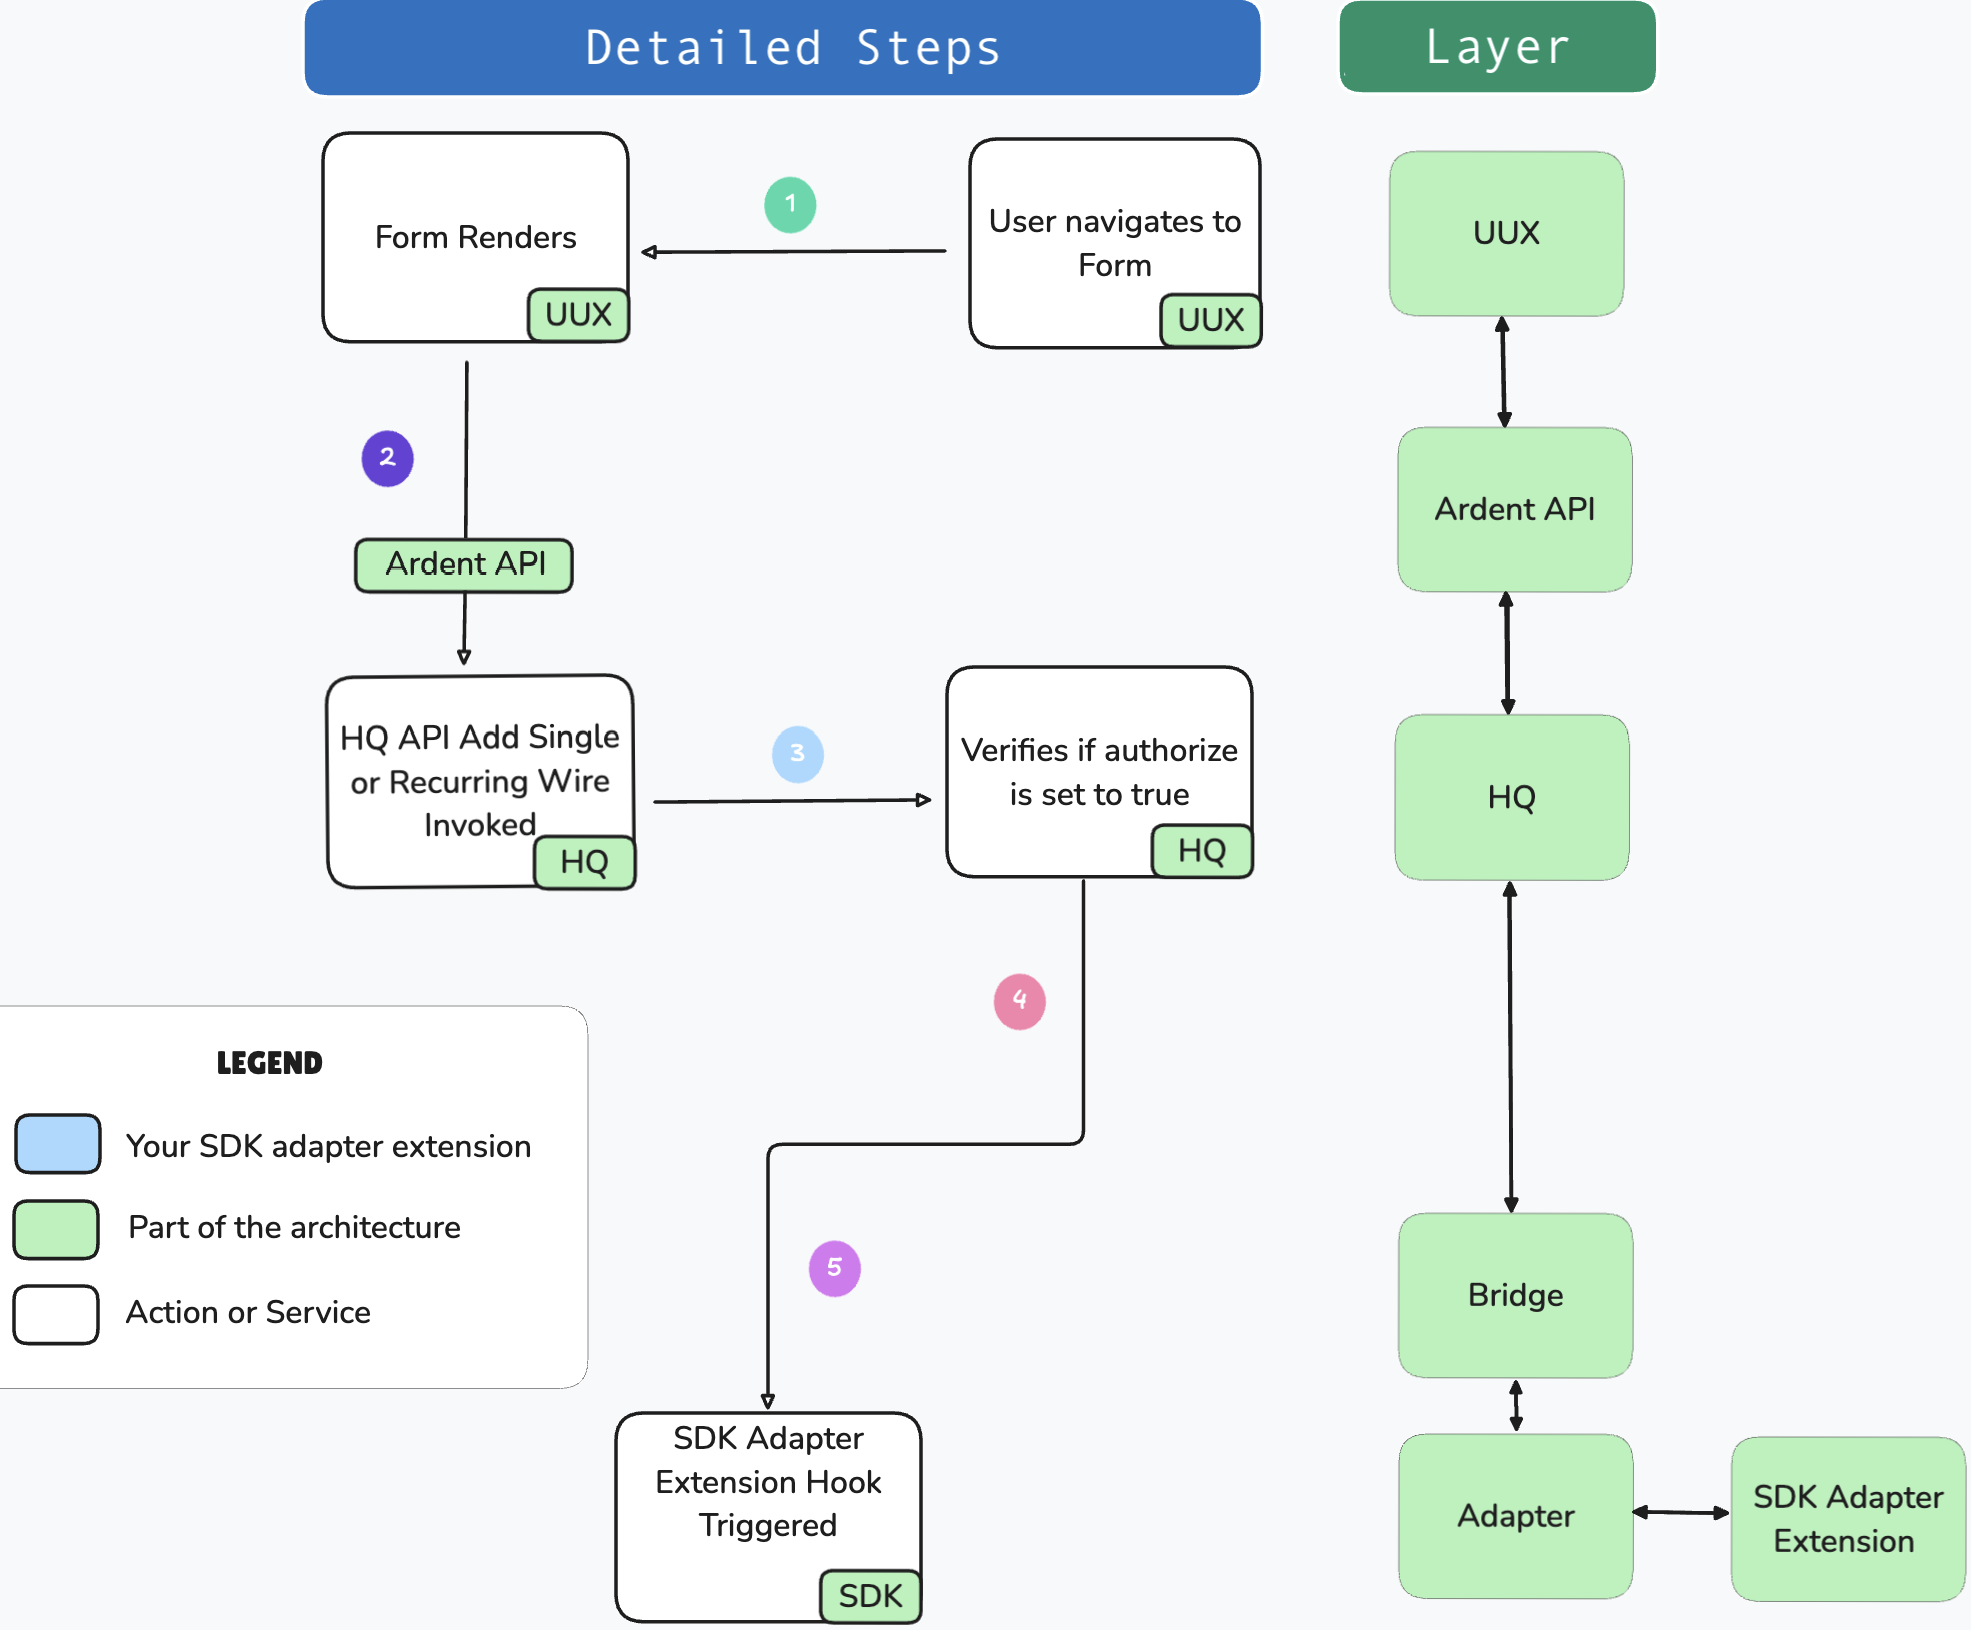
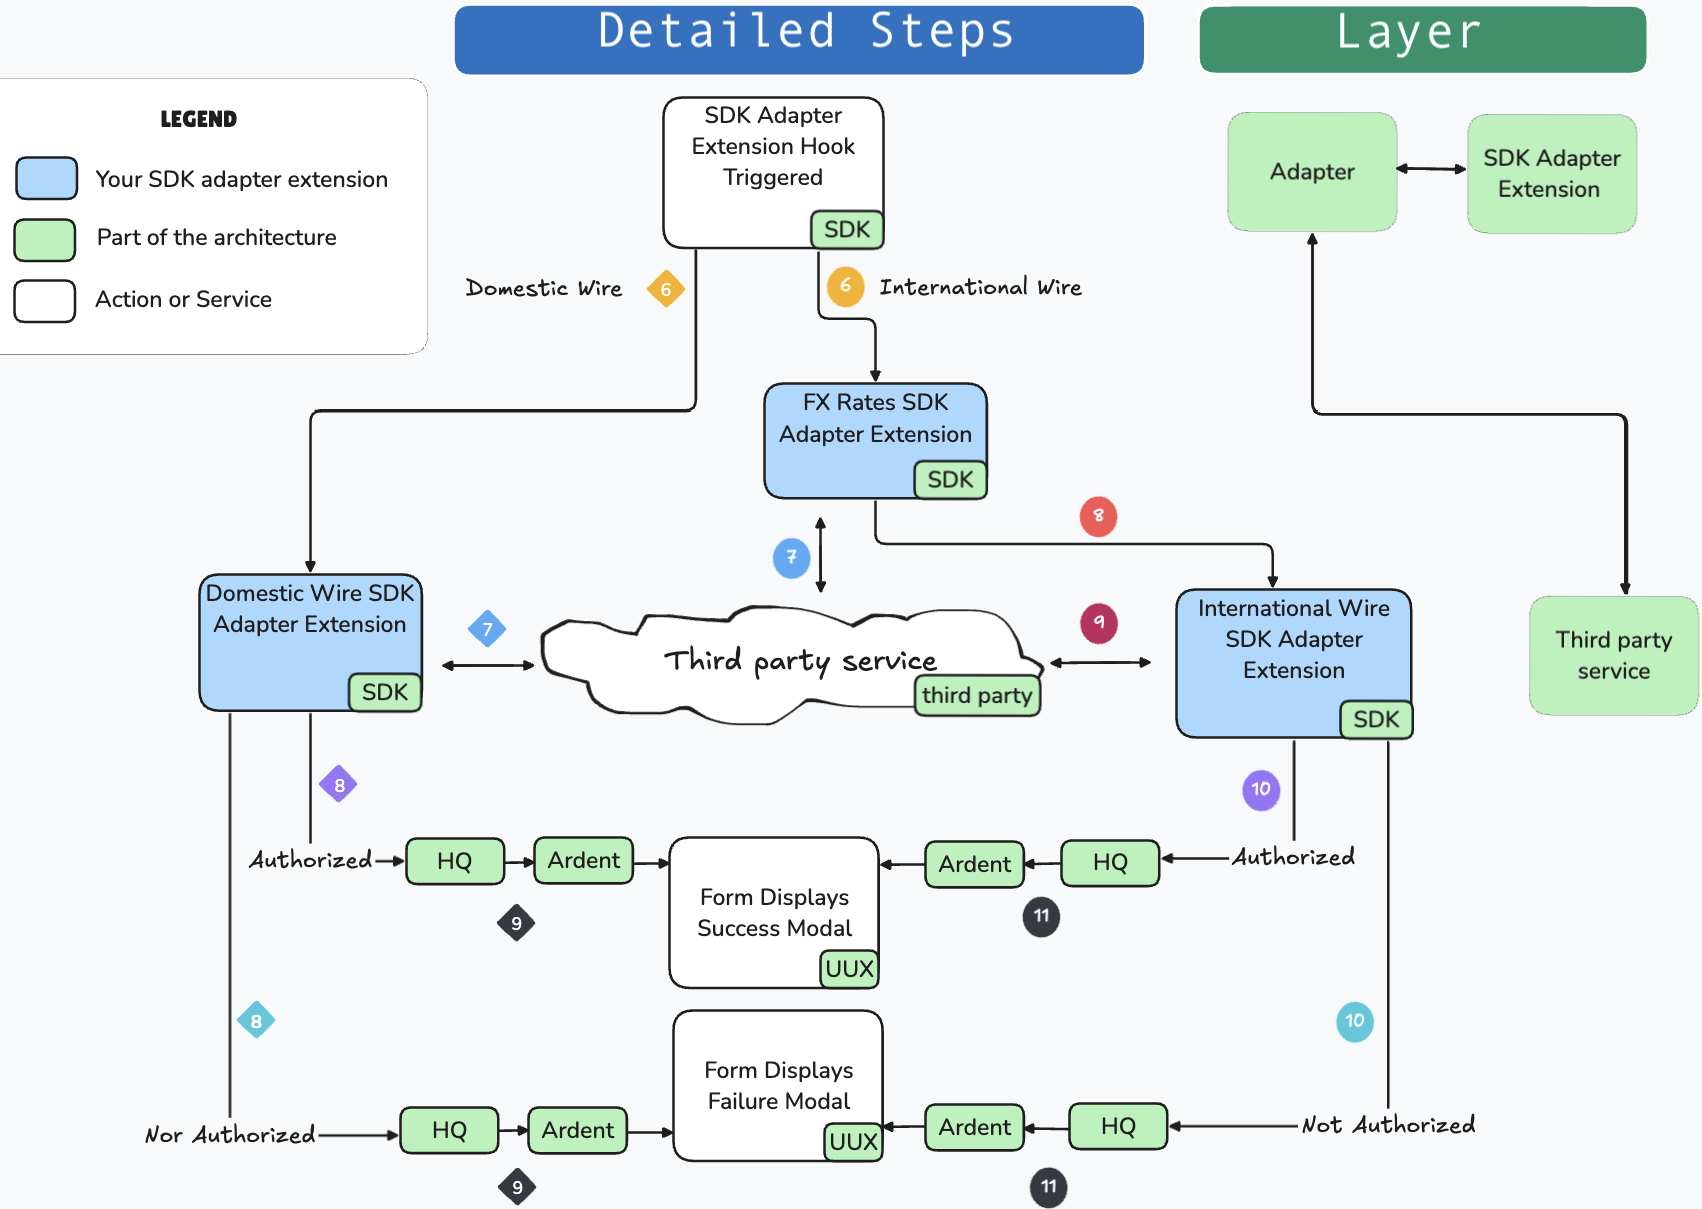
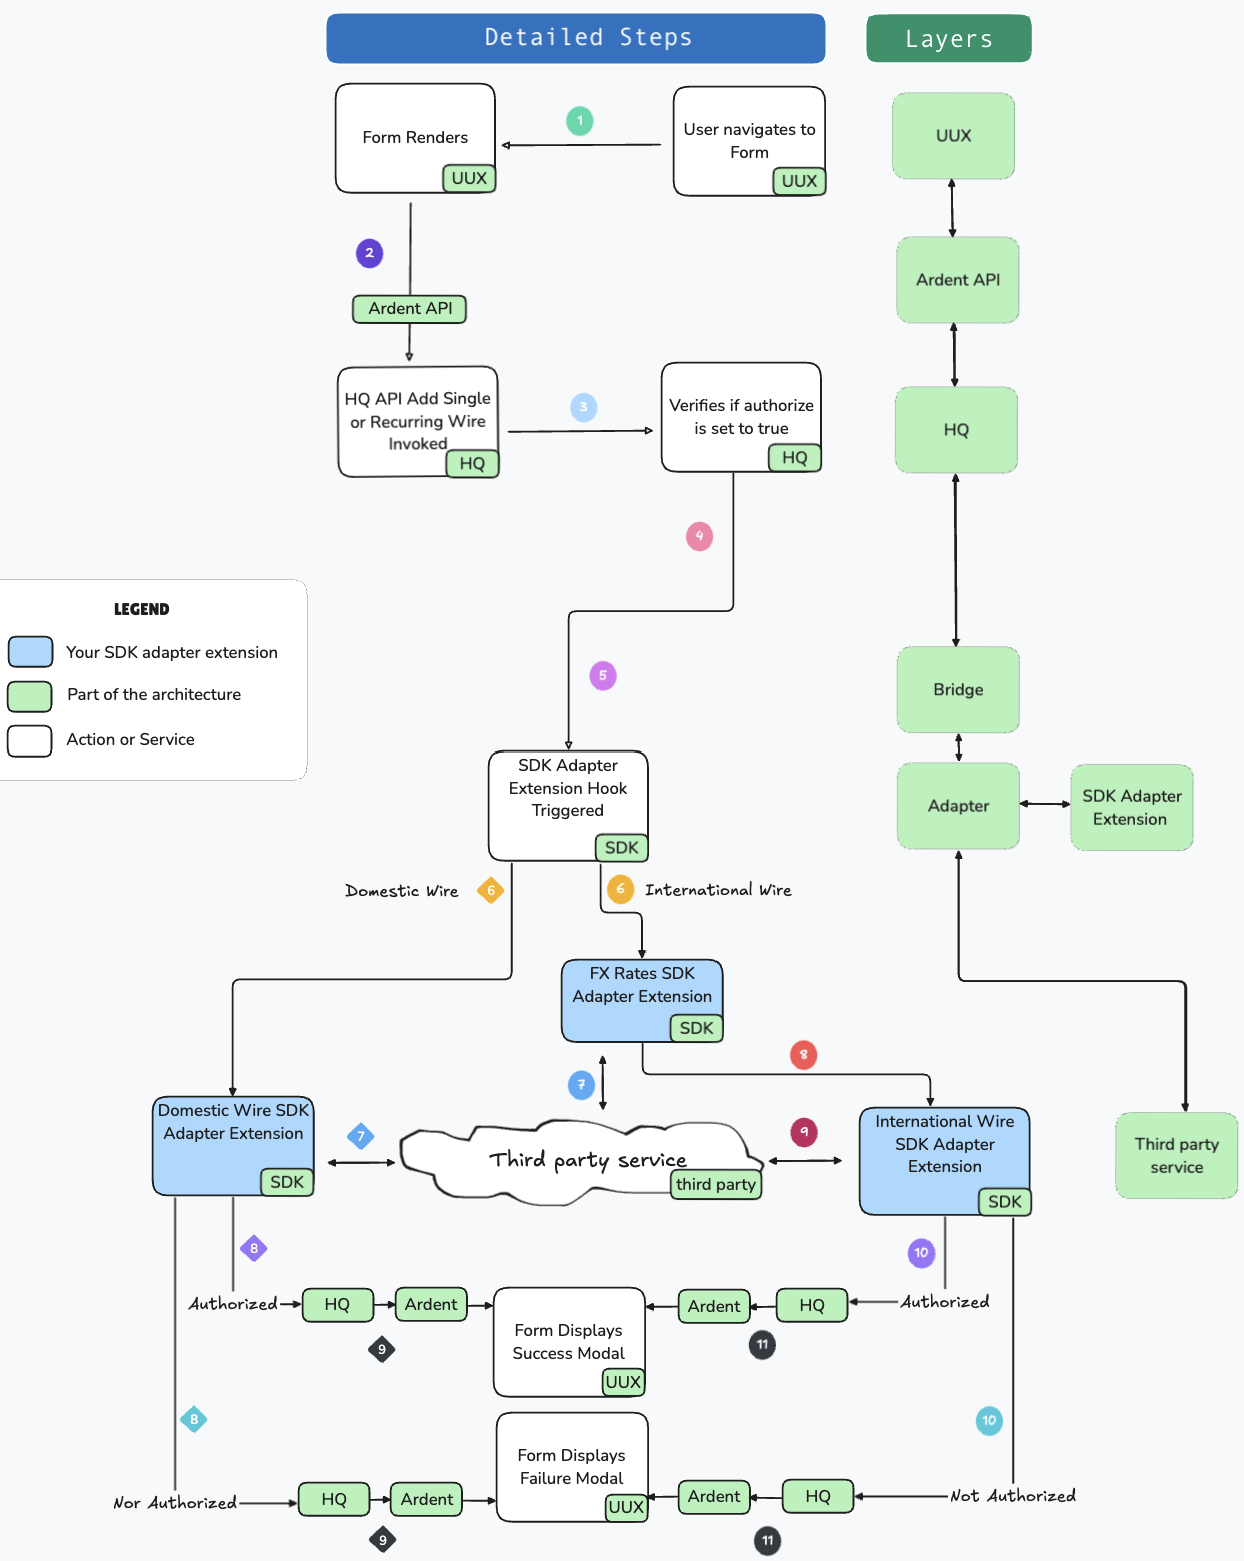
Your wire adapter extension will allow you to customize the transaction authorization process, ensuring it’s handled according to your specific business logic, and allowing you to integrate with third-party services as needed. Now, let’s dive into how you can extend these adapters to meet your needs.
Creating an Extension
To create a wire adapter extension, you’ll follow the standard process using the Q2 CLI. This process ensures your extension is correctly configured and able to handle wire transfer requests from the Q2 platform.
Create the Extension
To start, run the following command in your terminal:
$ q2 create_extension
When prompted, enter a name for your extension. For example, you could name it
DomesticWire,InternationalWireor something specific to your project. Ensure you provide a unique name, especially if other developers at your organization are working through this tutorial, as each extension name must be unique.Select Adapter as the Extension Type
Next, you’ll be prompted to select the type of extension you’re creating. Select
Adapter:What type of extension are you creating? 1) Online (default) 2) SSO (Third Party Integration) 3) Ardent (API) 4) Q2Console (Backoffice) 5) Central (Legacy Backoffice) 6) Adapter <-------- 7) Audit Action 8) Custom Health Check 9) Message Bus 10) Caliper API Custom Endpoint 11) Base Extension Please make a selection and press Return [1]: 6
Choose the Specific Adapter Type
Now, select the adapter type to generate. You’ll be presented with the following options:
Select adapter type to generate

    1) Account Details
    2) Authentication Token
    3) External Authentication
    4) Check Image
    5) Domestic Wire
    6) Deposit Item Image
    7) FX Rate
    8) Instant Payments
    9) International Wire
    10) Remote Deposit
    11) Statement Image
For Domestic Wire, select:
Please make a selection and press Return: 5
For International Wire, select:
Please make a selection and press Return: 9
For FX Rate, select:
Please make a selection and press Return: 7
This creates an extension.py file with the necessary boilerplate code, ready for you to extend and customize the wire transfer functionality.
Next Steps
Once you’ve generated your wire adapter extension, the next step is to implement the functionality required for your use case. The functionality will differ based on the wire type you’re working with-whether it’s domestic, international, or an FX rates adapter. Be sure to check the additional tutorials for each adapter type: